FINDING EFFORT & EASE IN WARRIOR I
Virabhadrasana I/Warrior I is one of the most widely known foundational poses of yoga. It features in the Sun Salutations sequences – which are often used at the start of class. But Virabhadrasana I/Warrior I is quite a statement pose in its own right, and to find effort and ease in your expression of the pose it helps to explore some targeted stretching and strengthening, before you arrive there.
THE BENEFITS OF VIRABHADRASANA I/WARRIOR I
Virabhadrasana I/Warrior I stretches the hip flexors, calf muscles and inner groin; and strengthens the quads, glutes, shoulders and the muscles of the spine and ankles. It is quite a complex pose for the back leg, and you are not alone if you find it very challenging to get that back heel comfortably grounded, with the toes pointing forward. The hip joint of the back leg is externally rotated, to allow the heel to drop down, while the muscle action of the back leg is internal rotation! This can sometimes feel like the leg is fighting to find its position in the pose, and if you are overzealous about reaching that left hip forward it can manifest in discomfort in the knee or the sacroiliac joints.
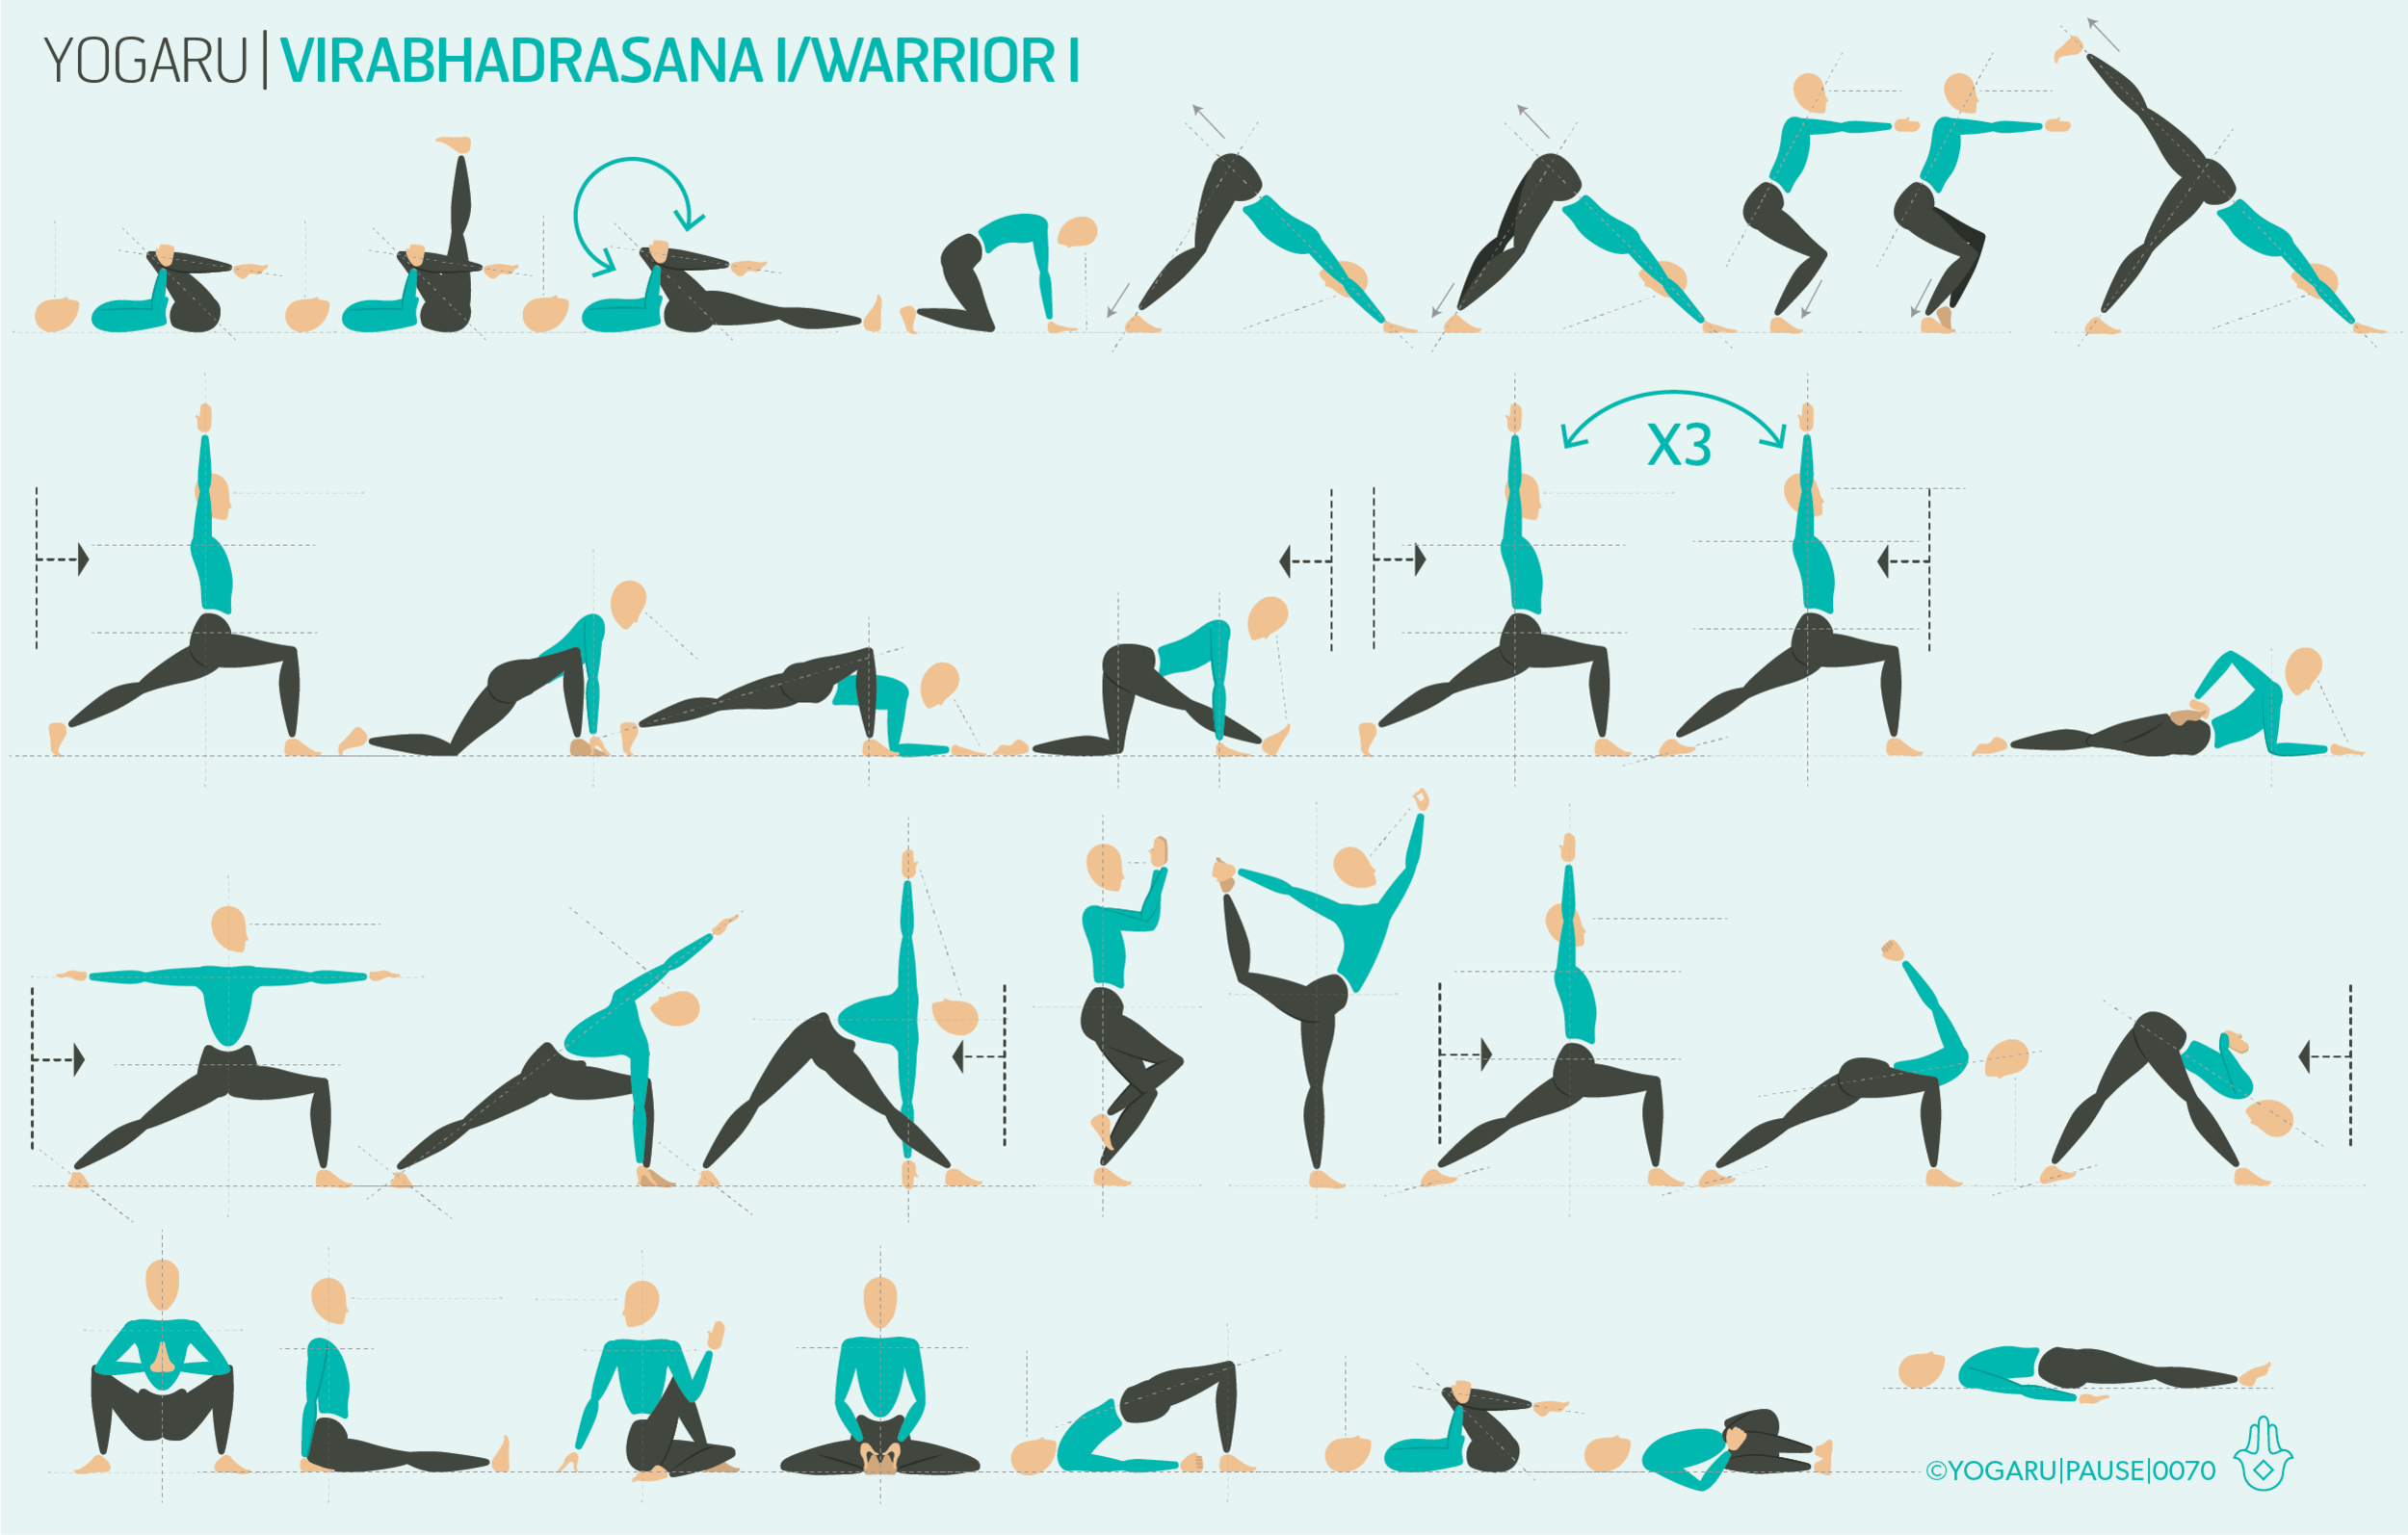
EXPLORING VIRABHADRASANA I/WARRIOR I IN YOUR PRACTICE
The above sequence stretches and strengthens all the appropriate muscle groups in preparation for the nuances in Virabhadrasana I/Warrior I. It also incorporates two balancing standing poses to strengthen the ankle and bring some stability to the joint which takes a lot of pressure in the pose.
In the second pose of the sequence lengthen through your whole leg, press you heel away from you and draw your toes down towards your face, until you feel a strong stretch in the calf muscle. Take some ankle circles here too before you move on to the next hip circling pose. Throughout the sequence there is specific targeted poses for the calves and hip flexors in particular. Bring your attention to these two areas – press the heel towards the ground in the standing calf stretches, and gently let your hips become heavy towards the ground in the standing hip flexor stretches.
In the Ashta Chandrasana/High Lunge to Virabhadrasana I/Warrior I flow, which you will run through three times, place your hands on your pointy hip bones and notice what needs to change when you drop that back heel to the ground.
When you are in Virabhadrasana II/Warrior II pay particular attention to the back leg and the action of the glute muscle to open the hip out to the side. Press into the big toe mound and try to find that inner arch of your back foot.
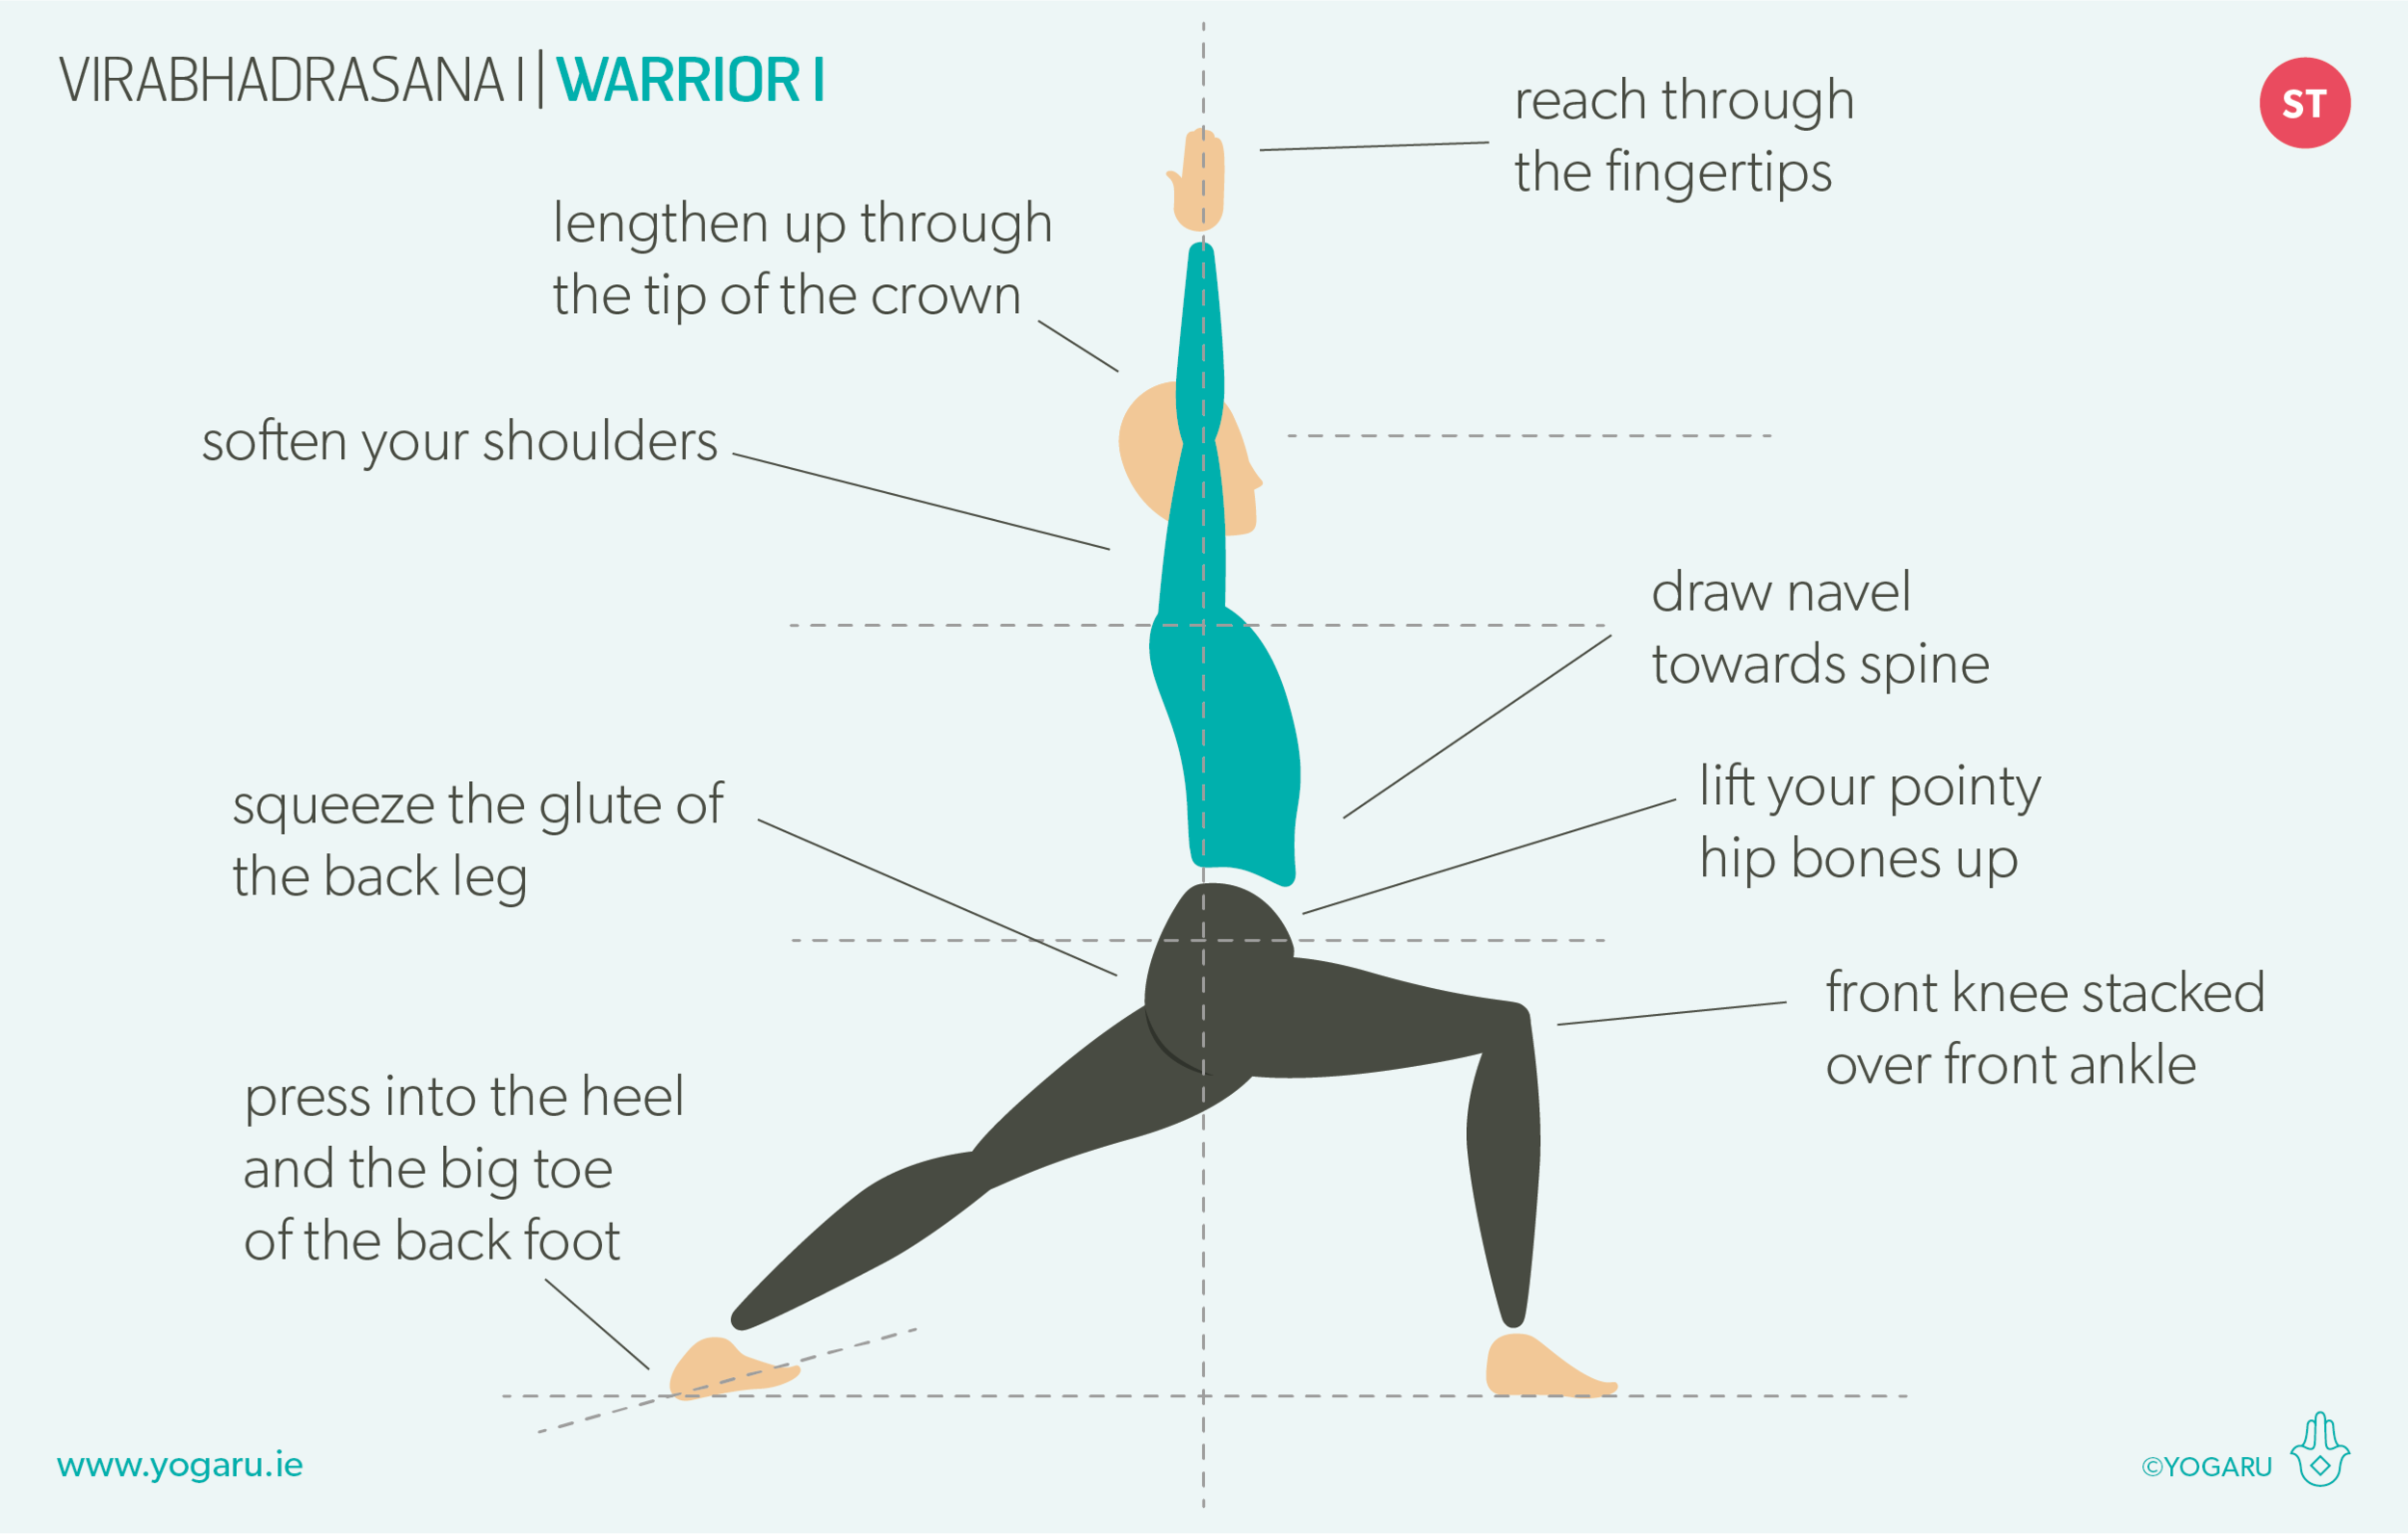
ALIGNMENT CUES
When you find yourself in Virabhadrasana I/Warrior I in this sequence consider the 'squaring of the hips' as directional action rather than a definitive end goal. Allow the hip of the back leg to be further back than the hip of the front leg if it feels kinder to the knee and sacroiliac. Spend some extra time in Warrior I and notice what your optimal alignment is, with effort and ease, for your unique body.
Print out the below tips, along with the sequence, and give Warrior I some extra time and exploration:
From Adho Mukha Svanasana/Downward Facing Dog, ground your left foot at a 45 degree angle.
Inhale, step your right foot to just inside of your right hand, check that your feet are tracking behind their hip joints to allow space for the hips to rotate forward, exhale here.
Inhale, place your hands on your right knee to help you come up, or draw your navel towards your spine and reach your arms forward and up.
Reach your arms up high, arms shoulder width apart or palms together.
Lift your lower ribs up from the rim of your pelvic bowl.
Keep your front knee bent and stack your front knee over your front ankle.
Press into your big toe mound of your back leg to find your inner arch.
Press down into your left heel to ease the left hip forward.
Press into your right foot to draw the right hip back.
Scissors your legs together and roll your right thigh down.
Lift your two pointy hip bones up from your right thigh and gaze forward or to your fingertips.
To save the images for personal use click and hold down the image until the ‘save image’ option appears; on Mac hold down ‘control’ and click the image to get the option box; on PC right click on the image to get the option box. Scroll down in the ‘option box’ and click ‘save image’.
Ruth Delahunty Yogaru