CALMING INVERSION
Salamba Sarvangasana/Shoulderstand is very calming to the nervous system and increases circulation to the thyroid and endocrine glands. It is an inversion that can be held for longer periods of time than some of the other more challenging inversions like Adho Mukha Vrksasana/Handstand or Salamba Sirsasana/Headstand. Which means you can linger a little longer to get all the benefits from inversions. Some yogis even use Salamba Sarvangasana/Shoulderstand as their meditation pose! Whether you intend to go down this route or not this is a pose that should be approached with care for the neck in particular. In Salamba Sarvangasana/Shoulderstand the full body weight sits mainly on the shoulder girdles. If you don’t have sufficient strength in your shoulder girdle the weight will collapse into the back of the neck which, with repeated practice, could cause strain to the back of the neck. A good judge on whether you are ready to try Salamba Sarvangasana/Shoulderstand is if you are comfortable in Setu Bandha Sarvangasana/Bridge and feel that you are able to press into the shoulder girdle rather than the back of the neck.
THE BENEFITS OF SALAMBA SARVANGASANA/SHOULDERSTAND
Salamba Sarvangasana/Shoulderstand strengthens the shoulders, arms, spine, and core. It also stretches the back of the neck and stretches the back of the shoulders. Inversions are fantastic poses to practise to strengthen your immune system – they boost circulation and flush out toxins from all the systems of the body and allow it to work more efficiently. This gives your immune system the resources to do its important job of protecting us from harmful microorganisms. Inversions are also very beneficial for good digestion; increasing metabolism; regulating hormones; stimulates abdominal organs; reduces fatigue; nourishing the cells of the brain; balancing hormones; building focus and concentration; eases stress, tension and anxiety; suppprts fertility; alleviates insomnia; and helps relive symptoms of menopause and sinusitus.
EXPLORING SALAMBA SARVANGASANA/SHOULDERSTAND IN YOUR PRACTICE
For most students it feels safer to give the neck a bit more space by lifting the upper arms and shoulders up a little higher than the head. To do this place one or two folded blankets at the top of your mat with enough room for your head to drop behind it onto your mat. The blankets should be folded big enough for your upper arms and shoulders to fit along the length of it. When positioning yourself make sure there is about 2 inches between the top of your shoulder and the edge of the blanket so that when you roll into position your shoulders don't fall off the edge of the blanket. Remember this is a shoulderstand not a neck stand!
If Salamba Sarvangasana/Shoulderstand is not for you there is plenty in this sequence to do all but the peak pose. Instead of Salamba Sarvangasana/Shoulderstand you can linger a little longer in Setu Bandha Sarvangasana/Bridge, take either of the supported Half Sarvangasana/Shoulderstand – either support the hips with a brick or place the hands, fingers facing up, just at the top of your hips and let your legs just drape over your head rather than reaching them straight up.
Before you come into the pose be sure to tuck your elbows into your body and your shoulder blades together to ensure that when you roll up you are pressing the weight of the body into the shoulder girdle. When you have raised your hips up over your chest, check your elbows haven’t splayed out and adjust them back in line with the shoulders if they have. It is much easier to adjust them now than in the full pose. When you are in Salamba Sarvangasana/Shoulderstand it is very important to not turn your head. Believe me when I say, this can cause a very uncomfortable nerve pinch in the neck.

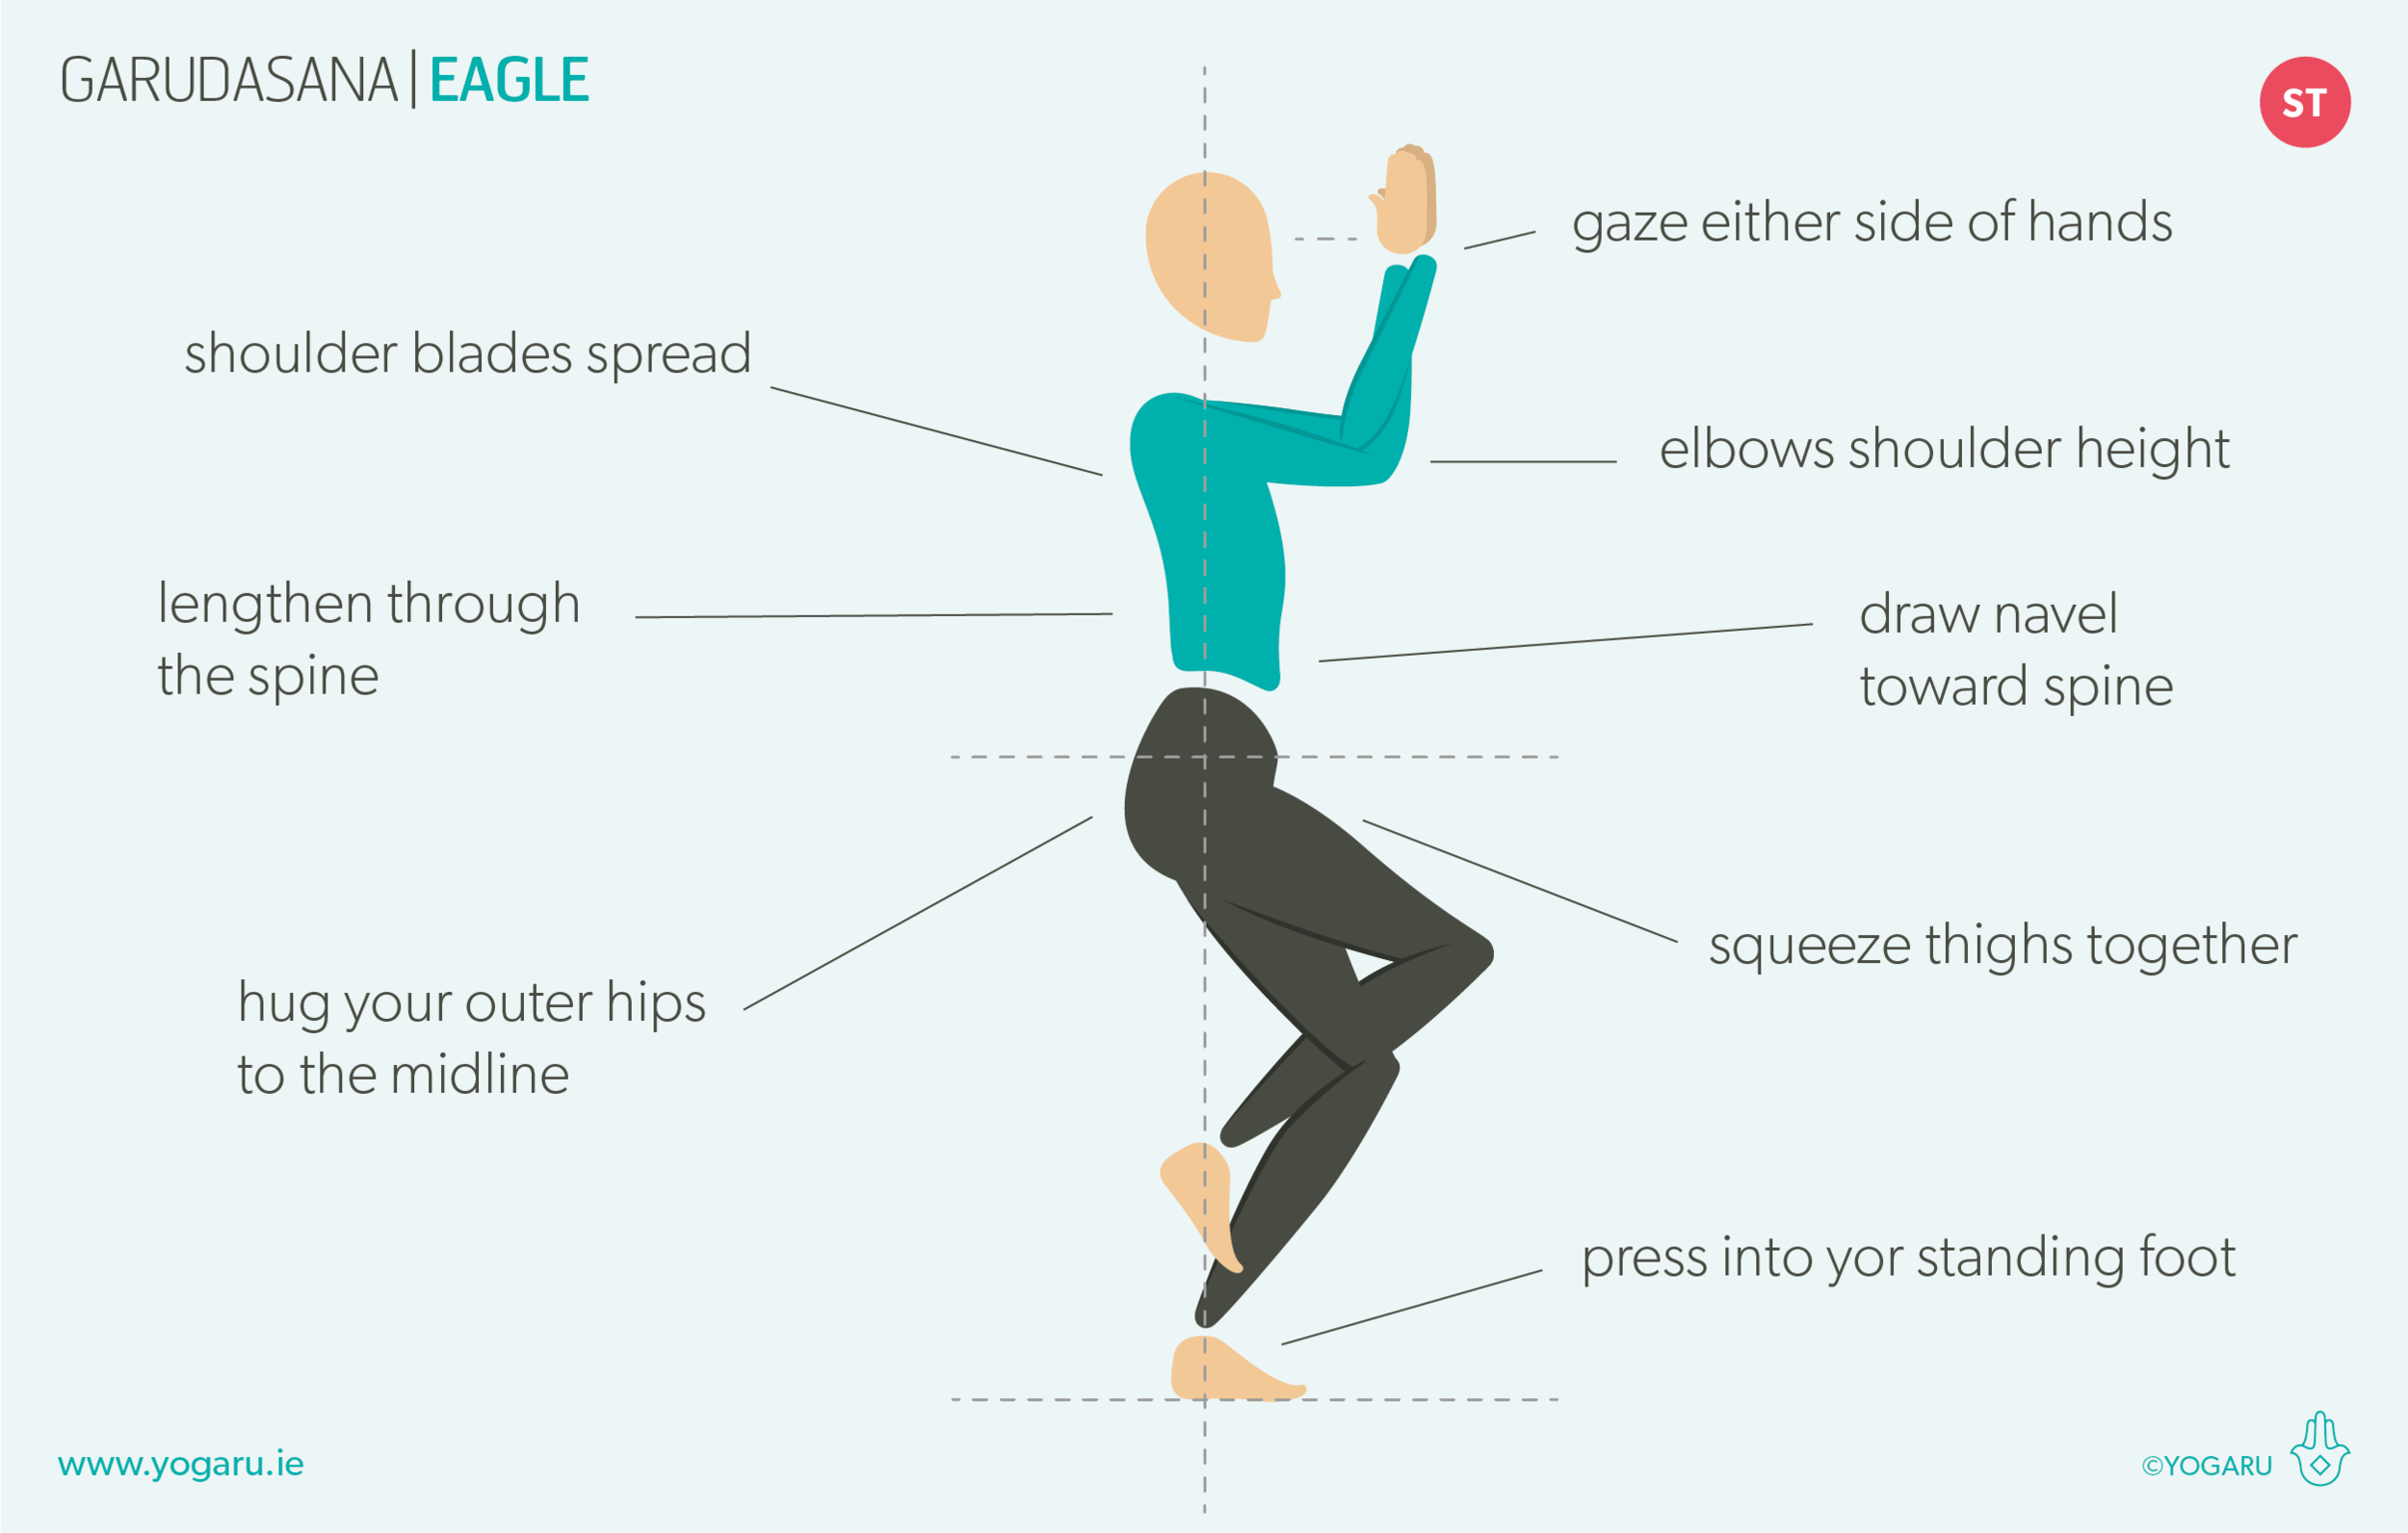
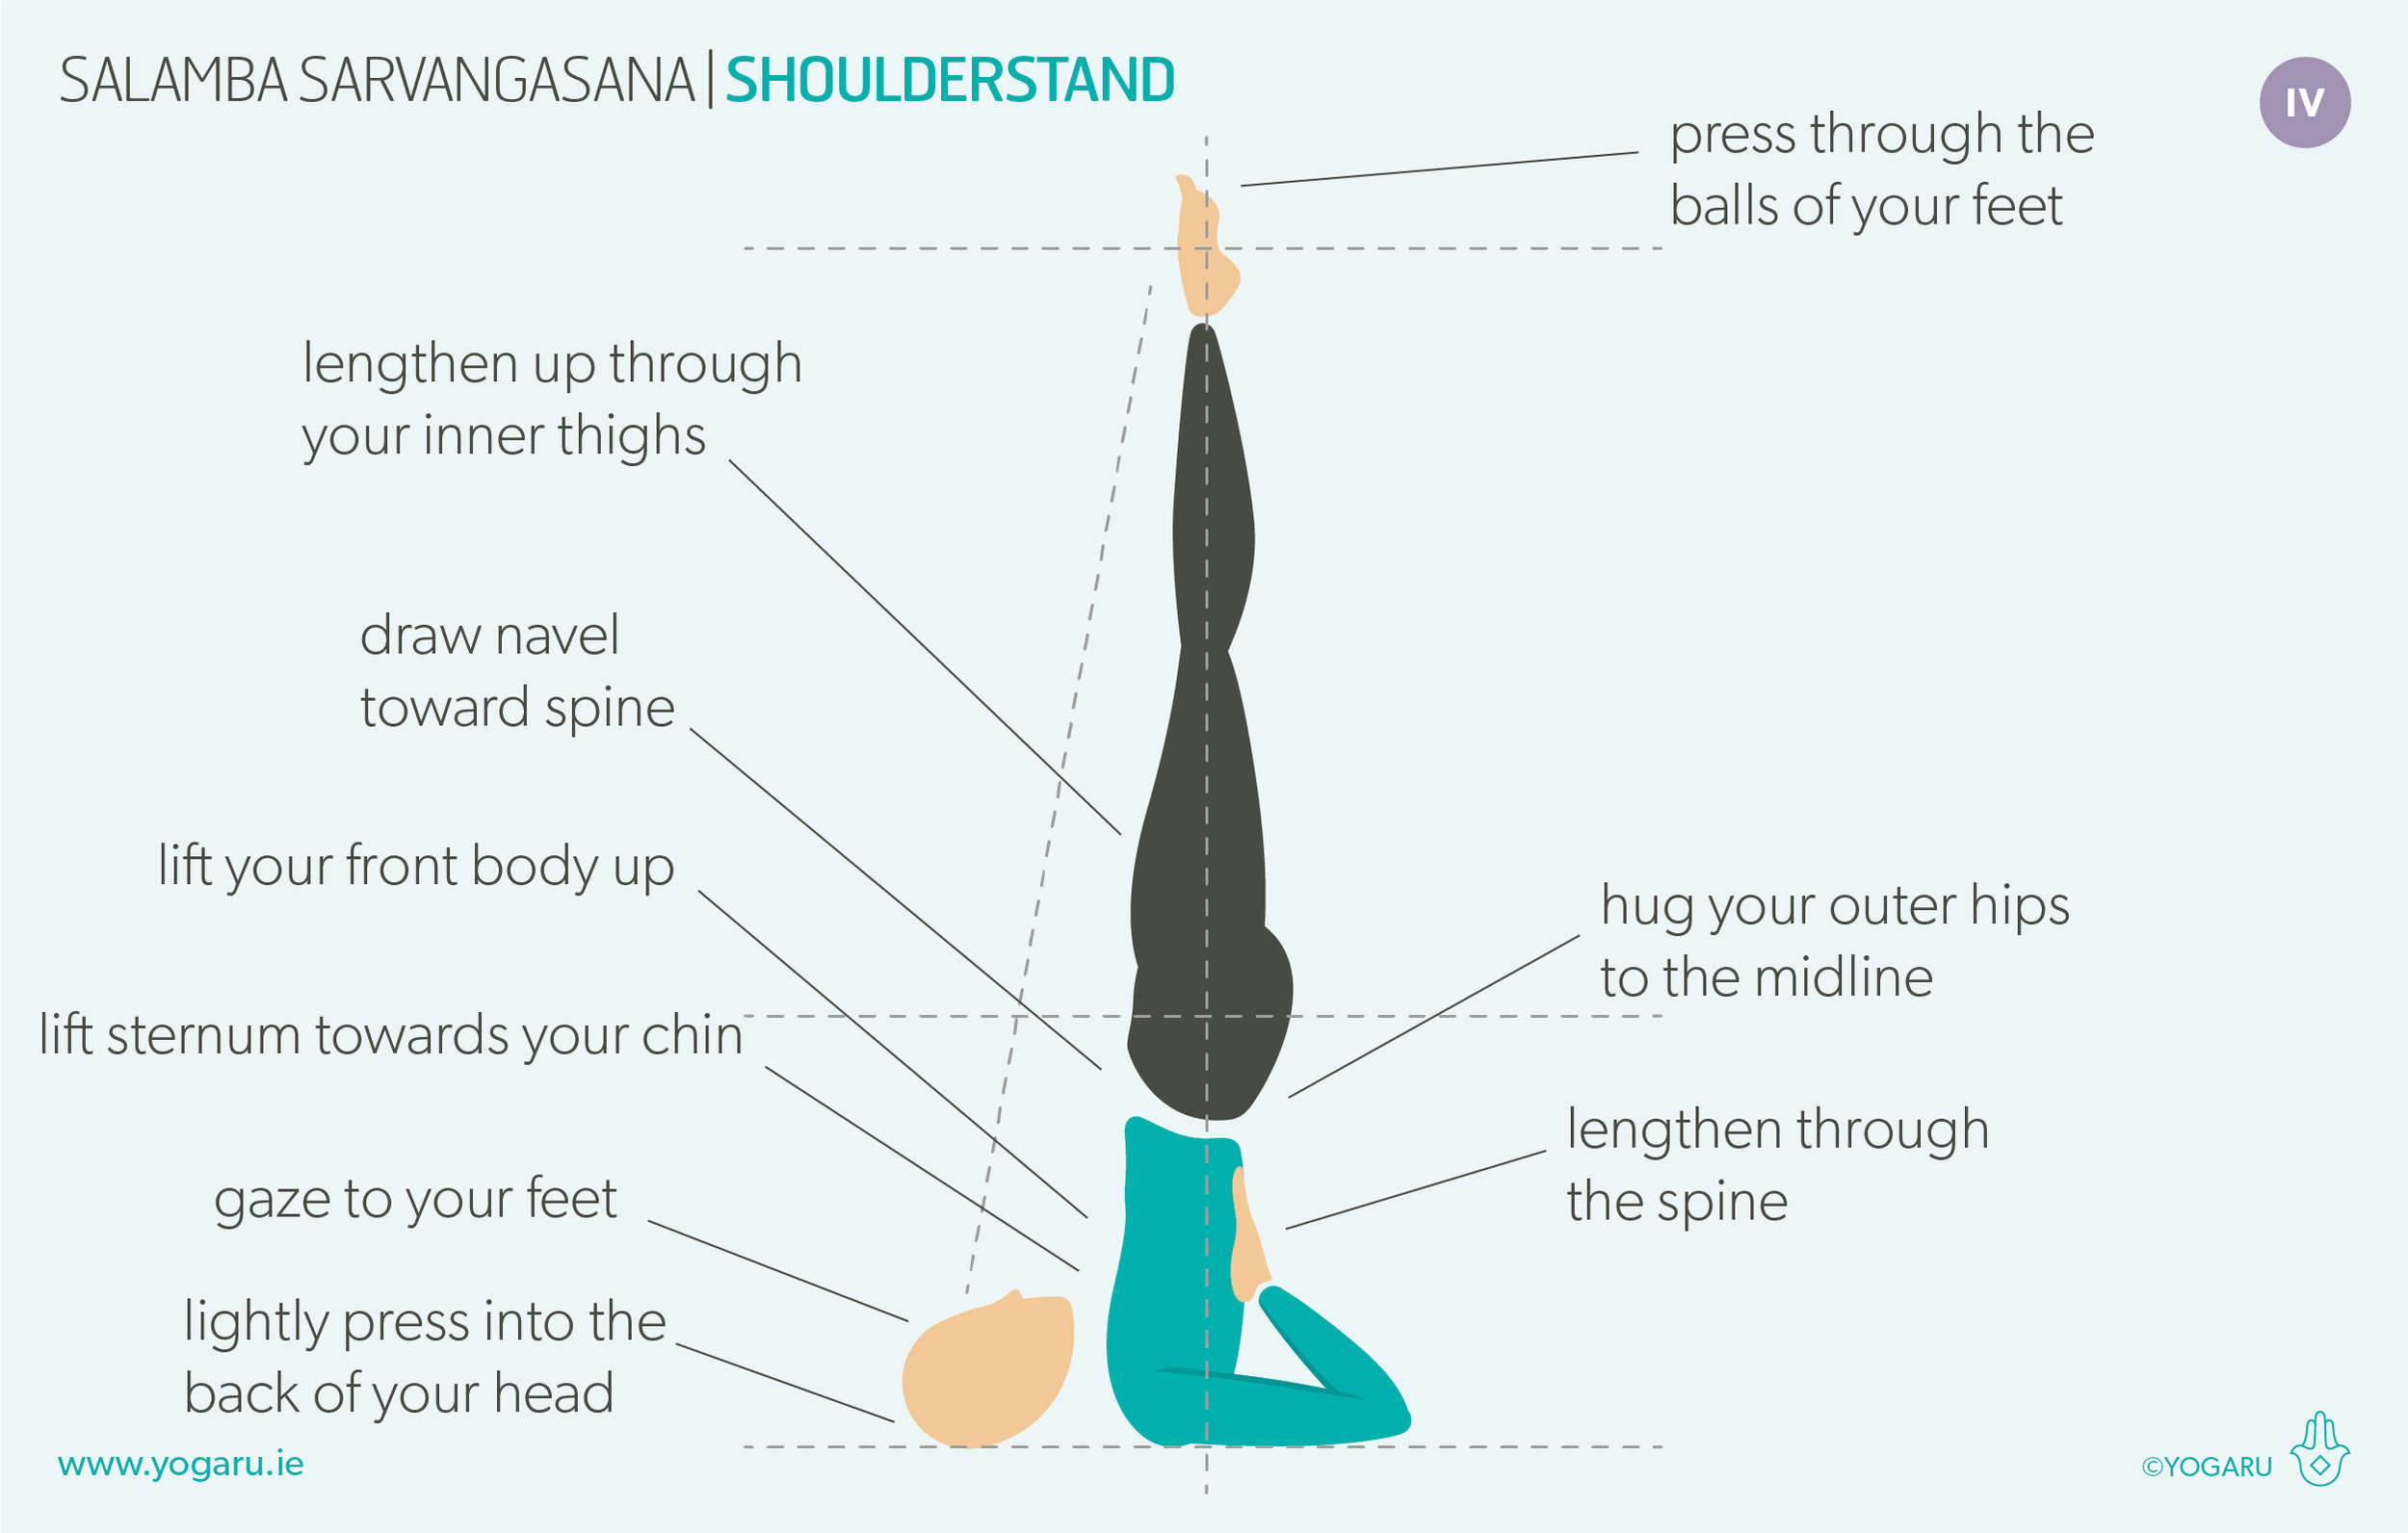
ALIGNMENT CUES
For this sequence remember to hug the outer hips to the midline in Salamba Sarvangasana/Shoulderstand and squeeze to the midline.
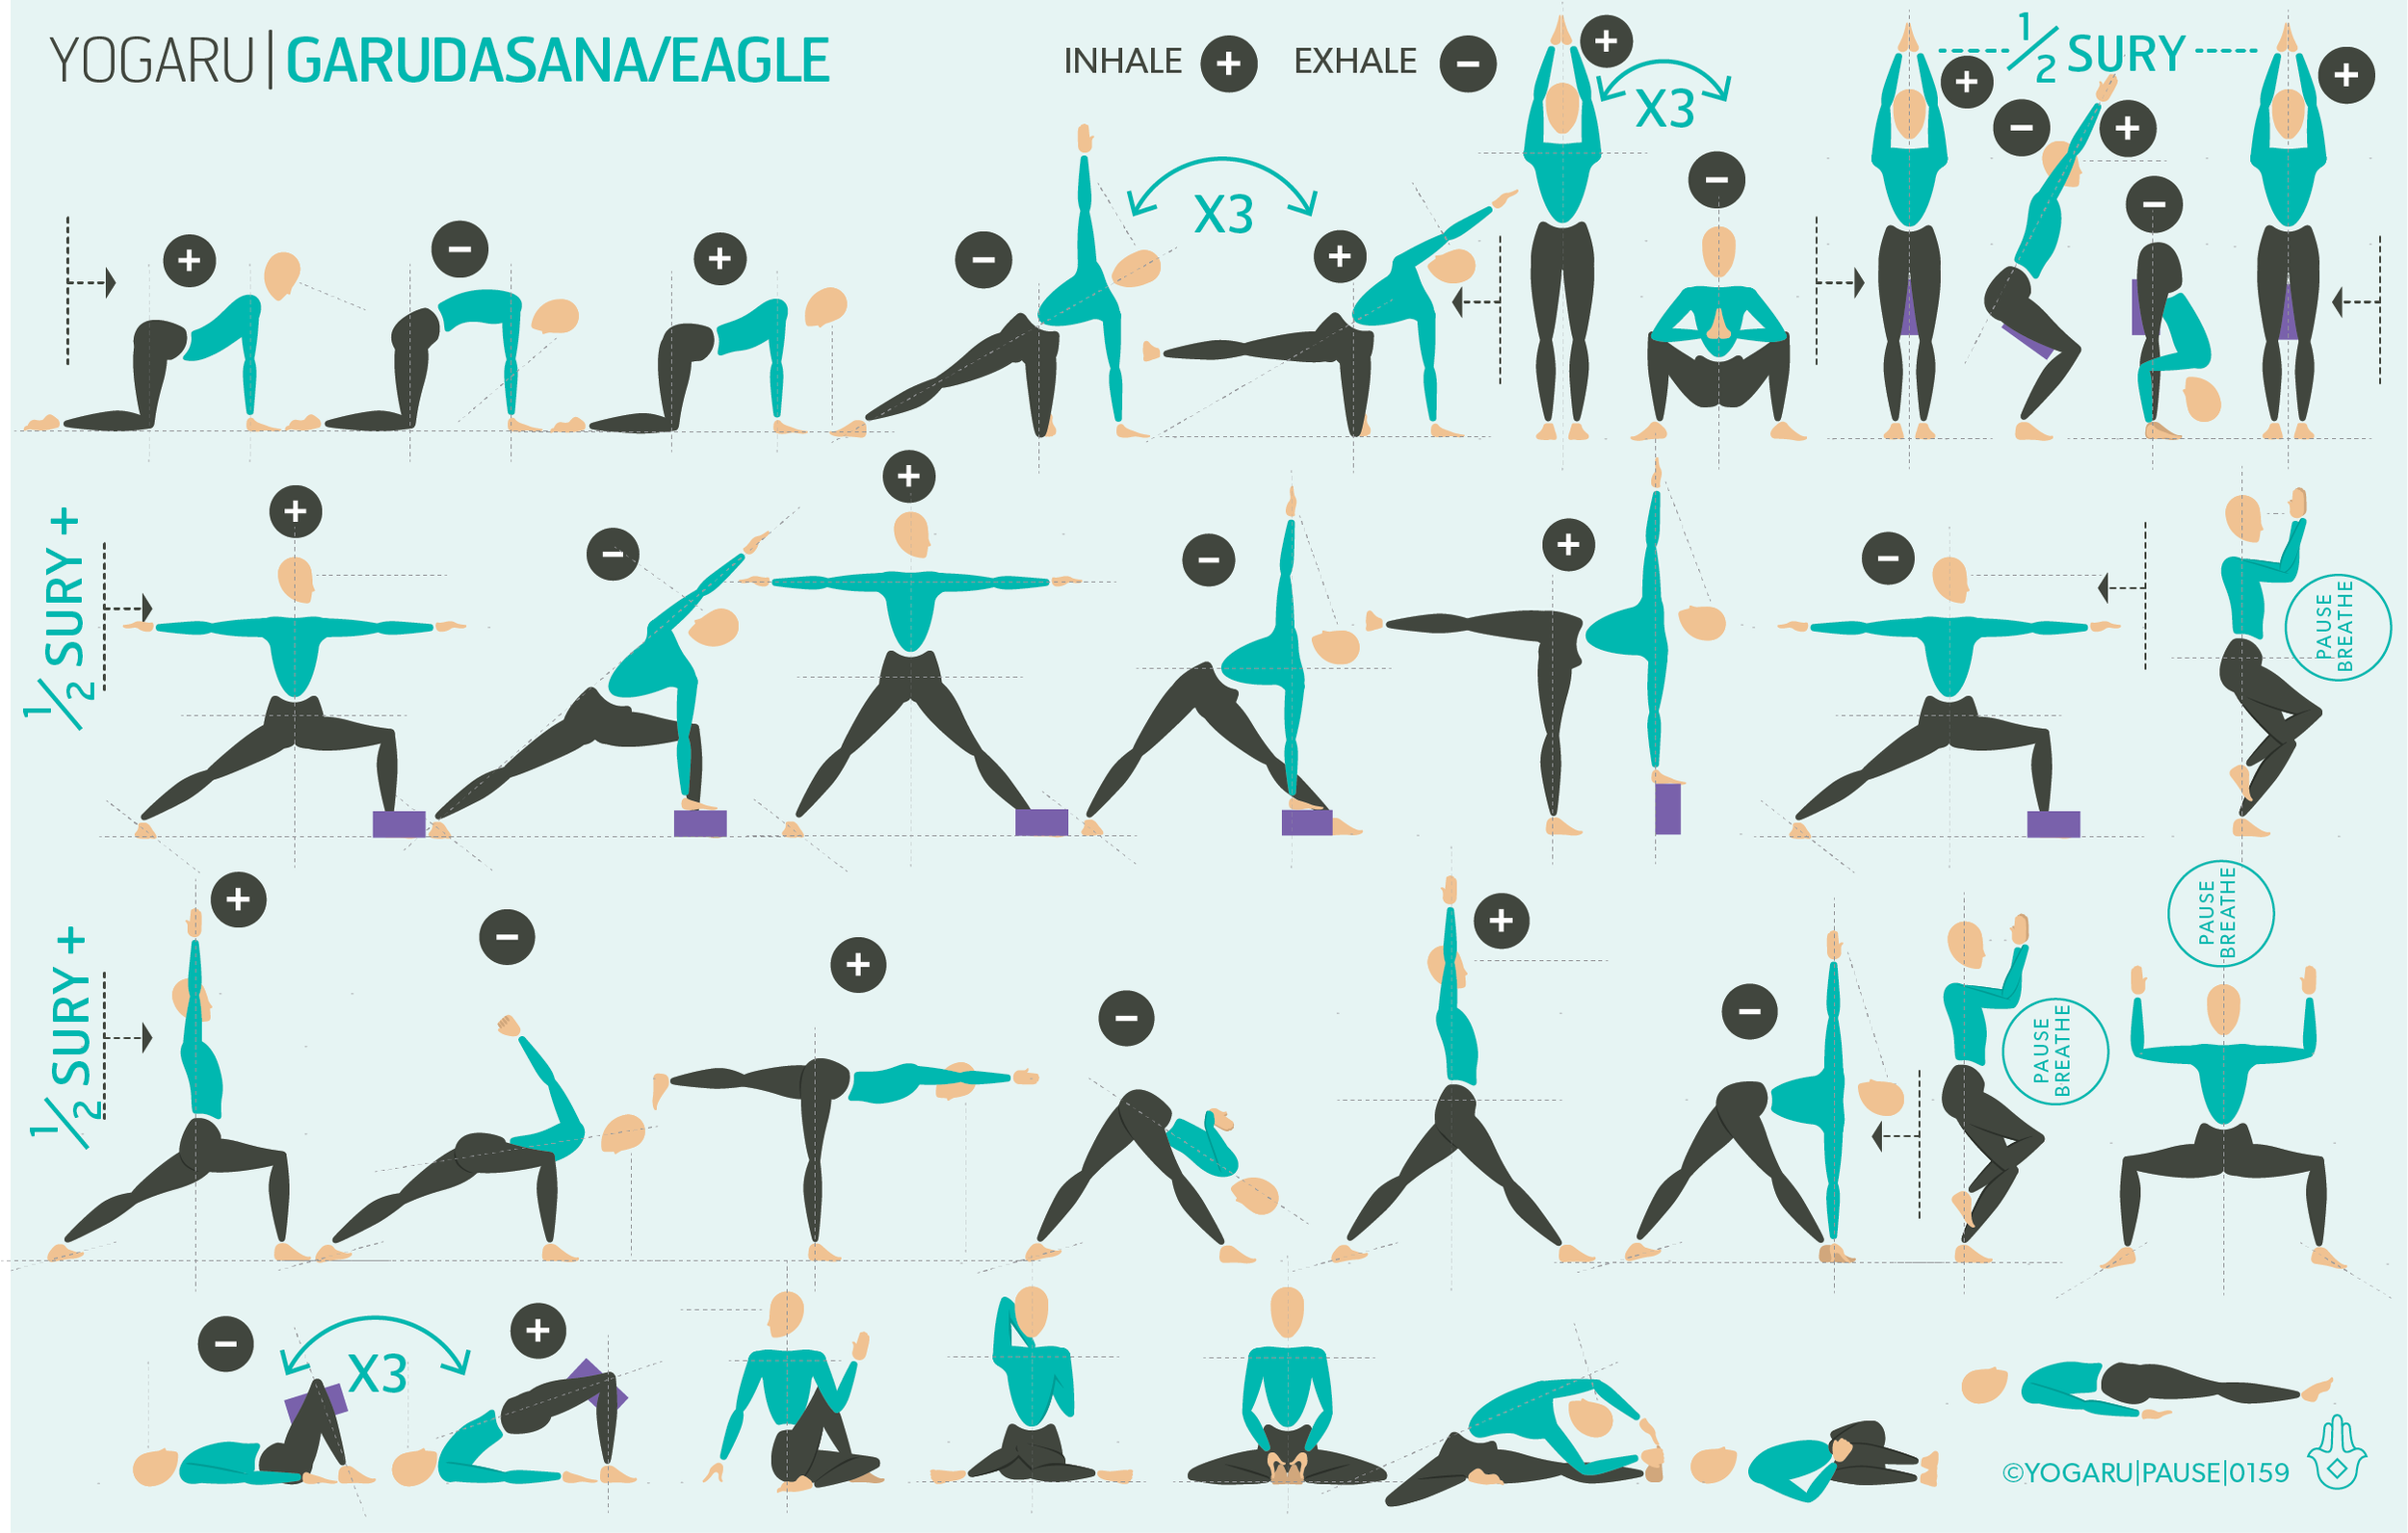
Have a read of the tips below and either print out the sequence or save it onto your device:
Lie on your back, inhale, arms press into the ground beside you. Exhale, bend your knees, lift your hips up and roll your legs towards your head.
Place your hands on your lower back, fingers facing up, elbows shoulder width apart. Straighten your legs up high, lengthen up through your inner thighs, press through the balls of your feet. Walk your hands down your back towards your shoulders.
Hug your outer hips to the midline, lift your front body up, lengthen your spine. Lift sternum up and towards your chin, lightly press into the back of your head, gaze to your feet. To come down, use your arms to support your lower back and slowly roll back down.
To save the images for personal use click and hold down the image until the ‘save image’ option appears; on Mac hold down ‘control’ and click the image to get the option box; on PC right click on the image to get the option box. Scroll down in the ‘option box’ and click ‘save image’.
Ruth Delahunty Yogaru