HAPPY HIP OPENERS
Although you could argue that most yoga poses are hip openers, Utthan Pristhasana/Lizard gives the opportunity for a deep hip opening. The hip muscles can get very tight from sitting for long periods of time, or from sports that repeatedly contract these muscles, and can lead to a shortened stride or lower back issues. Utthan Pristhasana/Lizard helps relieve this issue and is a perfect pose for runners, cyclists, desk sitters and for anyone looking to increase hip mobility and freedom in everyday life.
The hip joint is made of a ball shape at the top of the leg bone (femur) and a socket shape at the base of the pelvis (acetabulum). This creates a ‘ball and socket’ joint that gives a wide range of movement to the hips. Within this range there are some directions the femur moves with more range than others. You can lift your leg up to an average height of 130 degrees but you can only extend your leg back to an average of 25 degrees. In Utthan Pristhasana/Lizard the back leg is extended and the front leg is flexed. When you come into the pose with the right leg forward and the left leg extended back, the front of the left hip is being stretched and the back of the right hip is being stretched. When you repeat the pose on the other side, with the left leg forward, you stretch the alternate sides – meaning both front and back of both hips have been equally stretched. Making Utthan Pristhasana/Lizard a great all round hip opener for both the front and back of the hips. That is why you will see in the benefits list below that it stretches and strengthens a lot of the same muscles.
THE BENEFITS OF UTTHAN PRISTHASANA/LIZARD
Utthan Pristhasana/Lizard is a standing pose and a deep hip opener. It stretches the hip flexors, glutes, groins, quads, hamstrings and strengthens core, hip flexors, glutes, groins, quads, hamstrings. As a hip opener it reduces stress tension and anxiety, increases energising, aids digestion, stimulates the abdominal organs, relieves sciatica and balances the nervous system. As a standing pose it builds heat, increases circulation and stamina.
EXPLORING UTTHAN PRISTHASANA/LIZARD IN YOUR PRACTICE
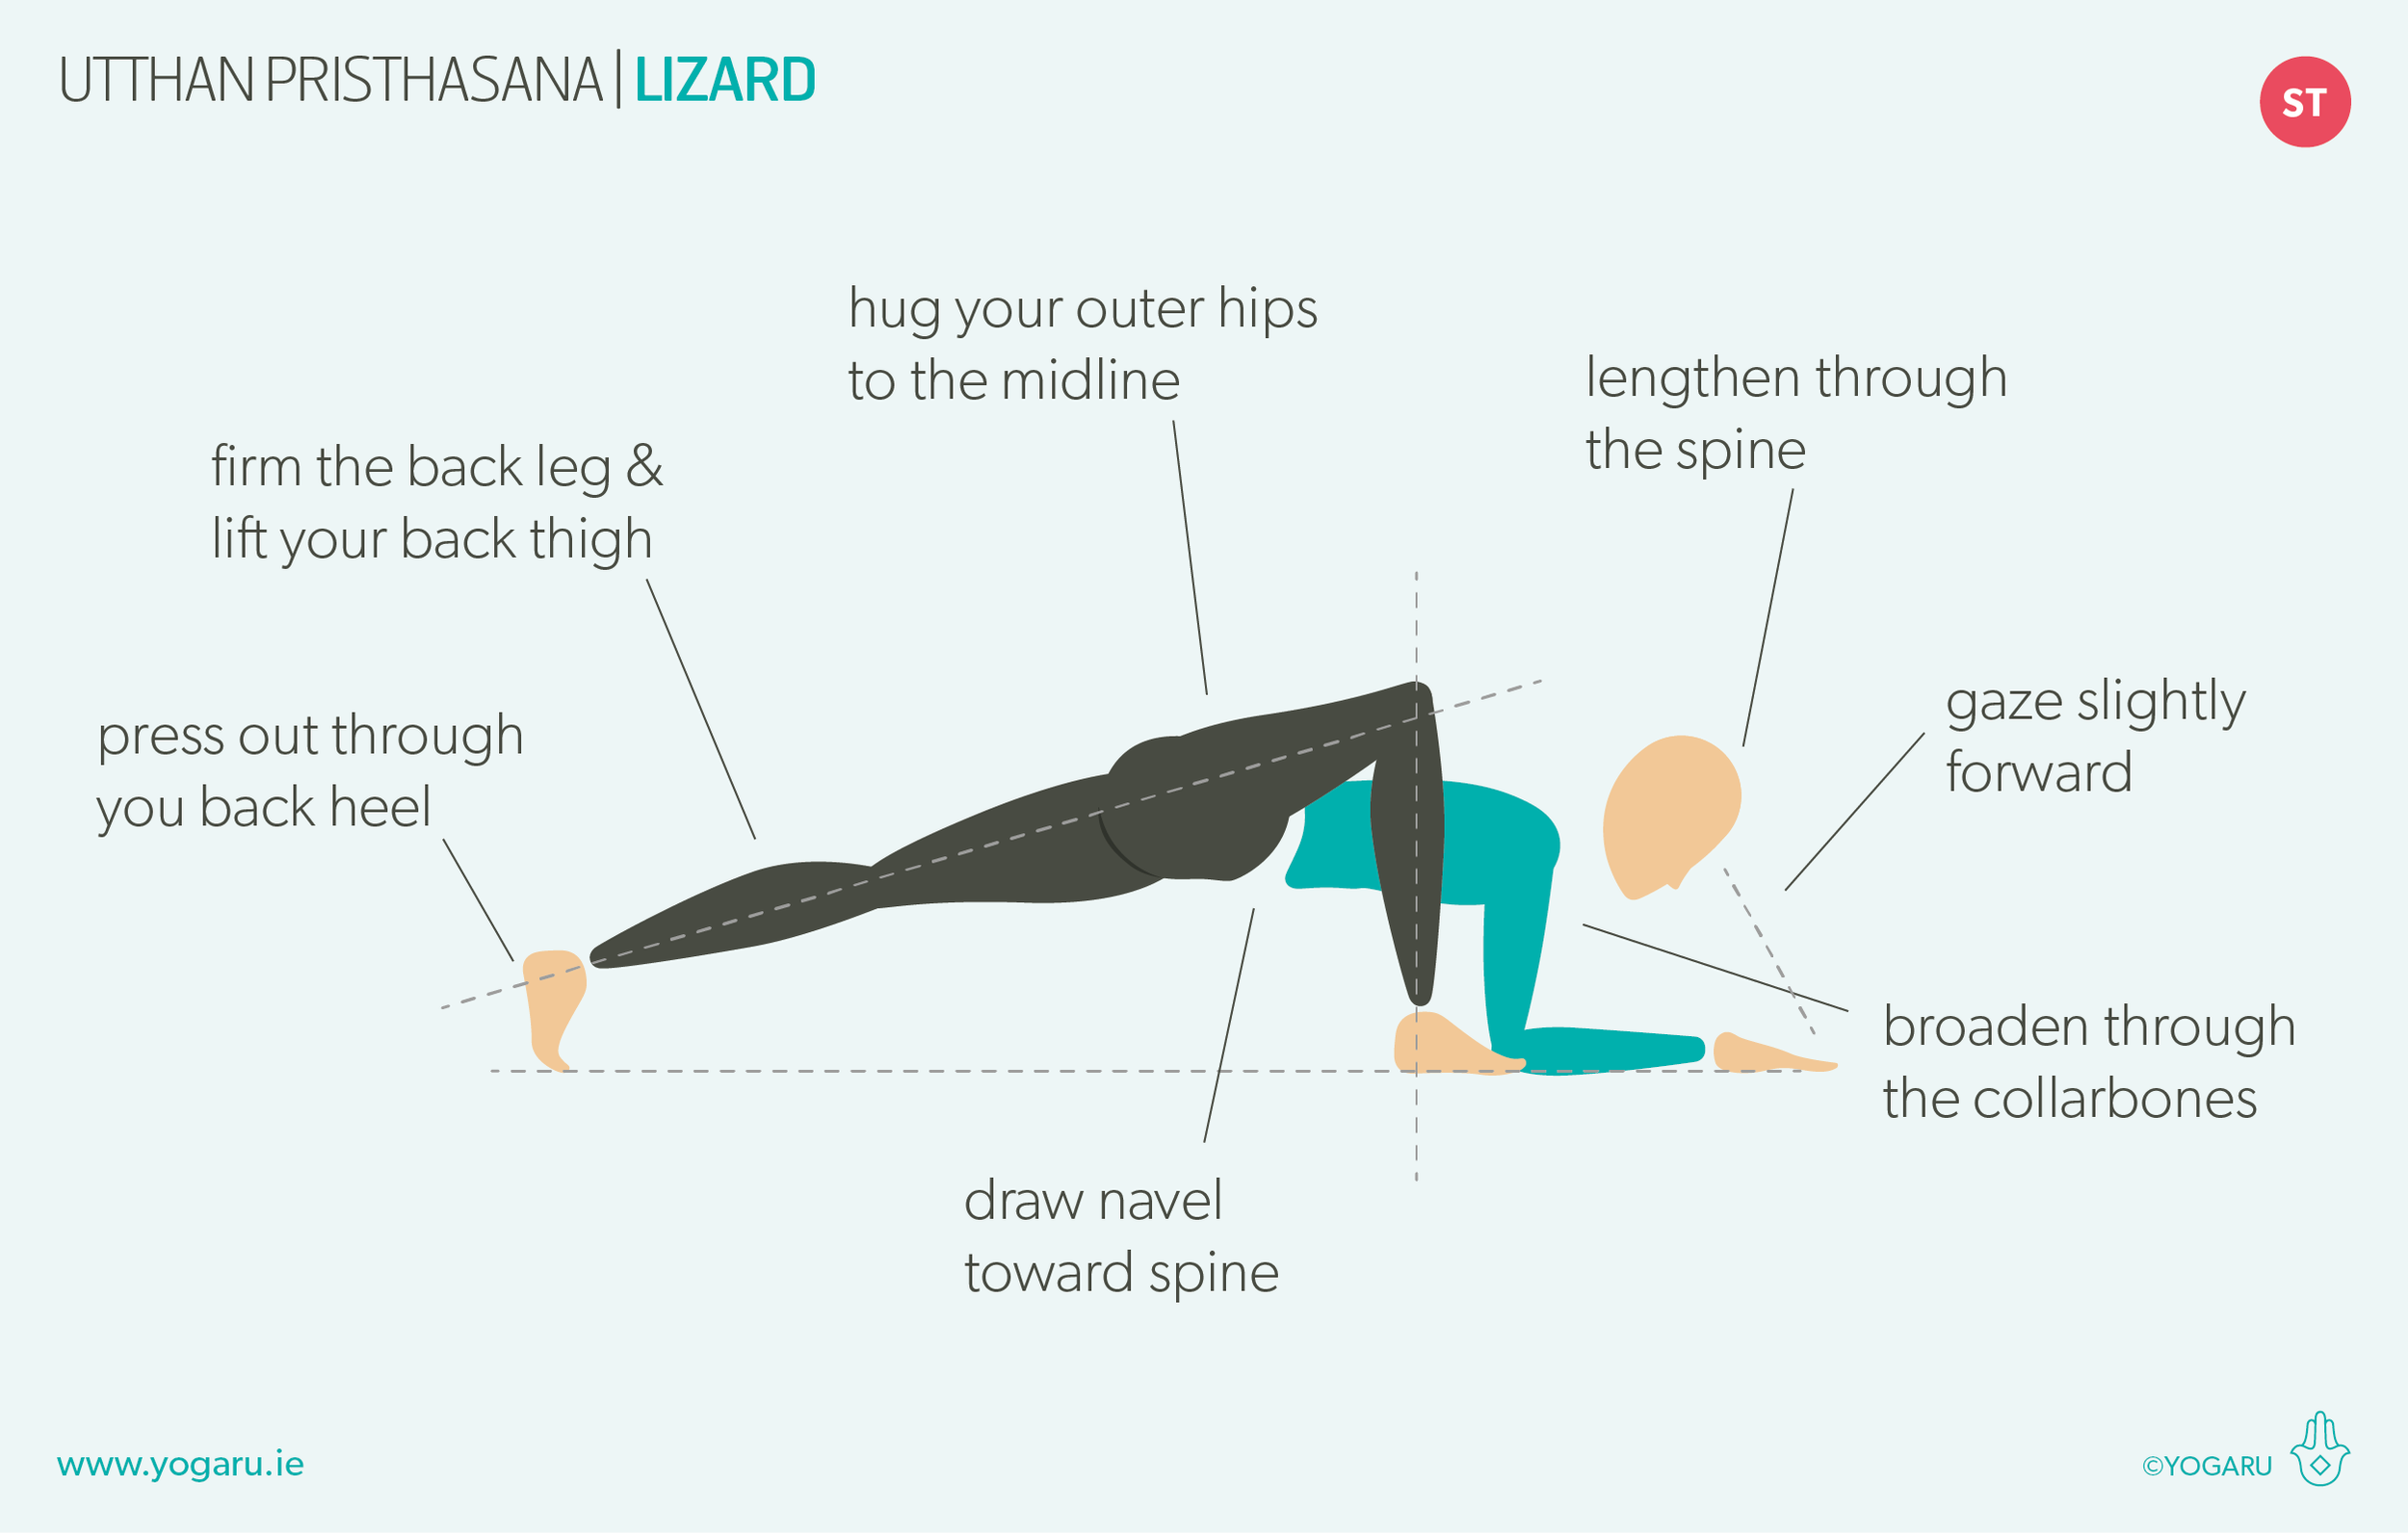
There are two versions of Utthan Pristhasana/Lizard. The first version, which you will find at the start of each mini flow, is where you keep your back knee down for balance, stay up higher and keep the arms straight. You can repeat this version or try the second version, which you will find at the end of each mini flow, is a deeper hip and groin opener, where you come down onto your forearms and lift the back knee. If you find you are somewhere in between the two you can use the version where you place bricks under the forearms to raise the ground up to meet you for both rounds. Regardless of which version you choose, remember to watch out for over rounding of the upper back and over extension of the neck. If you find your upper back is very rounded try broadening through the collarbones and lengthening through the spine. If this doesnt work then maybe take one of the versions with the chest a bit higher up off the ground. You can also play around with the optimal position for the front foot. Sometimes our anatomy will prevent the front leg from flexing deep enough to bring the hands to the ground when the head of the femur hits its end range with the pelvic socket. You can try placing your front foot at a 45 degree angle and allow the knee to move outwards to give more space for the femur bone to roll in the socket. In Utthan Pristhasana/Lizard gravity will do a lot of the work to drop you into the stretch, for this reason it is very important to make sure you are listening to your hips and stopping before they tell you they are at risk of muscle strain, particularly in the inner groins.

ALIGNMENT CUES
Allow plenty of time for the warm up phase of this sequence. The hips muscles habitually hold tightness in one of the directions for most people. Patience and plenty of breathing as you gently explore the prep and peak pose will serve your hips well.
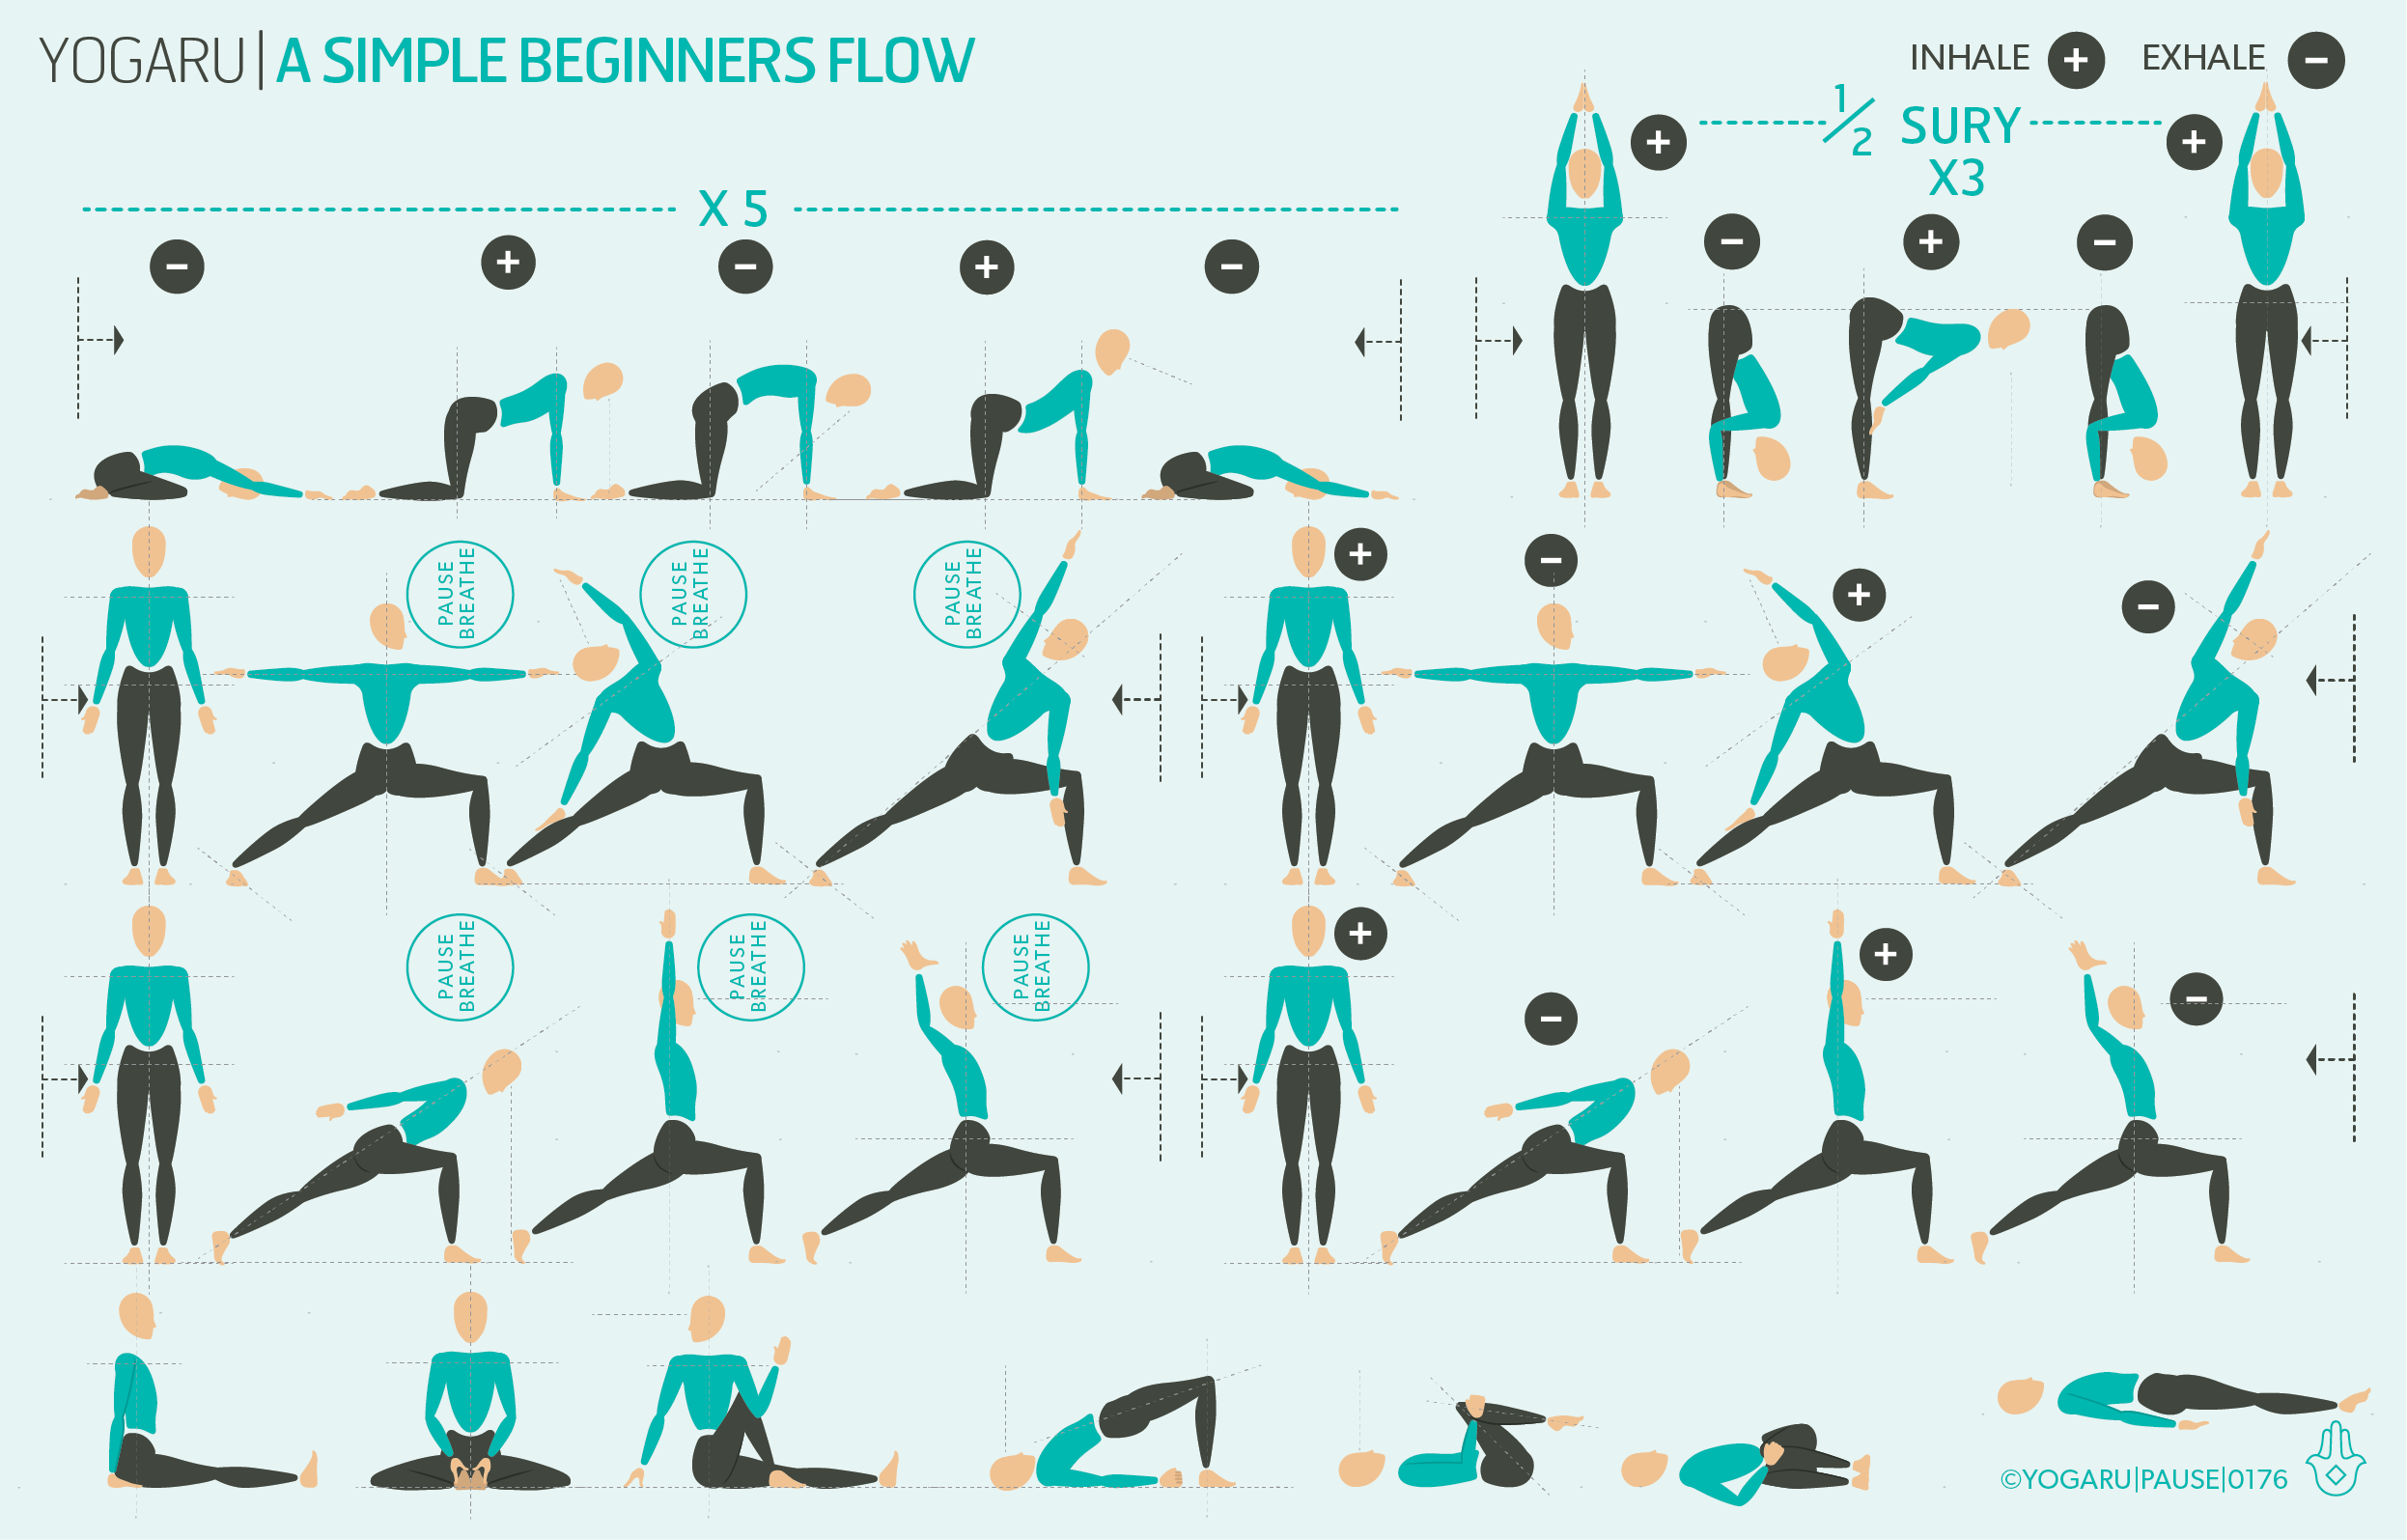
Have a read of the tips below and either print out the sequence or save it onto your device:
From Adho Mukha Svanasana, inhale, step your right foot to the outside of your right hand, lower your left knee to the ground.
Hug your outer hips to the midline, hips squared to the front of the mat, lower your hips down towards the ground.
Stay here, or for a stronger stretch, lower onto your forearms and lift your left knee. Press out through your left heel to firm the back leg, hips level.
Press into your right foot and forearms, broaden through the collarbones, lengthen through your spine to the tip of your crown, gaze slightly forward.
To save the images for personal use click and hold down the image until the ‘save image’ option appears; on Mac hold down ‘control’ and click the image to get the option box; on PC right click on the image to get the option box. Scroll down in the ‘option box’ and click ‘save image’.
Ruth Delahunty Yogaru