SPINAL HEALTH
Parsvakonasana/Side Angle is one of the foundational poses of yoga that you will find in many yoga classes and sequences. It partners up well with Virabhadrasana II in a standing flow and is very invigorating for the spinal connective tissue. It creates space for the abdominal organs and work to reverse the effect of gravity on our spine. You might also notice after practising this sequence that you are able to breathe more freely through your day. It stretches the intercostal muscles between the ribs and helps deepen the breath and increases intervertebral space. The more lengthened our spine feels the better we are able to take a deep breath and more more fluidly.
The spinal cord runs down the centre of the spine. The nerves branch out between each vertebra and travel around the whole peripheral body to gather sensory information for the brain to process and send back motor information to cause voluntary and involuntary actions. For this signaling system to work well there needs to be healthy lubrication and space for the nerves to travel. Adding Parsvakonasana/Side Angle to your practice will help to maintain this information highway.
THE BENEFITS OF PARSVAKONASANA/SIDE ANGLE
Parsvakonasana/Side Angle stretches the shoulders, spine, inner groins, and glutes; and strengthens the glutes, quads, core hamstrings and shoulders. It has many benefits including aiding digestion, reducing menstrual cramps, stimulates abdominal organs, strengthens lungs and boosts circulation.
This pose is a very good pose to build awareness of the core being a 360 degree wrapping muscle rather than just the front of the body. The upper body is surprisingly heavy to hold at an angle. The full 360 core is working hard in this pose to carry the weight of the upper body. When you are in the pose sinch in at the full 360 waist like a strong corset. This is the transverse abdominis muscle whose main job is to contain the organs of the abdominal region and protect the spine against gravity. You will also feel the internal and external obliques working hard on the upper side of the body to stop your spine from collapsing sideways.
EXPLORING PARSVAKONASANA/SIDE ANGLE IN YOUR PRACTICE
The mini flow in the first row of the sequence targets all the areas you will need for Parsvakonasana/Side Angle – strengthening the glutes, core and shoulders; and stretching the shoulders, spine, groin and side body. On your first round take your time, scan down through your body and check your alignment in each pose. Then run through the flow two or three times with the breath.
Although strictly speaking Parsvakonasana/Side Angle is not a side bend there is certainly plenty of stretch in the upper side body and a lovely opening in the chest. This sequence has lots of side bends built into it to make sure your side body is ready to stretch open in the peak pose. Extension through the spine and lifting up out of the pelvic bowl will help you find space to hinge over the front leg.
For your first Parsvakonasana/Side Angle you will take your elbow to your knee. Press gently into the knee to help you open the chest and spin the bottom waist forward and the top waist back. To make sure your spine and core are working to hold the weight of your upper body try reaching the arm on the knee forward for a breath. For your second Parsvakonasana/Side Angle place your upper hand on the back of your head, press gently into your supporting elbow and circle your elbow and chest open.

ALIGNMENT CUES
This sequence prepares you for Parsvakonasana/Side Angle. There are two standing flows with your peak pose. If you want to extend your practice run through these two main flows twice. If you want to try a few different versions of Parsvakonasana/Side Angle have a look at my Instagram post.
Have a read of the tips below and either print out the sequence or save it onto your device:
From Adho Mukha Svanasana, ground your left foot at a 45 degree angle. Inhale, step your right foot between your hands, check for front heel to back arch alignment, exhale here.
Inhale, press into your feet to come up, open your hips to the side of the mat, front knee bent. Exhale hinge to your right from your hip joint. Place your right elbow on your right thigh, or place your right hand on a brick, or to the ground inside/outside your right foot.
Extend your left arm up palm facing the front of your mat, reach your arm over your ear. Press into your nig toe and squeeze into the back of the hips. Lift the arches of your back food and lift the inner seams of your thighs.
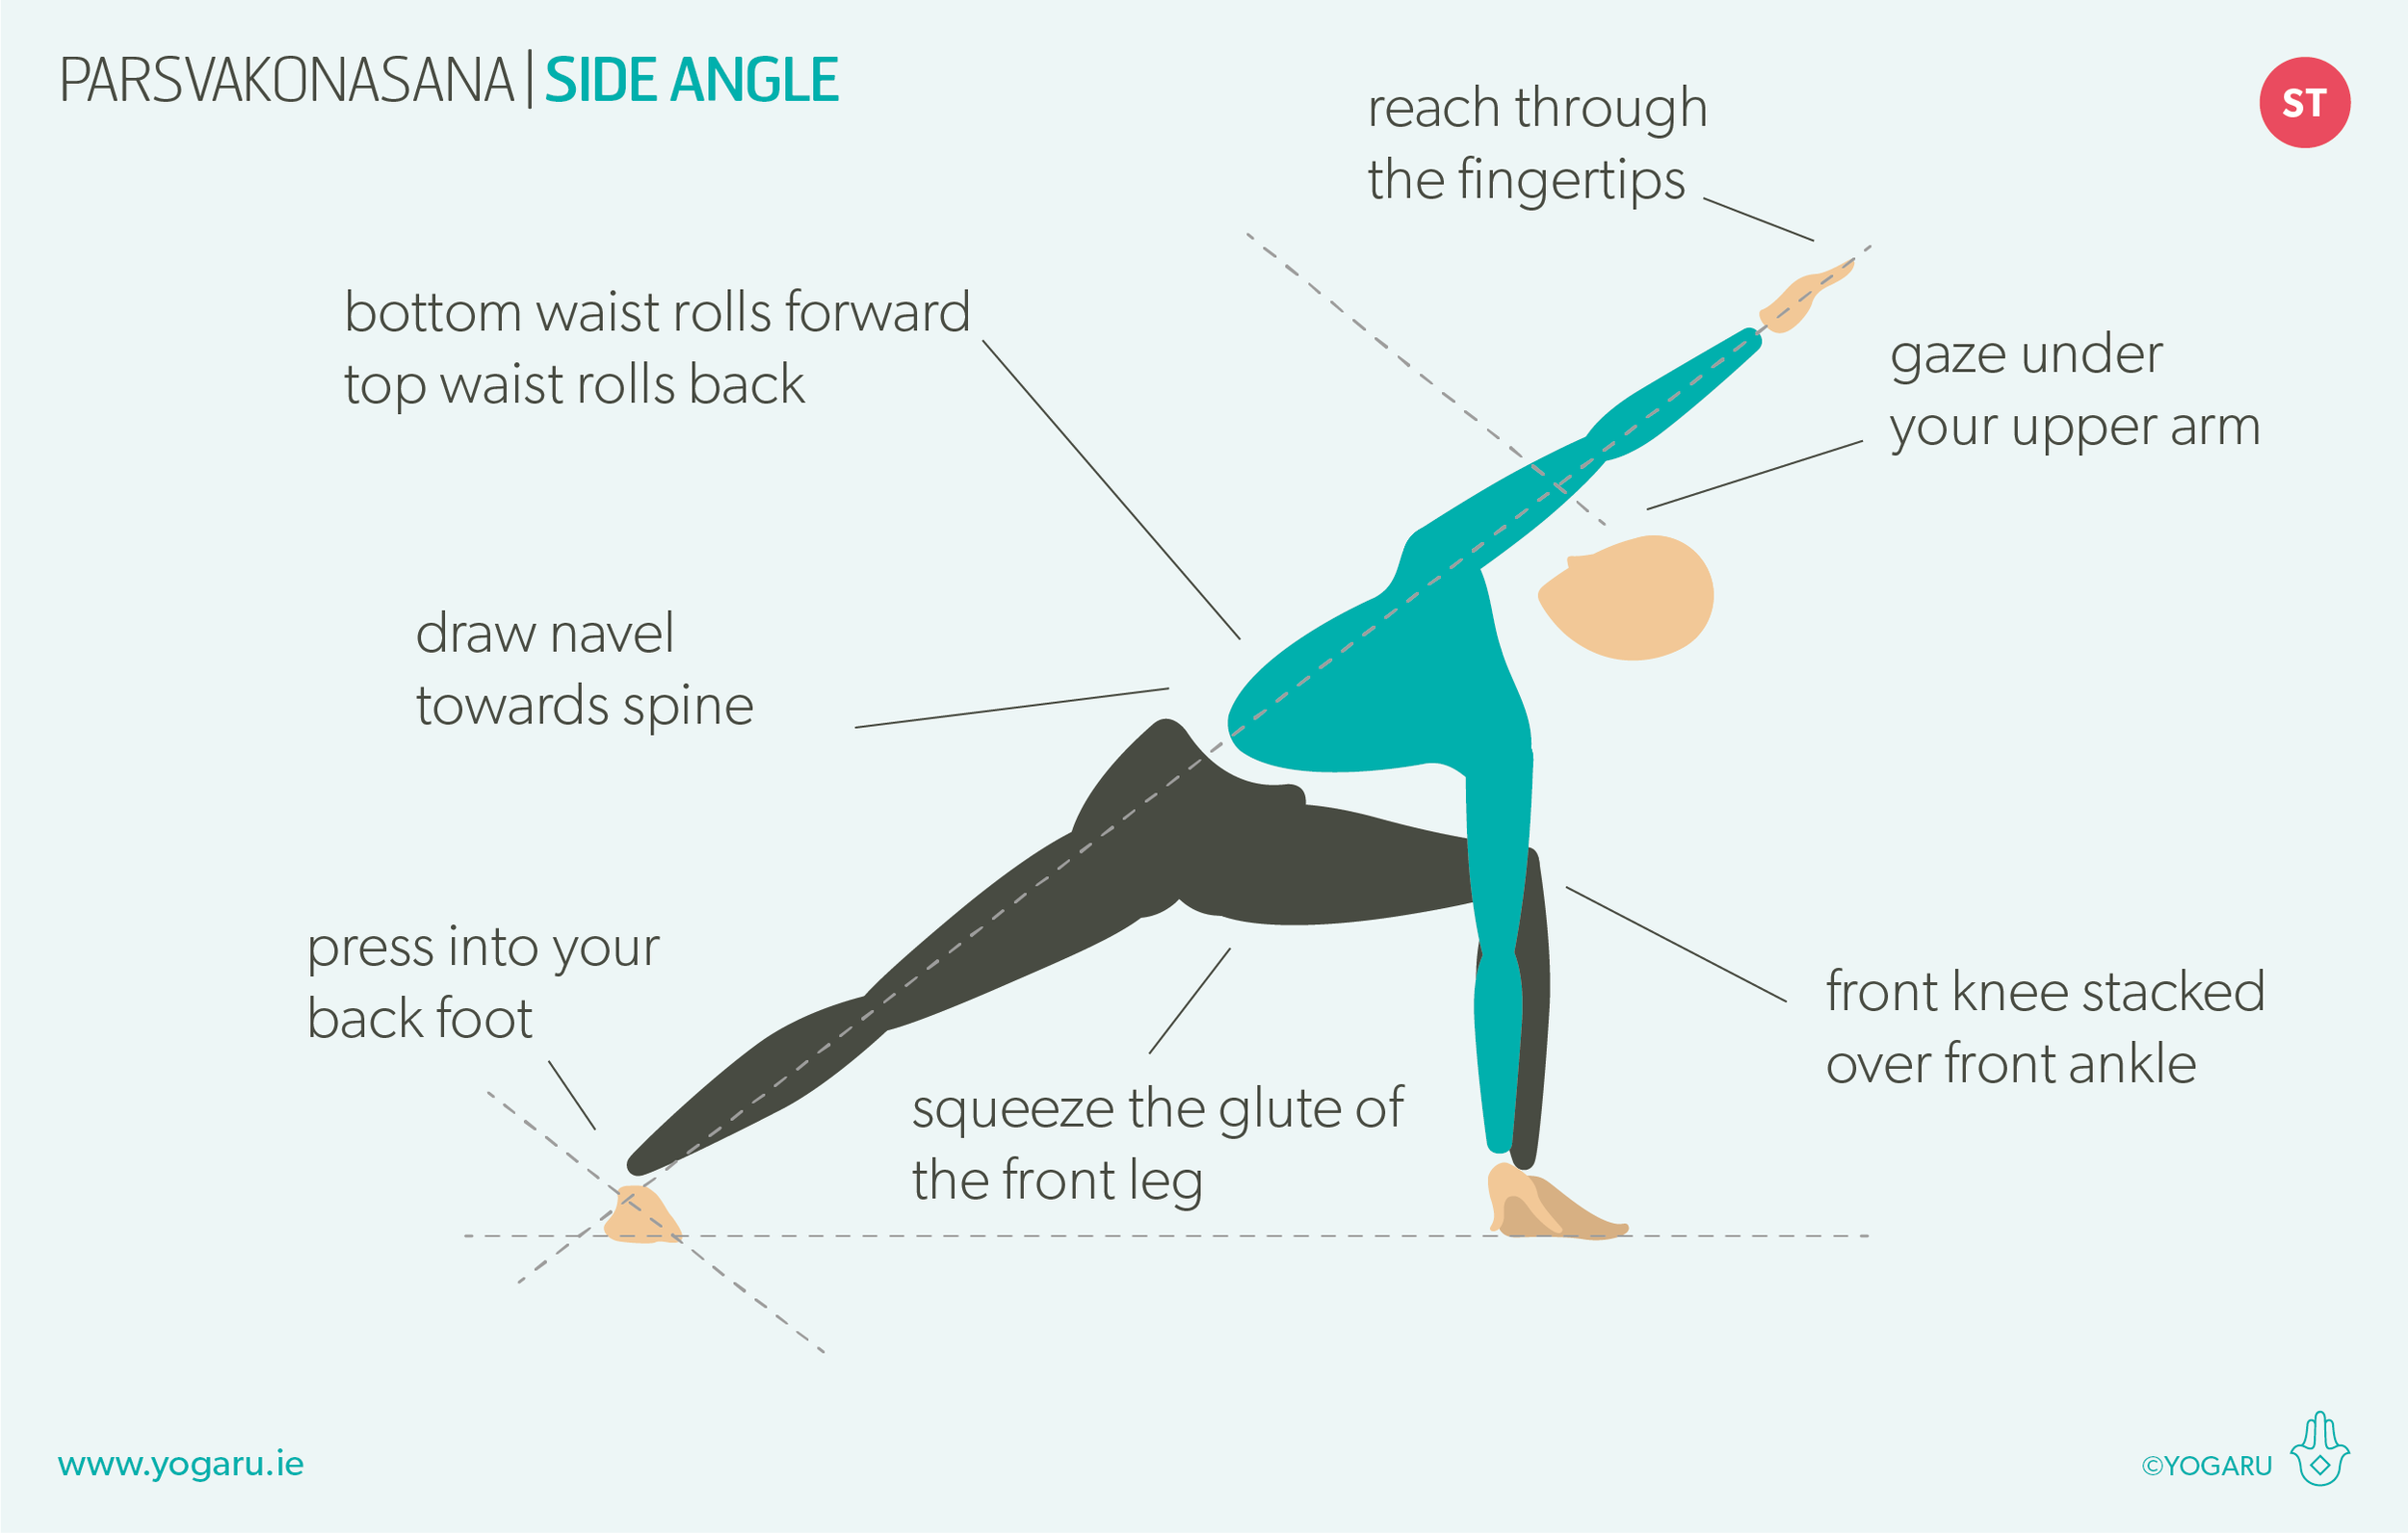
Draw your navel towards your spine. Bottom waist rolls forward, top waist rolls back, gaze under your upper arm.
To save the images for personal use click and hold down the image until the ‘save image’ option appears; on Mac hold down ‘control’ and click the image to get the option box; on PC right click on the image to get the option box. Scroll down in the ‘option box’ and click ‘save image’.
Ruth Delahunty Yogaru