KING OF ALL ASANA
Salamba Sirsasana/Headstand is probably one of the most widely practiced inversions. It is more accessible than a Adho Mukha Vrksasana/Handstand for many yogis, because it has a wider foundation to build from, but gives exactly the same benefits as a Adho Mukha Vrksasana/Handstand. Including the thrill of flipping your world upside down! Known as ‘the king of all asana’ it has many benefits – it nourishes the cells of the brain; stimulates circulation; balances the hormones; builds focus and concentration; eases stress, tension and anxiety; flushes toxins out; aids the digestive system; and boosts the immune system. With all these benefits it’s no wonder yogis have a certain glow about them – Salamba Sirsasana/Headstand are also well known for their anti-aging properties. What’s not to like about them!
THE BENEFITS OF SALAMBA SIRSASANA/HEADSTAND
Salamba Sirsasana/Headstand strengthens the shoulders, spine, arms and core. While the journey up into the inversion stretches the hamstrings. Most inversions are known for their energising effects. Salamba Sirsasana/Headstand is the one inversion that does the opposite – it is very calming and nourishing to the nervous system. Making it a good pose to practice at any time of day.
EXPLORING SALAMBA SIRSASANA/HEADSTAND IN YOUR PRACTICE
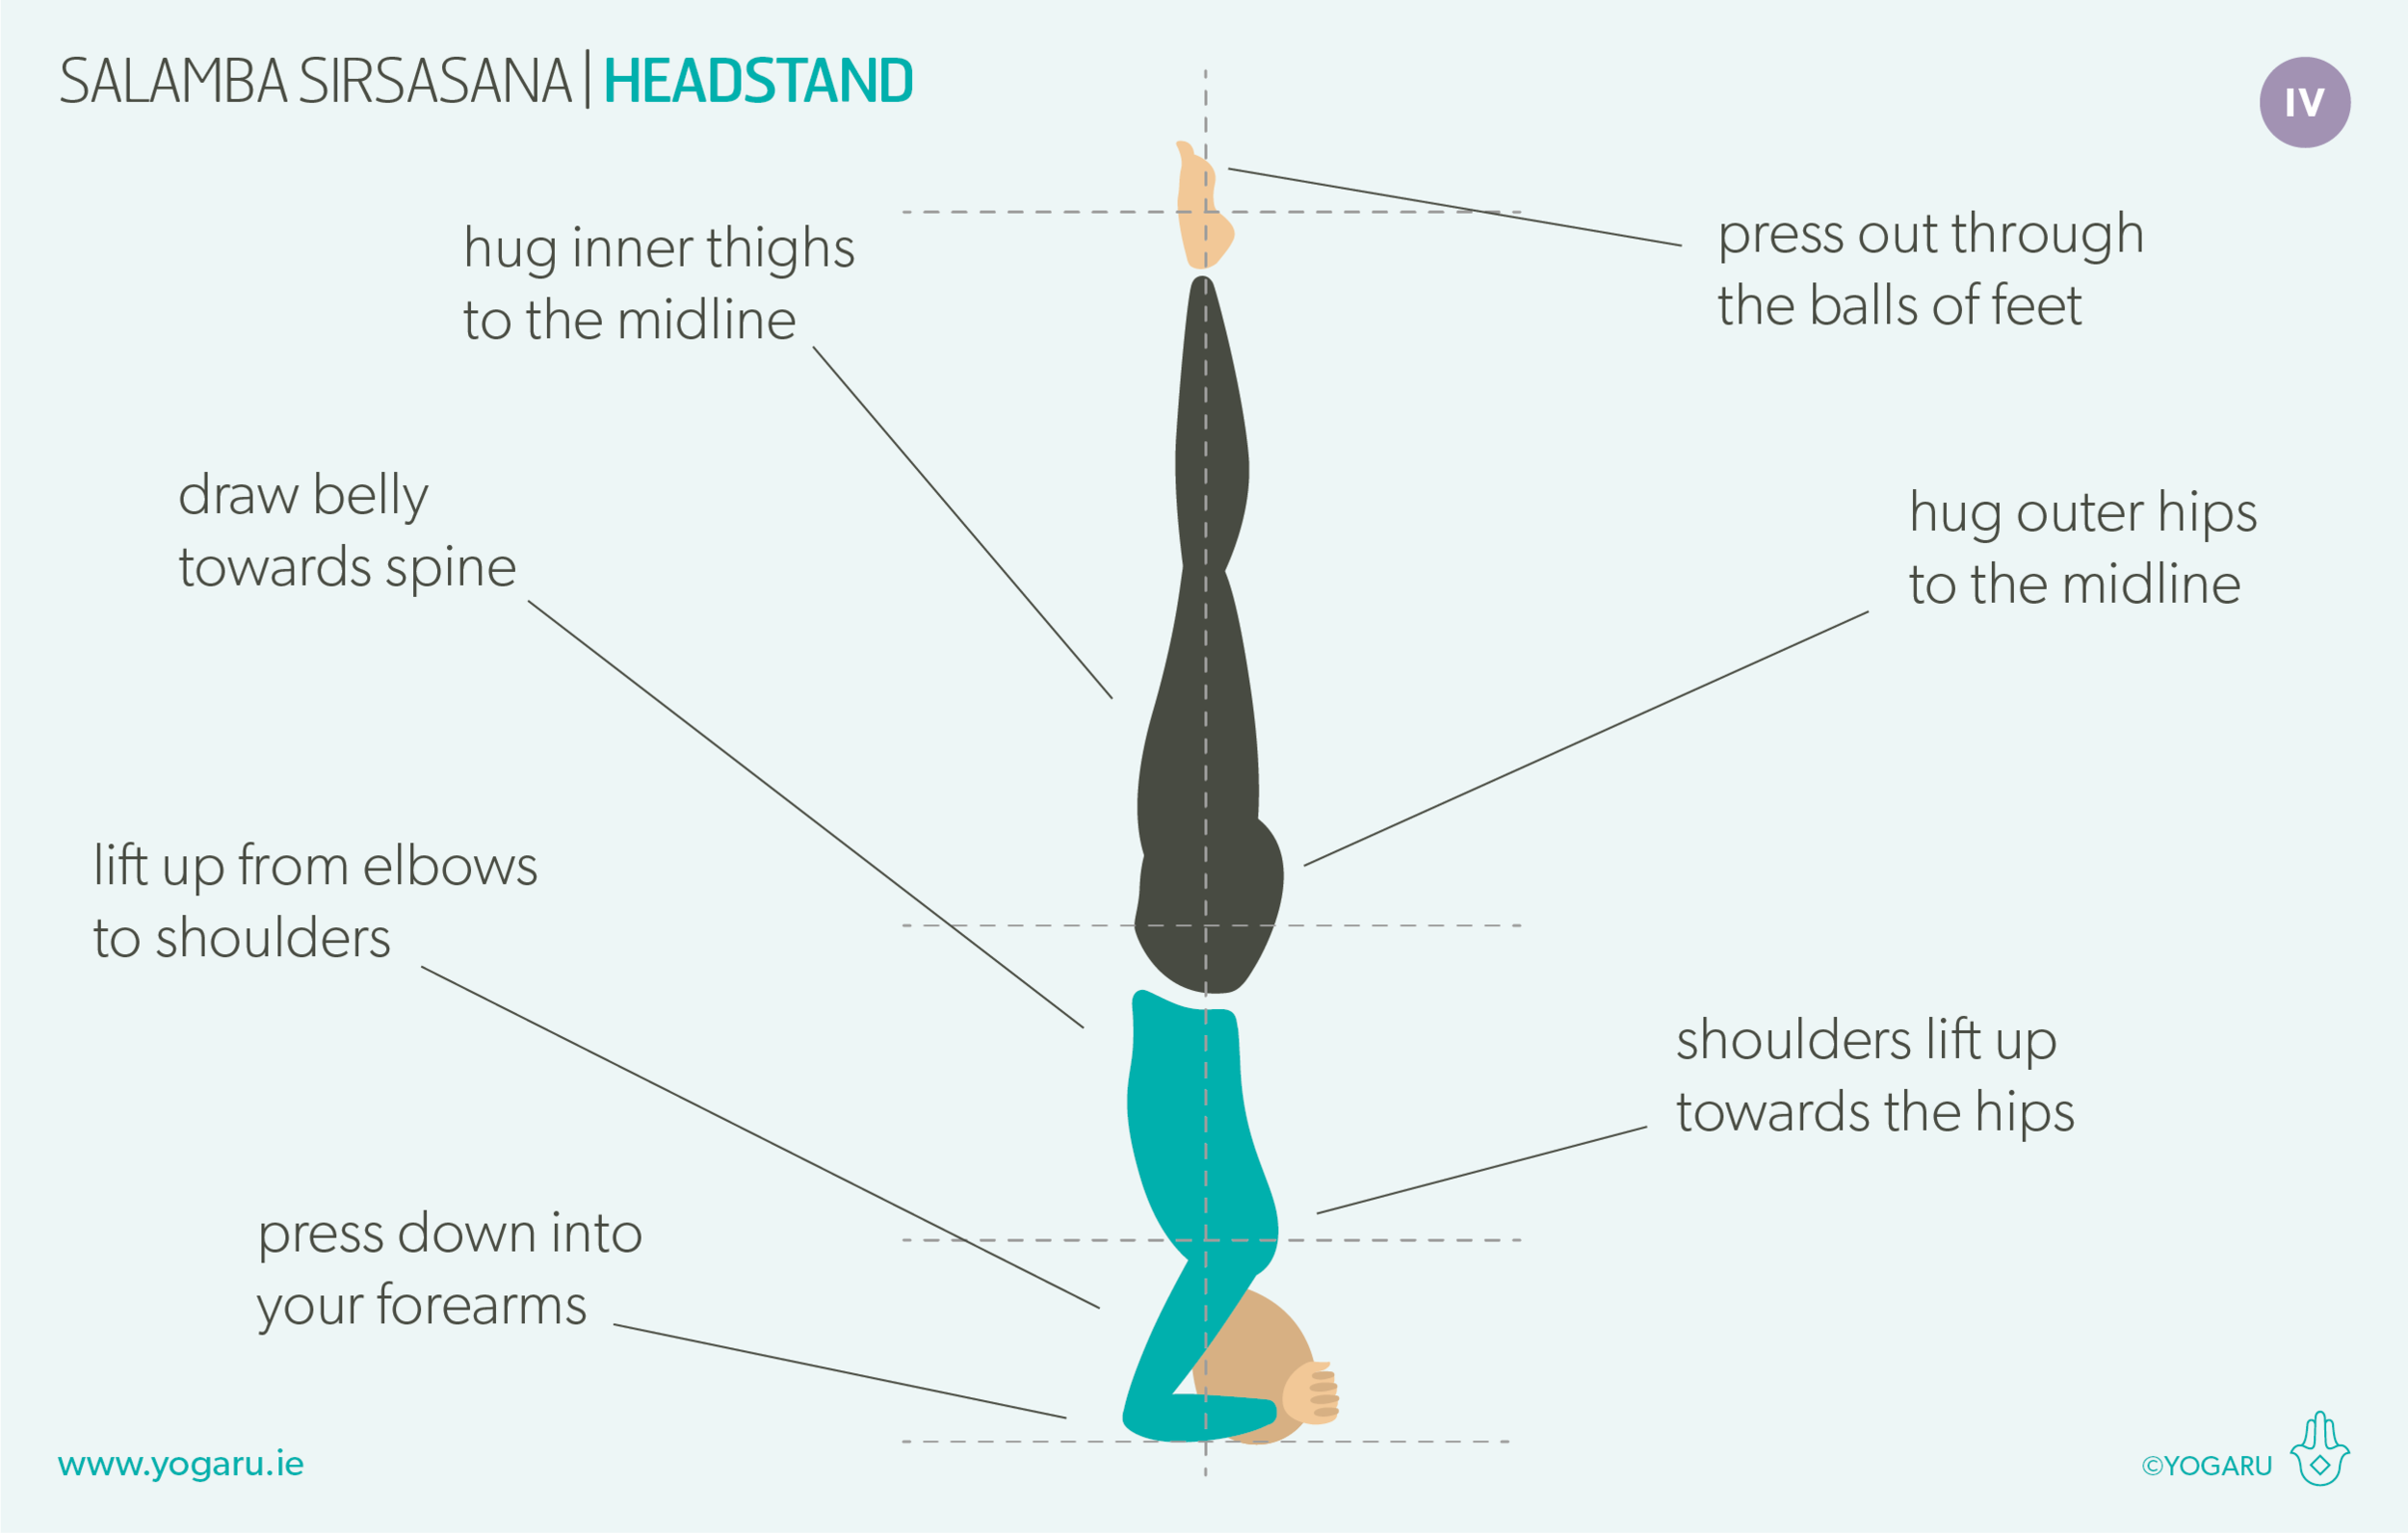
Proper prep and a well warmed up body is essential before you attempt a Salamba Sirsasana/Headstand. The neck wasn’t built for weight bearing, so strong shoulders and core are needed to assist in lifting some of the pressure off the top of the head. It can also help in your prep work to lengthen out the hamstrings at the back of the legs so you can walk your feet in towards your elbows when you are preparing to come into your Salamba Sirsasana/Headstand. Strong core engagement will protect your lower lumbar spine from ‘banana back’ and help you lift up through your shoulders too. You should feel the majority of your body weight through your forearms rather than your head and neck. If you are feeling excessive pressure on your head it would be advisable to revert to the ‘how to lift your legs up’ until you are more able to lift up through the shoulders.
ALIGNMENT CUES
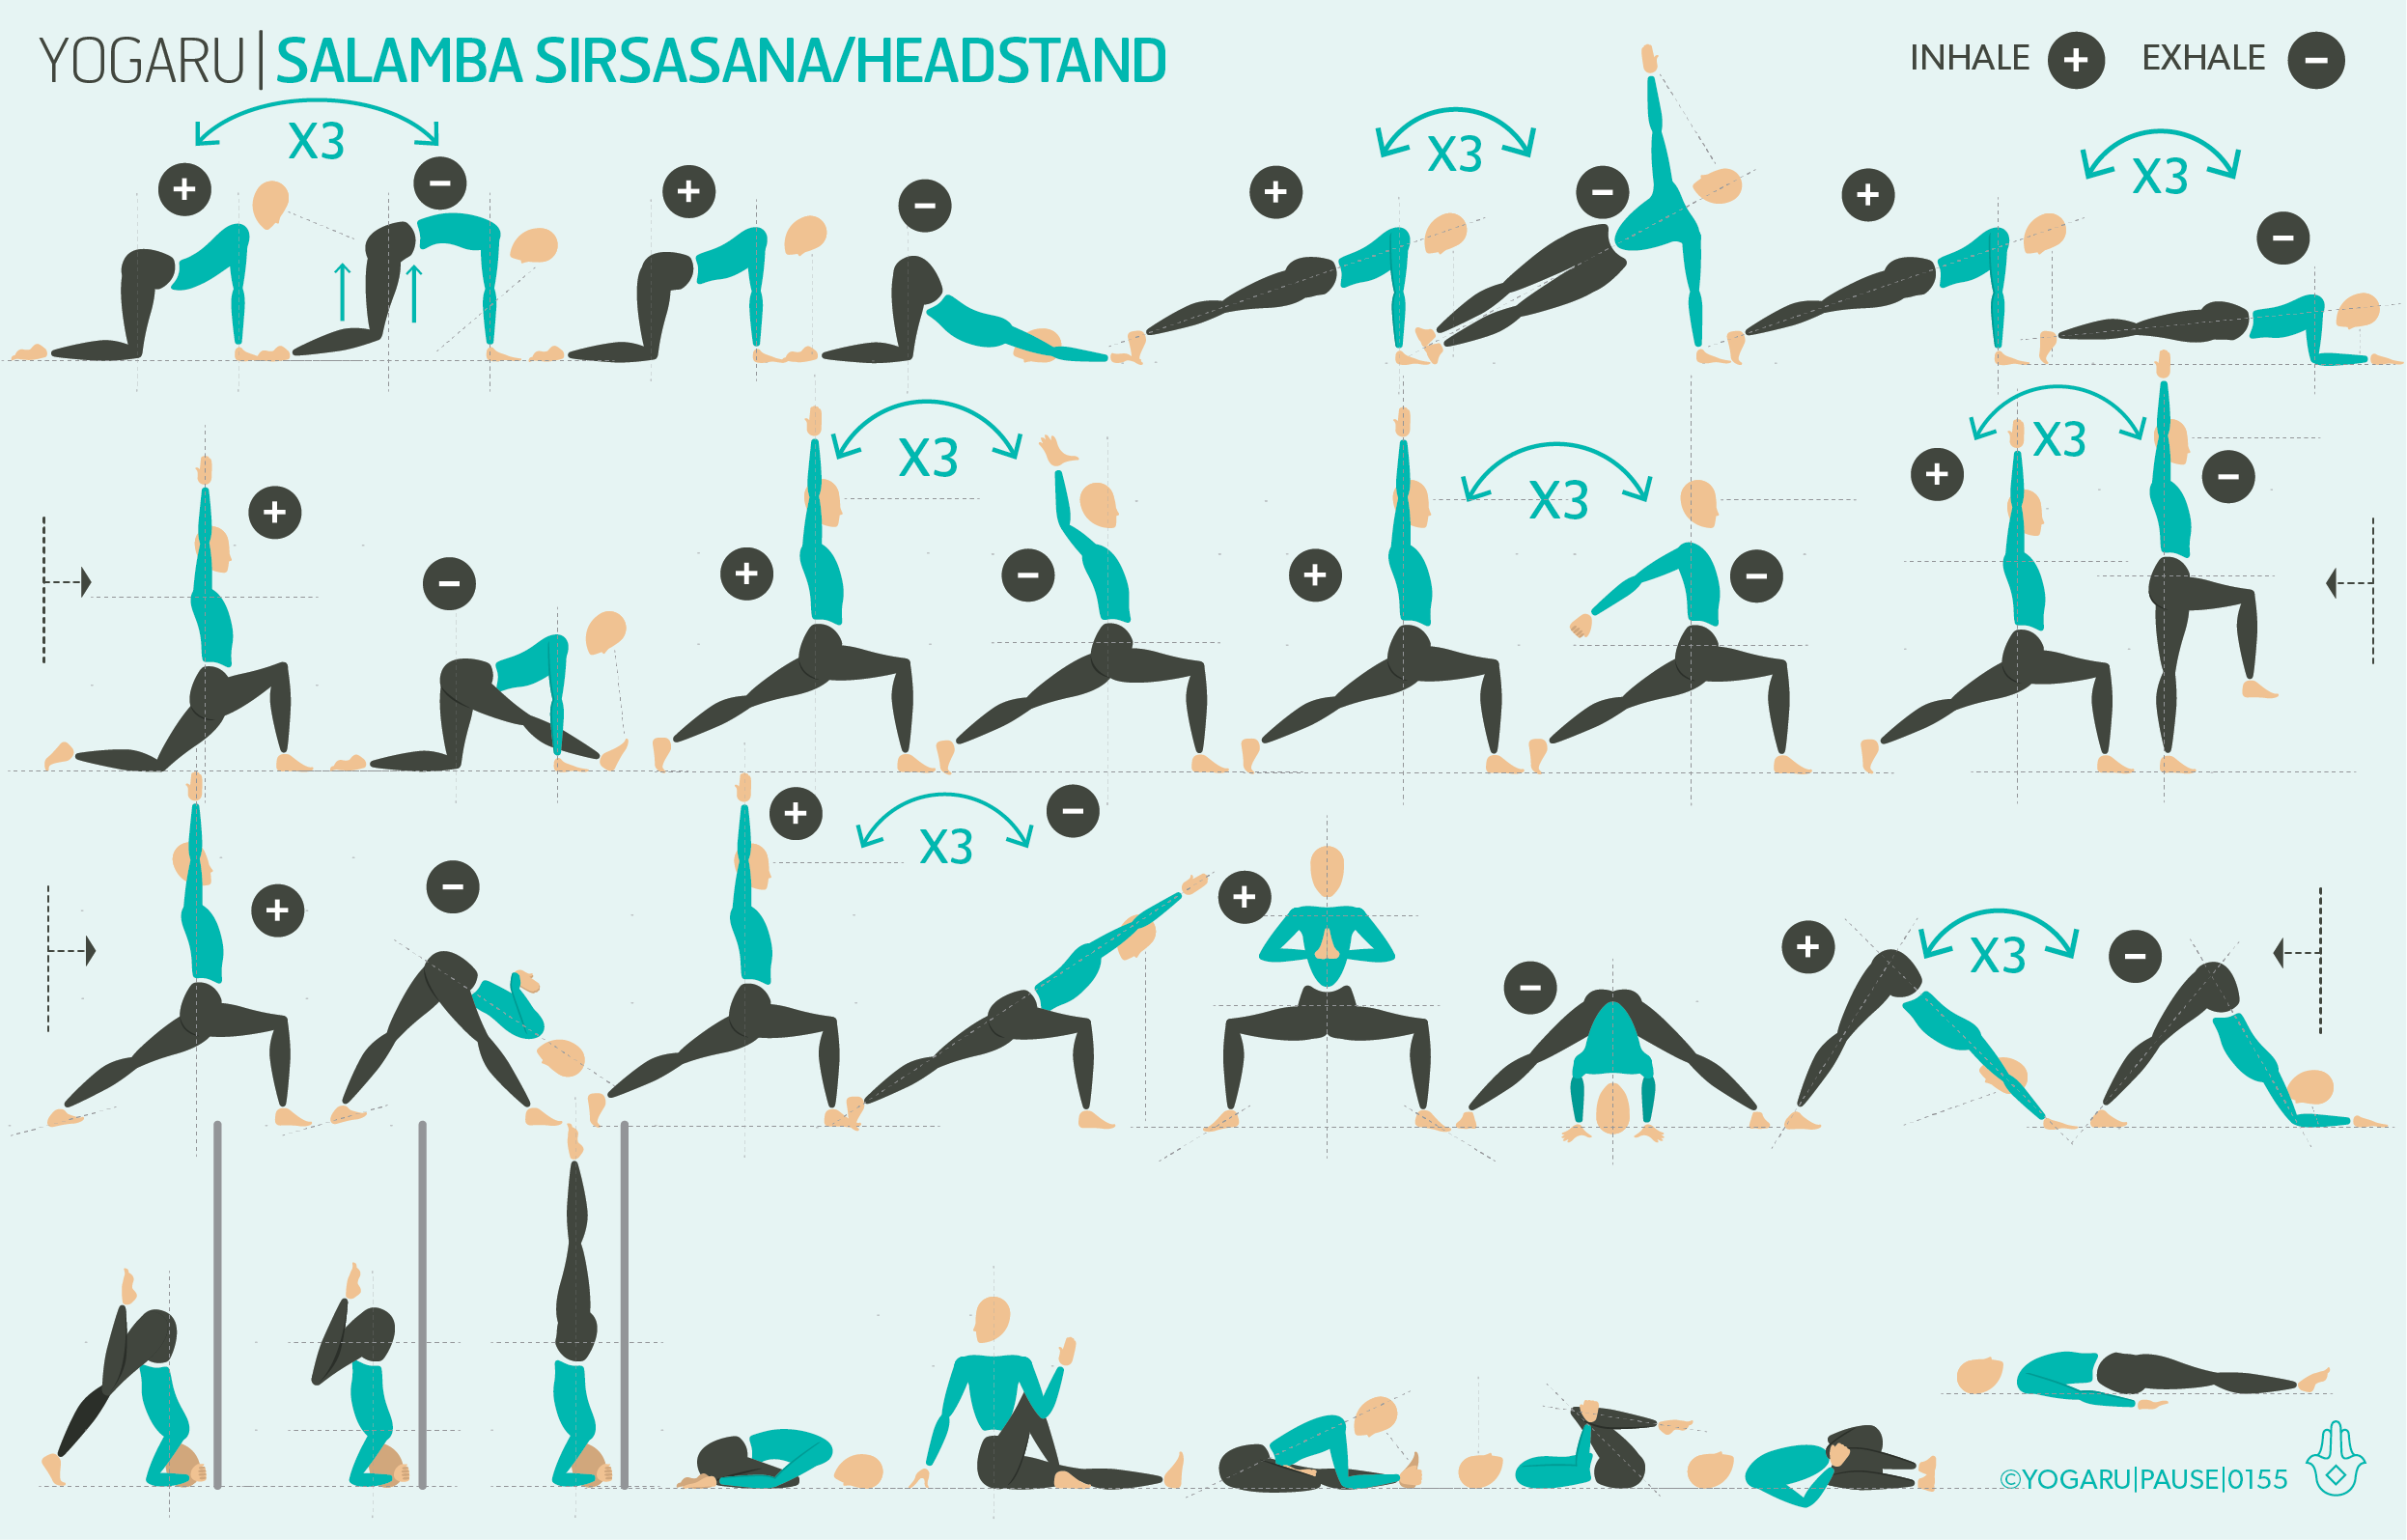
Throughout the sequence lengthen through the whole spine to find strength and build a steady focused practice. Move slowly through the whole flow and then you will be ready to move slowly and carefully for your Salamba Sirsasana/Headstand.
Have a read of the tips below and either print out the sequence or save it onto your device:
HOW TO LIFT YOUR LEGS UP FOR SALAMBA SIRSASANA/HEADSTAND
If you find it hard to get both legs up, work with these tips before you progress into full Salamba Sirsasana/Headstand.
Set your yoga mat up short end to the wall. From all fours place your elbows down directly under your shoulders and interlace your fingers. Place your knuckles about an inch away from the wall.
Place the crown of your head on the ground using the interlaced fingers as a support wall. Lift your knees up and walk your toes in towards your elbows until you find the support of the wall against your back. Stack your hips over your shoulders and draw your belly strongly towards your spine.
Press down into your forearms, lengthen up to your shoulders and hug your upper arms in. Lift your right leg up with a bent knee and draw it into your chest. Squeeze into the back of your knee and reach your toes towards your buttocks.
Stack your hips over your shoulders and draw your belly strongly towards your spine. On an exhale, slowly lift your left leg up with a bent knee and reach your toes towards your buttocks.
Practice coming up and down with your back supported by the wall until you are comfortable that you can lift without hopping, and you can take some of the weight out of your head with the support of your strong shoulders.
HOW TO USE A WALL FOR SALAMBA SIRSASANA/HEADSTAND
When you’re ready to move on to full Salamba Sirsasana/Headstand stay at the wall until you are very comfortable with balancing without the support of the wall.
Set your yoga mat up short end to the wall. From all fours place your elbows down directly under your shoulders and interlace your fingers. Place your knuckles about 5 inches from the wall.
Place the crown of your head on the ground using the interlaced fingers as a support wall. Lift your knees up and walk your toes in towards your elbows.
Press down into your forearms, lengthen up to your shoulders and hug your upper arms in. Lift your right leg up with a bent knee and draw it into your chest. Squeeze into the back of your knee and reach your toes towards your buttocks.
Stack your hips over your shoulders and draw your belly strongly towards your spine. On an exhale, slowly lift your left leg up with a bent knee and reach your toes towards your buttocks.
Slowly extend both legs up high using your core as brakes. Hug your outer hips and inner thighs to the midline, press out through the balls of your feet. BREATHE!
To come down, slowly bend your knees and lower your feet to the ground. Remember to counterpose your headstand with a few deep breaths in Child Pose.
TIPS
Below are some extra tips to help you along the way.
If you are not ready to fully weight bear in Salamba Sirsasana/Headstand practice this sequence and follow ‘How to lift your legs’ with single leg lifts until you get used to carrying extra weight in your head and neck.
To work on strengthening your core work on lowering your legs from full Salamba Sirsasana/Headstand as slow as you can all the way down to the ground with knees bent. Sounds easy but very hard to hold the legs steady on the descent!
If you are working on your Salamba Sirsasana/Headstand, take advantage of a well warmed up body at the end of class and ask your teacher if you can practice just before they guide the class in Savasana.
If you are new to Salamba Sirsasana/Headstand practice with the guidance of a yoga teacher before you incorporate them into a home practice.
Avoid practicing Salamba Sirsasana/Headstand if you have a back injury, neck injury, shoulder injury, high blood pressure, glaucoma, sinus infection or it’s your time of the month.
To save the images for personal use click and hold down the image until the ‘save image’ option appears; on Mac hold down ‘control’ and click the image to get the option box; on PC right click on the image to get the option box. Scroll down in the ‘option box’ and click ‘save image’.
Ruth Delahunty Yogaru


