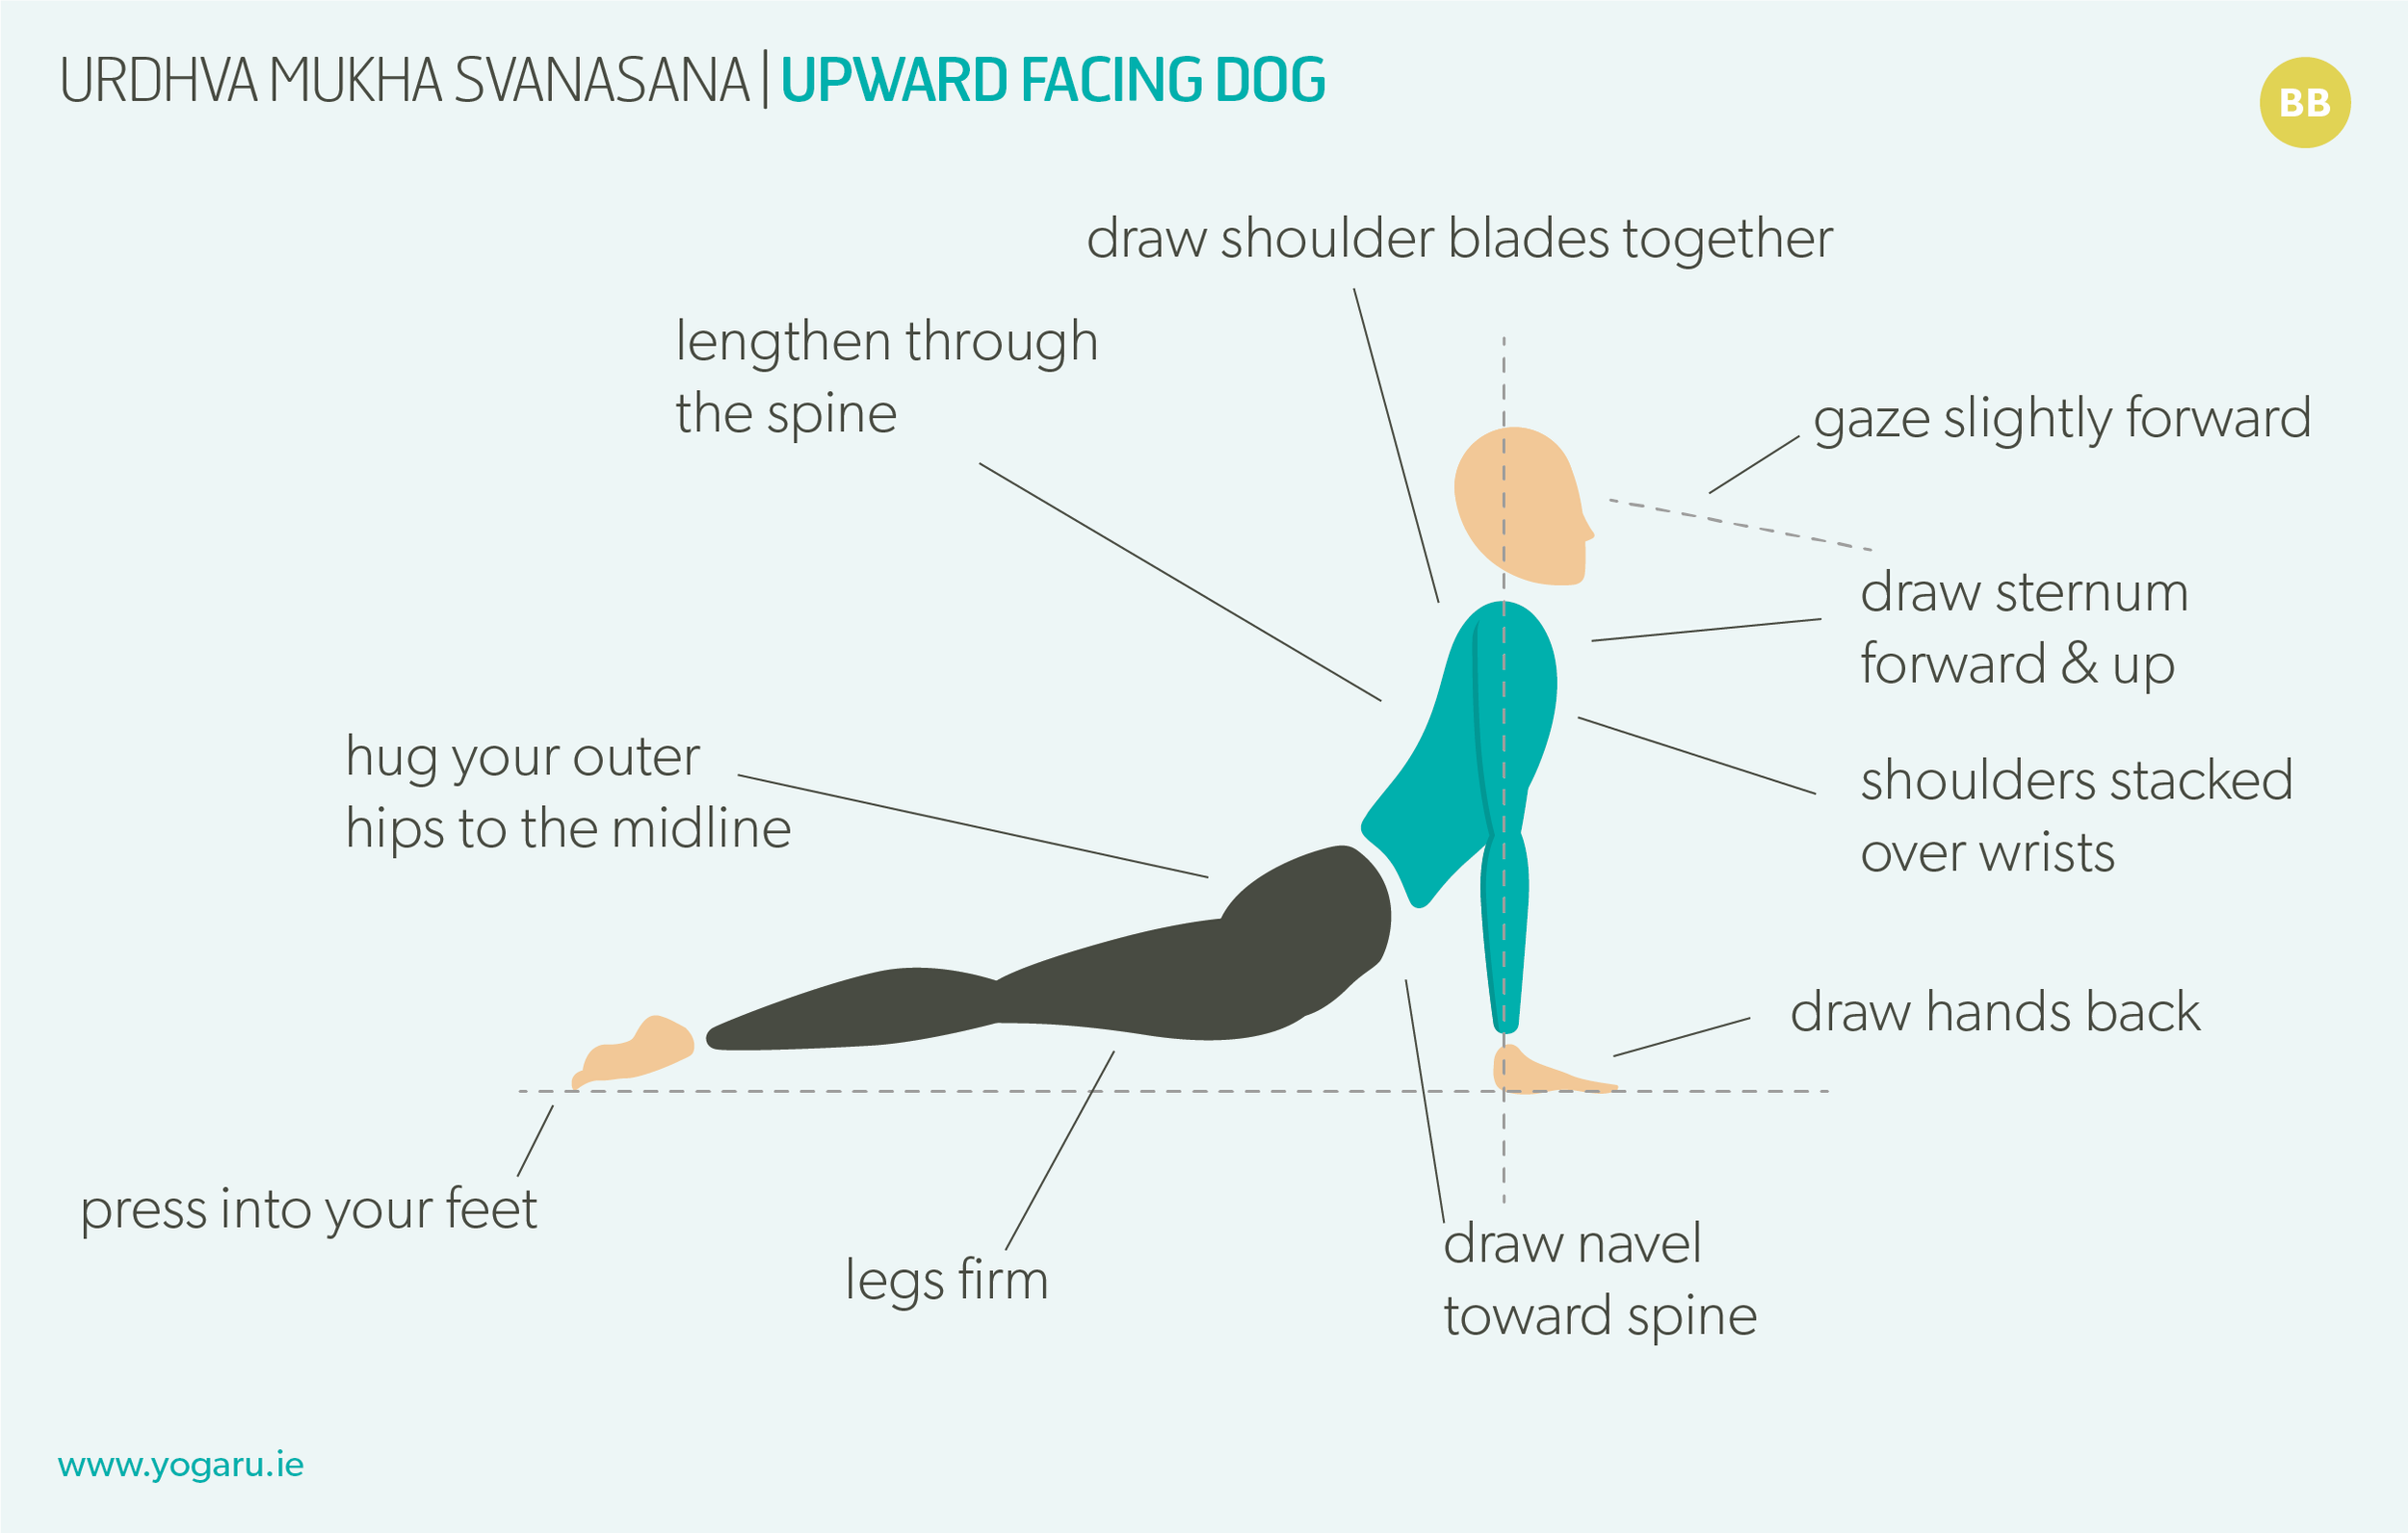
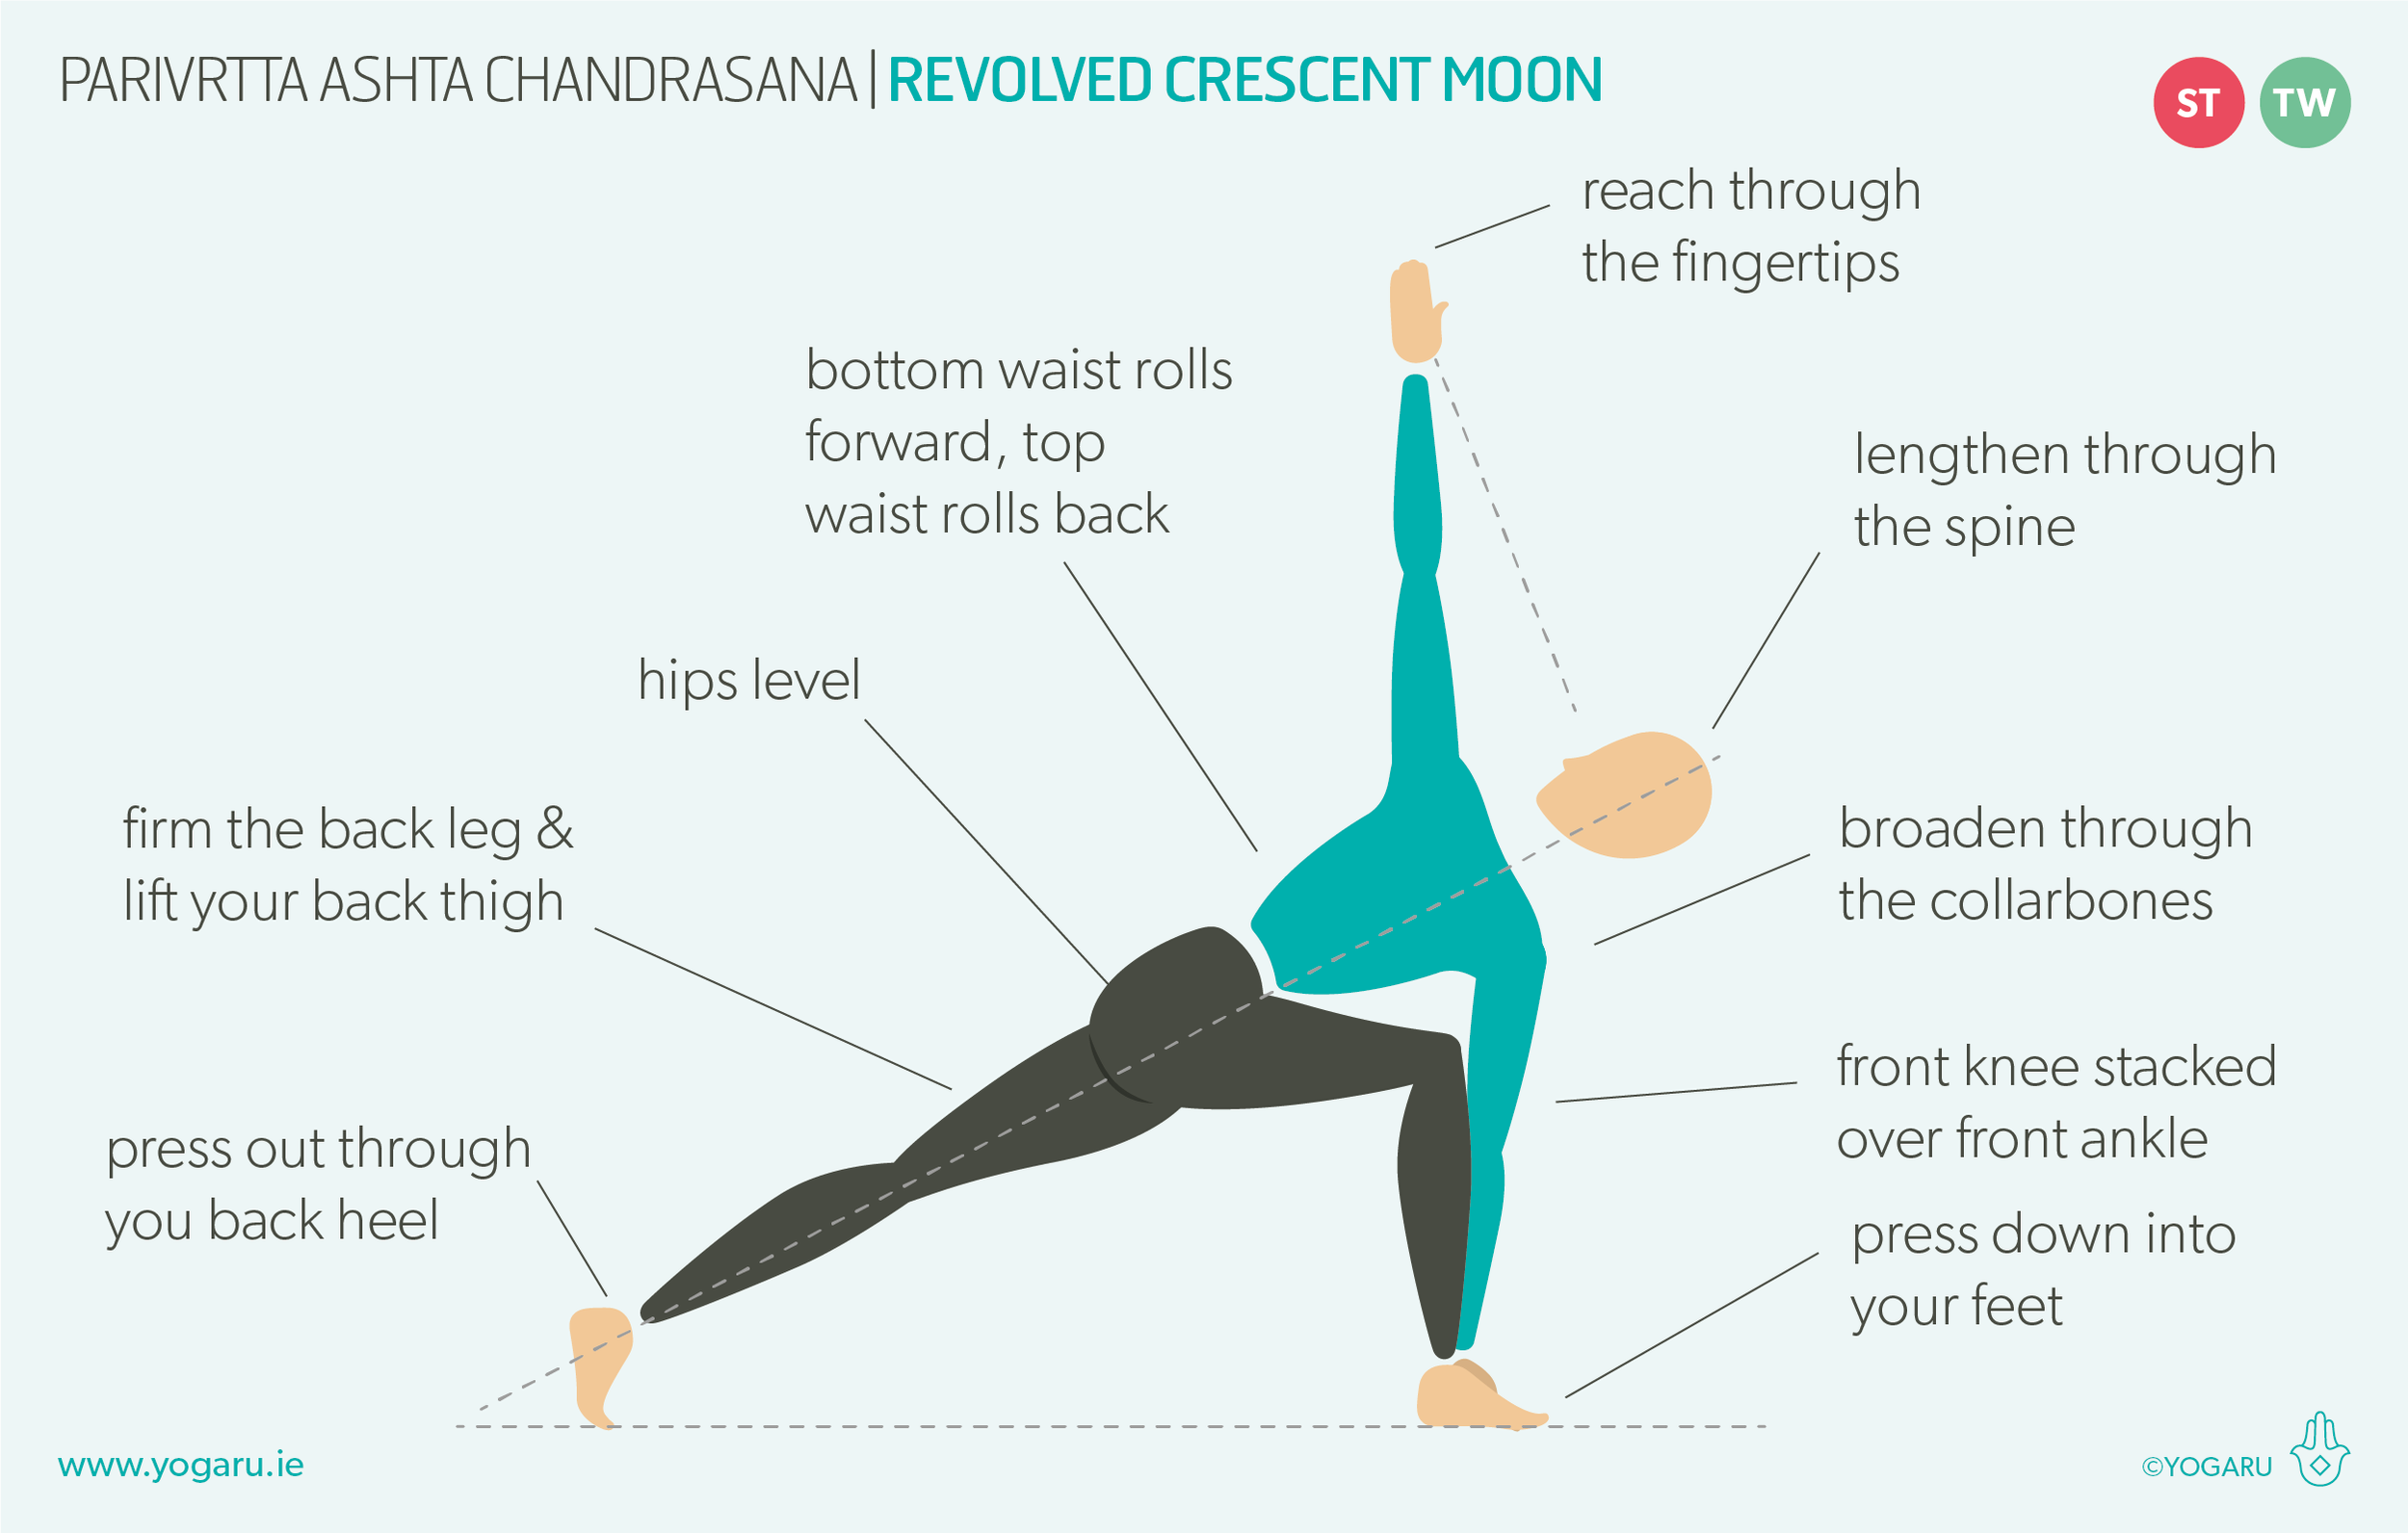
This sequence is available on YouTube.
YOGA AND SLEEP
Sleep has been a hot topic of conversation for the last few years and is part of ‘the four pillars of health’ – nutrition, exercise, relaxation and sleep. Sleep is essential to our physical and mental wellbeing. Good sleeping habits help with focus and concentration, mental health, a strong immune system, lower inflammation, a healthy metabolism, weight maintenance, and muscle repair. The body works on a 24hr sleep-wake cycle, known as the circadian rhythm. When the sun rises, we are exposed to light and the body releases cortisol to give us energy for the day ahead. As the sun goes down, we are exposed to darkness and the body releases melatonin to make us drowsy and ready for sleep. Screen use, caffeine and alcohol inhibit this evening melatonin production and stop us from falling or staying asleep. To help you establish a healthy circadian rhythm, aim to get the sun in your eye within an hour after you wake and reduce stimulants, including light, for 4-6hrs before bed.
10 TIPS FOR GOOD SLEEP
Building good sleep habits will give you the best chance possible of establishing a good sleep routine. Below are 10 tips to help you along the way:
Establish a regular sleep routine, sleep-wake times, even at weekends!
Get some fresh air everyday.
Get morning sunlight exposure within an hour after you wake.
If you like strong exercise, schedule it in the morning or afternoon.
Avoid caffeine (6hrs) before bedtime.
Avoid alcohol (3hrs) before bedtime.
Avoid screen (4hrs) use before bedtime.
Avoid big or heavy meals (4hrs) before bedtime.
Introduce relaxation techniques (warm bath, essential oils, gentle yoga) before bed.
Keep your bedroom dark and cool (18o).
YOGA AND SLEEP
Yoga is perfect if you are looking for ways to support good sleep cycles and wake up feeling refreshed. It settles the mind and body, helping you fall and stay asleep. It also reduces stress which is one of the main causes of insomnia. Yoga calms the body and mind, relieving physical and mental tension. Yoga is a practice built on breath, movement and meditation. The breath is one of the fastest and most accessible ways to bring the body into a state of rest and tap into the parasympathetic ‘rest and restore’ nervous system response. The gentle movement of yoga releases muscle tension and relieves stiffness from long periods of sitting or standing. Yoga also creates a meditative, mindfulness flow which gives the brain a chance to shift gears away from work mode and increases levels of the sleep hormone melatonin. The perfect formula to gently nudge the body towards a good night sleep and to wake up feeling refreshed.
RESTORATIVE YOGA
While a gentle yoga practice is very calming, restorative yoga is the king of all yoga when it comes to helping you sleep better. Restorative is a healing practice of passive poses that targets the parasympathetic ‘rest and restore’ nervous system, and consciously relaxes the body to bring you into a deep state of rest. Practising restorative early in the day will help you feel refreshed and ready for the day ahead, while practising in the evening will help you prepare the nervous system for a good night's sleep. The poses are held for longer periods of time and are supported with props to create effortless comfort. The aim is to feel gentle opening sensations, which stimulate the parasympathetic ‘rest and restore’ response, rather than active and strong stretches, which stimulate the sympathetic ‘flight and flight’ response.
As we consciously breathe in our restorative practice the breath stimulates the vagus nerve, which travels to and from the brainstem straight to the throat, heart, diaphragm, stomach, kidneys, liver, pancreas, gallbladder, sphincter and reproductive organs. The vagus nerve is associated with 75% of the parasympathetic, rest and restore, nerve fibres. When it is stimulated it slows heart rate, reduces blood pressure, relaxes our airways, stimulates digestion and reproductive organs, inhibits the stress hormones cortisol and adrenaline production, stimulates happy hormone endorphin productions and relaxes the muscles. This helps create optimal conditions for sleep.
THE BENEFITS OF RESTORATIVE
Aids digestion, aids fertility, aids pain management, aids relaxation, balances emotions, balances hormones, balances nervous system, boosts immune system, boosts healing capacity, eases constipation & bloating, eases back pain, eases fatigue, eases headaches, eases insomnia, eases menstrual & menopause symptoms, eases muscle tension, eases neck pain, eases stress, tension & anxiety, improves healing capacity, improves posture, improves sleep, increases circulation, increases mindfulness, massages abdominal organs, reduces blood pressure, reduces inflammation, strengthens lungs, strengthens spine.
EXPLORING SLEEPY FLOW IN YOUR PRACTICE
After a busy day this sequence of gentle movement and restorative yoga will help your body and mind let go of the day's activities and prepare to flick the switch from doing to non-doing. The sequence starts with gentle movement using the breath to create a meditative flow by linking an inhale and an exhale with each pose. This stimulates the vagus nerve in the diaphragm and initiates the ‘rest and restore’ process. You will then transition into the king of all yoga for the nervous system – restorative yoga. It is important to make sure you are completely comfortable and adjust to find comfort if required. You will see the suggested hold times in the sequence for each pose. Props needed and alignment cues for your restorative poses are below:
ALIGNMENT CUES
Below are the restorative techniques used in this sequence. The props you’ll need are:
1 x bolster - or 2 towels, wrapped around a horizontally rolled pillow and tied to secure.
2 x yoga bricks - or 2 two thick similar sized dictionaries.
2 x yoga blankets - or any wool, thick cotton or fleece blanket with density.
No.1 - Chest opener
Quarter roll a four fold blanket and place it at the top of your mat with the roll towards you. Lie supine on your back, with the tip of your shoulder blades on the roll end of the blanket. Extend your arms overhead in cactus position or in a ‘T’ shape if your shoulders don’t comfortably reach the ground in the cactus position. Feel a gentle opening across the chest and shoulders.
No.2 - Supported bridge
Lie supine on your back, lift your hips up and place a bolster horizontally under your hips. Settle your hips down onto the support of the bolster. Knees bent, feet hip distance apart. Arms extended either side of the body, palms facing up. Feel a gentle opening in the front of the hips and across the chest.
No.3 - Reclined seated
Place two bricks horizontally at the top of your mat, One at its highest height and the other at its mid height. Lie your bolster over the bricks along the centre of your mat and place a folded blanket on the far end of your bolster where your head will rest. Sit with the back of your hips along the short end of the bolster. Roll up a folded blanket and place it under your knees. Gently lie back onto your bolster. Feel a gentle opening across the chest.
No.4 - Prone twist
Place your bolster vertically along the top centre of your mat. Sit with your right hip along the short end of the bolster. Place a folded blanket between your knees. Turn to face your bolster and place your hands on the ground either side. With an inhale lengthen through the whole spine and on an exhale gently place your front spine along the centre of the bolster. Place your right cheek on the bolster. Shift your elbows away slightly from the bolster to allow the arms to gently hang out of the shoulder sockets. Feel the gentle twist in the spine and abdominal region. Repeat on the left side.
No.5 - Supported childs
Come into a kneeling position with your hips on your heels. Nestle a bolster between your knees, vertically along your mat with a folded blanket on the far end. Place your hands either side of the bolster. With an inhale lengthen through the whole spine and on an exhale gently place your front spine along the centre of the bolster. Place your right cheek on the bolster. Feel the breath in the back of the ribs and lungs. Swap to your left cheek half way through the pose.
No.6 - Elevated legs up the wall or chair
Bring your mat to a wall or in front of a chair. Smooth out a two fold blanket along your mat and place a bolster about 5“ away from the wall. Sit on the right edge of your bolster with your left side up against the wall. Slowly recline over the bolster and swing your legs up along the wall or on the chair. Make sure there is space between the back of your hips and the wall or chair, so that your legs are at a slight angle to allow gravity to hold your legs in place.
No.7 - Mountain brook
Half roll a four fold blanket and place it at the top of your mat. Accordion fold the other blanket and place it below your top blanket where your shoulder blades will lie. Place the bolster towards the bottom of your mat where your knees will be. Lie supine on your back, nestle the rolled part of the top blanket in the curve of your neck, place the accordion folded blanket under the lower tips of your shoulder blades and the bolster under the creases of your knees. Legs and arms extended, palms facing up, feet fall out to the side. Feel the rise and fall of the props supporting your back body.
No.8 - Savasana
End your practice with at least 10 minutes of Savasana or Resting Pose. Lie supine on your back, legs stretched out, arms slightly away from your body, palms facing up. Legs slightly apart, feet fall out to the sides, soften your shoulder, back of the neck long. Gently close your eyes, let the body become heavy and melt into the support of the ground. Soften the muscles across your forehead, releasing all tension, gaze inwards. Let all the muscles and bones of your body release.
If you are enjoying restorative yoga you will find more restorative sequences here.
To save the images for personal use click and hold down the image until the ‘save image’ option appears; on Mac hold down ‘control’ and click the image to get the option box; on PC right click on the image to get the option box. Scroll down in the ‘option box’ and click ‘save image’.
Ruth Delahunty Yogaru


