THE ‘PERFECT POSE’
Sometimes we need to remind ourselves that the ‘perfect pose’ is exactly where we are today with our bodies, not in the images posted up on social media. Each day the body is different, and each hour within each day is different too. Your body will be open to different energies at different times of the day. You might find you need to be more patient with your body in a morning practice, as the muscles gradually shake off the night sleep; if you have a desk job your back, shoulders and neck might feel tight, and a lunchtime practice will help you refocus for the rest of your day; in the evening your energies might be low after a busy day, and a slow meditative practice to calm the nervous system down can be the best thing to bring on a good night sleep! The ‘perfect pose’ for you is unique to your anatomical and muscular structure. Some asana might always be beyond our skeletal range of motion, and some asanas you will always find a challenge, depending on your day to day activity off the mat. Our bodies are incredibly complicated, when we listen to them they will tell us exactly what ways they do and don’t want to move. It’s also important to remember that you still get all the lovely benefits of your practice when you go to your optimal version of the pose, without judgement, with the right balance of effort and ease.
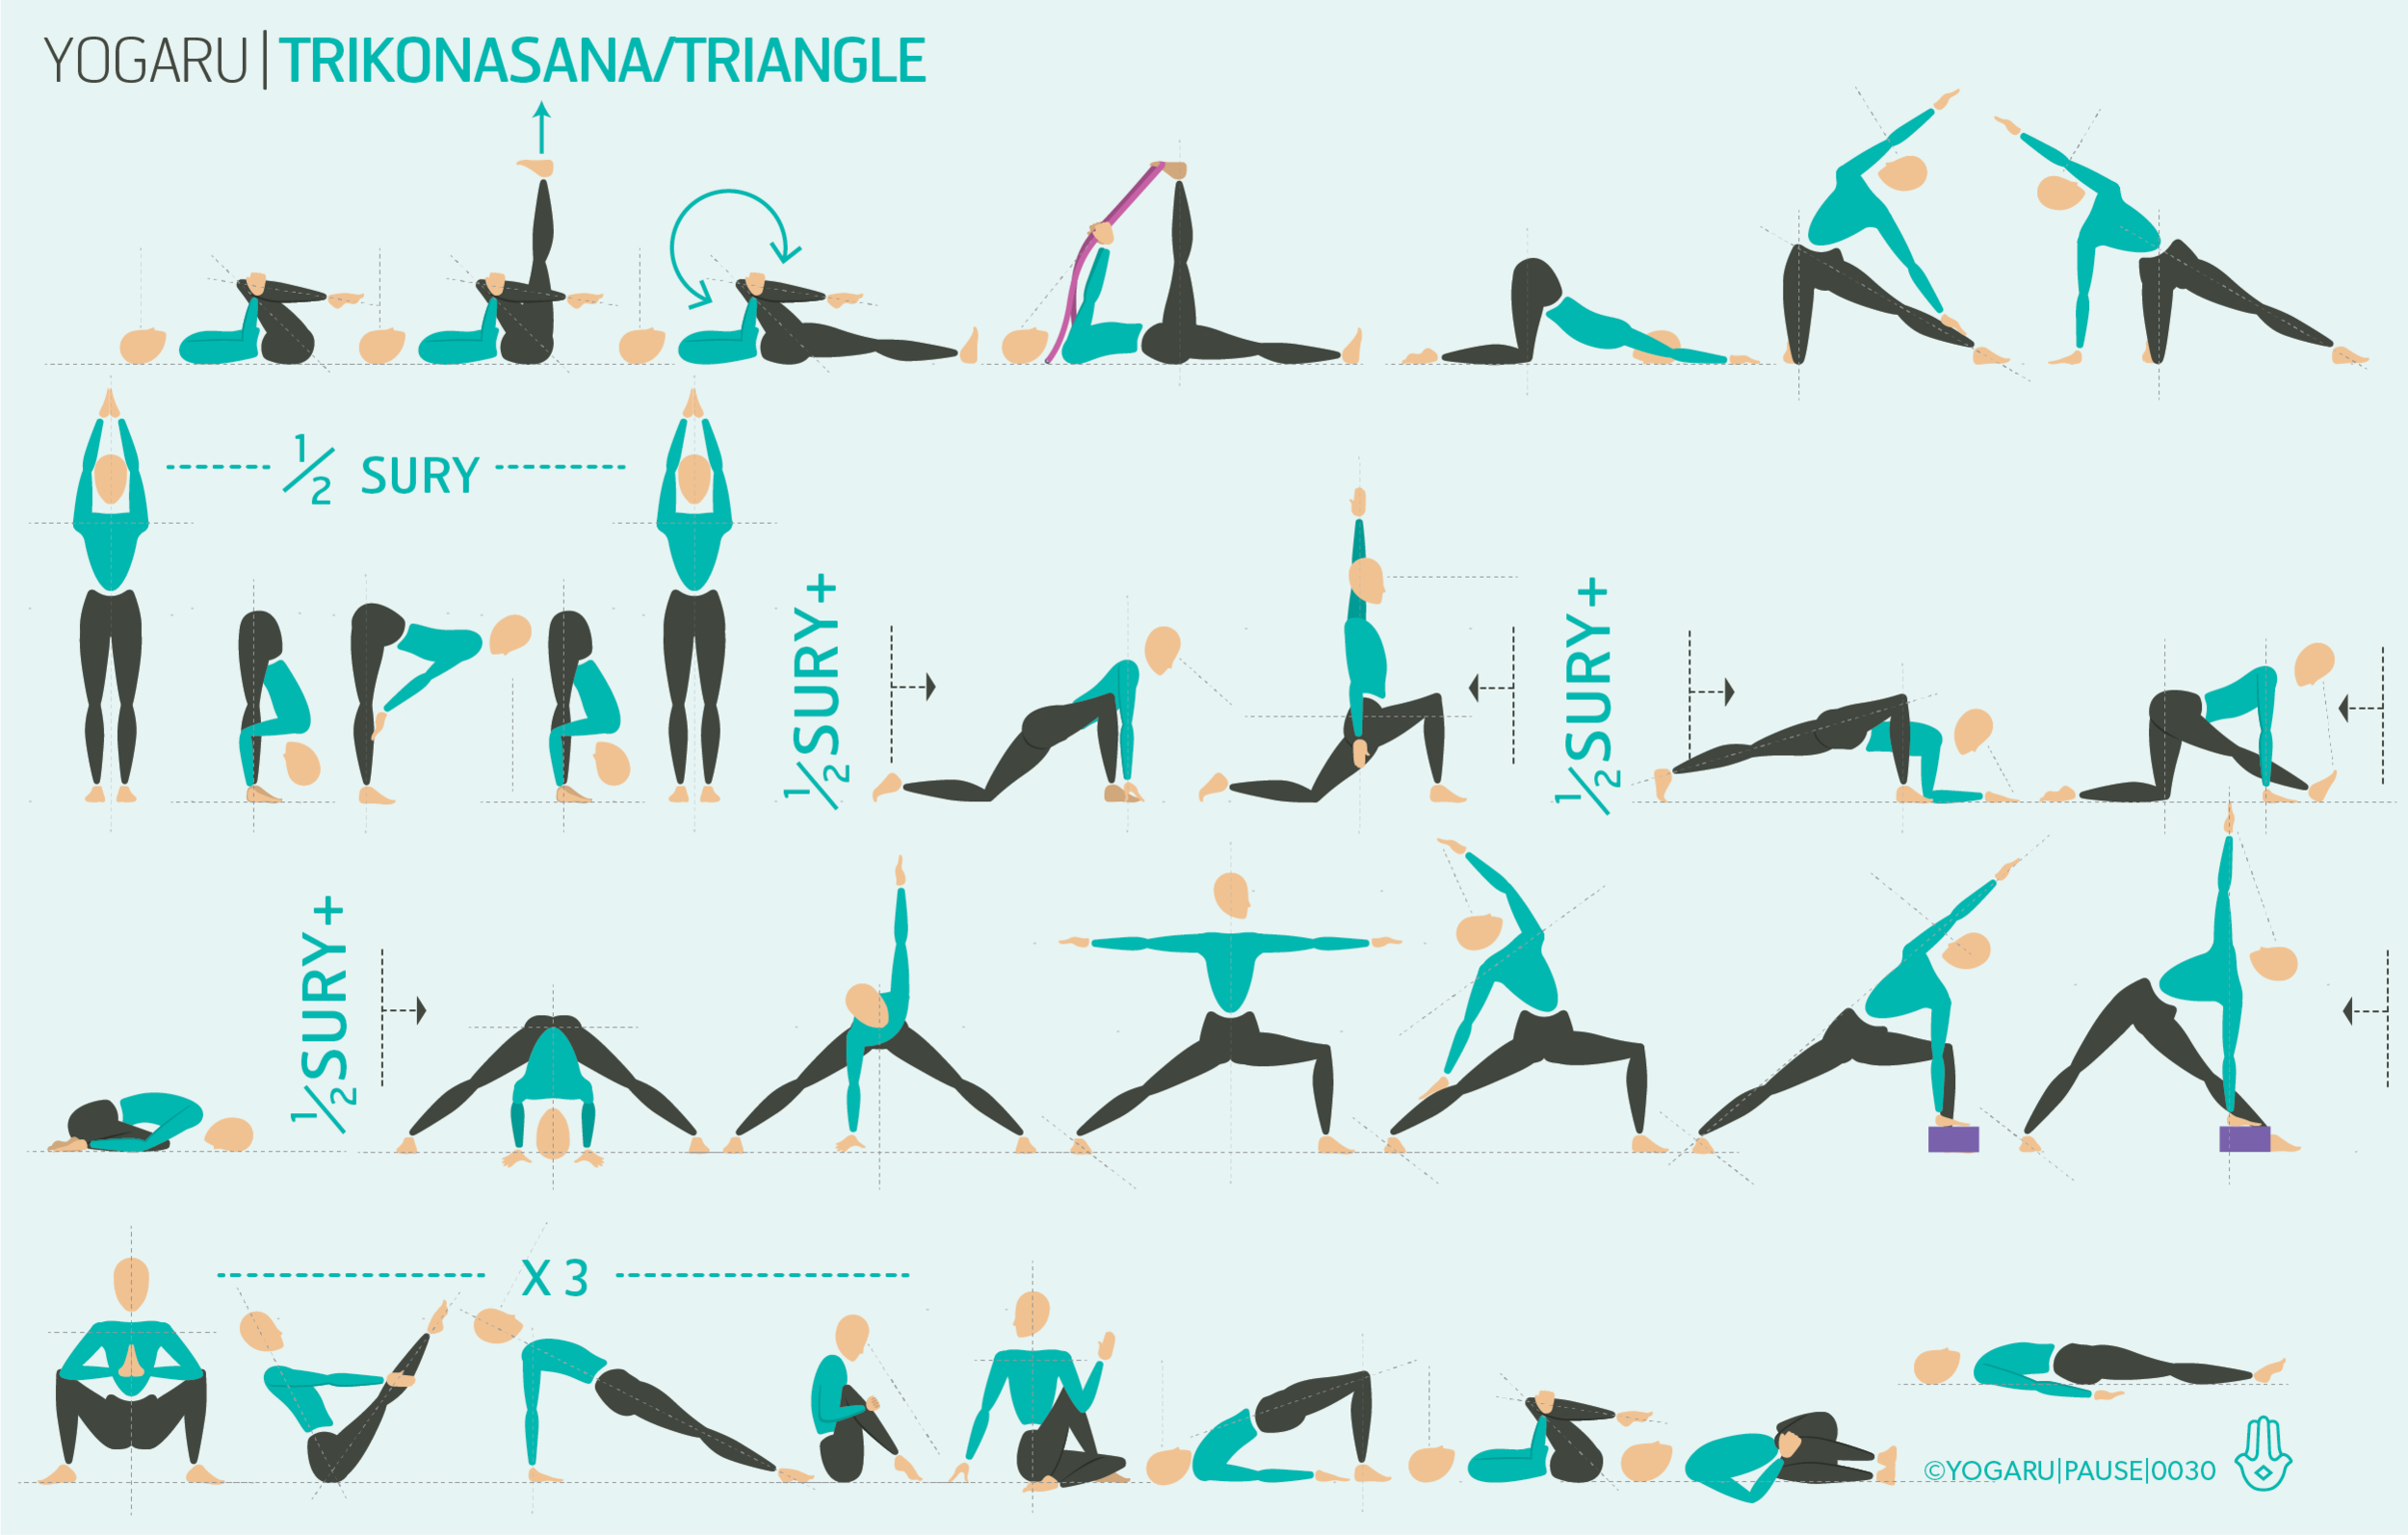
EXPLORING TRIKONASANA IN YOUR PRACTICE
With all this in mind, I’ve been exploring one of the foundational asana, Trikonasana/Triangle. We sometimes become so familiar with the basic poses we forget to pause and scan the body from the ground up to notice what sensations we’re feeling, and notice are we pushing into the pose on a day where the body is feeling a bit more tight or tired. Your perfect pose is the point where you feel sensation, strengthening and lengthening, and not beyond it into tension and pulling.
Trikonasana/Triangle teaches foundation, stability, balance and expansion. It brings blood flow to all the organs of the trunk of the body, aids good digestion and relieves stress, anxiety and tension. It strengthens the thighs, knees, ankles and glutes; and stretches the hips, groins, hamstrings, calves, shoulders, chest and spine. Different yoga traditions suggest different distances between your front and back foot. When your feet are closer together it can be more challenging to get the side tilt of the pelvis, when the feet are further apart the pelvis has more room to tilt, but it gives a stronger stretch to the inner groins. Play around with the distance of you feet and see what suits you best.
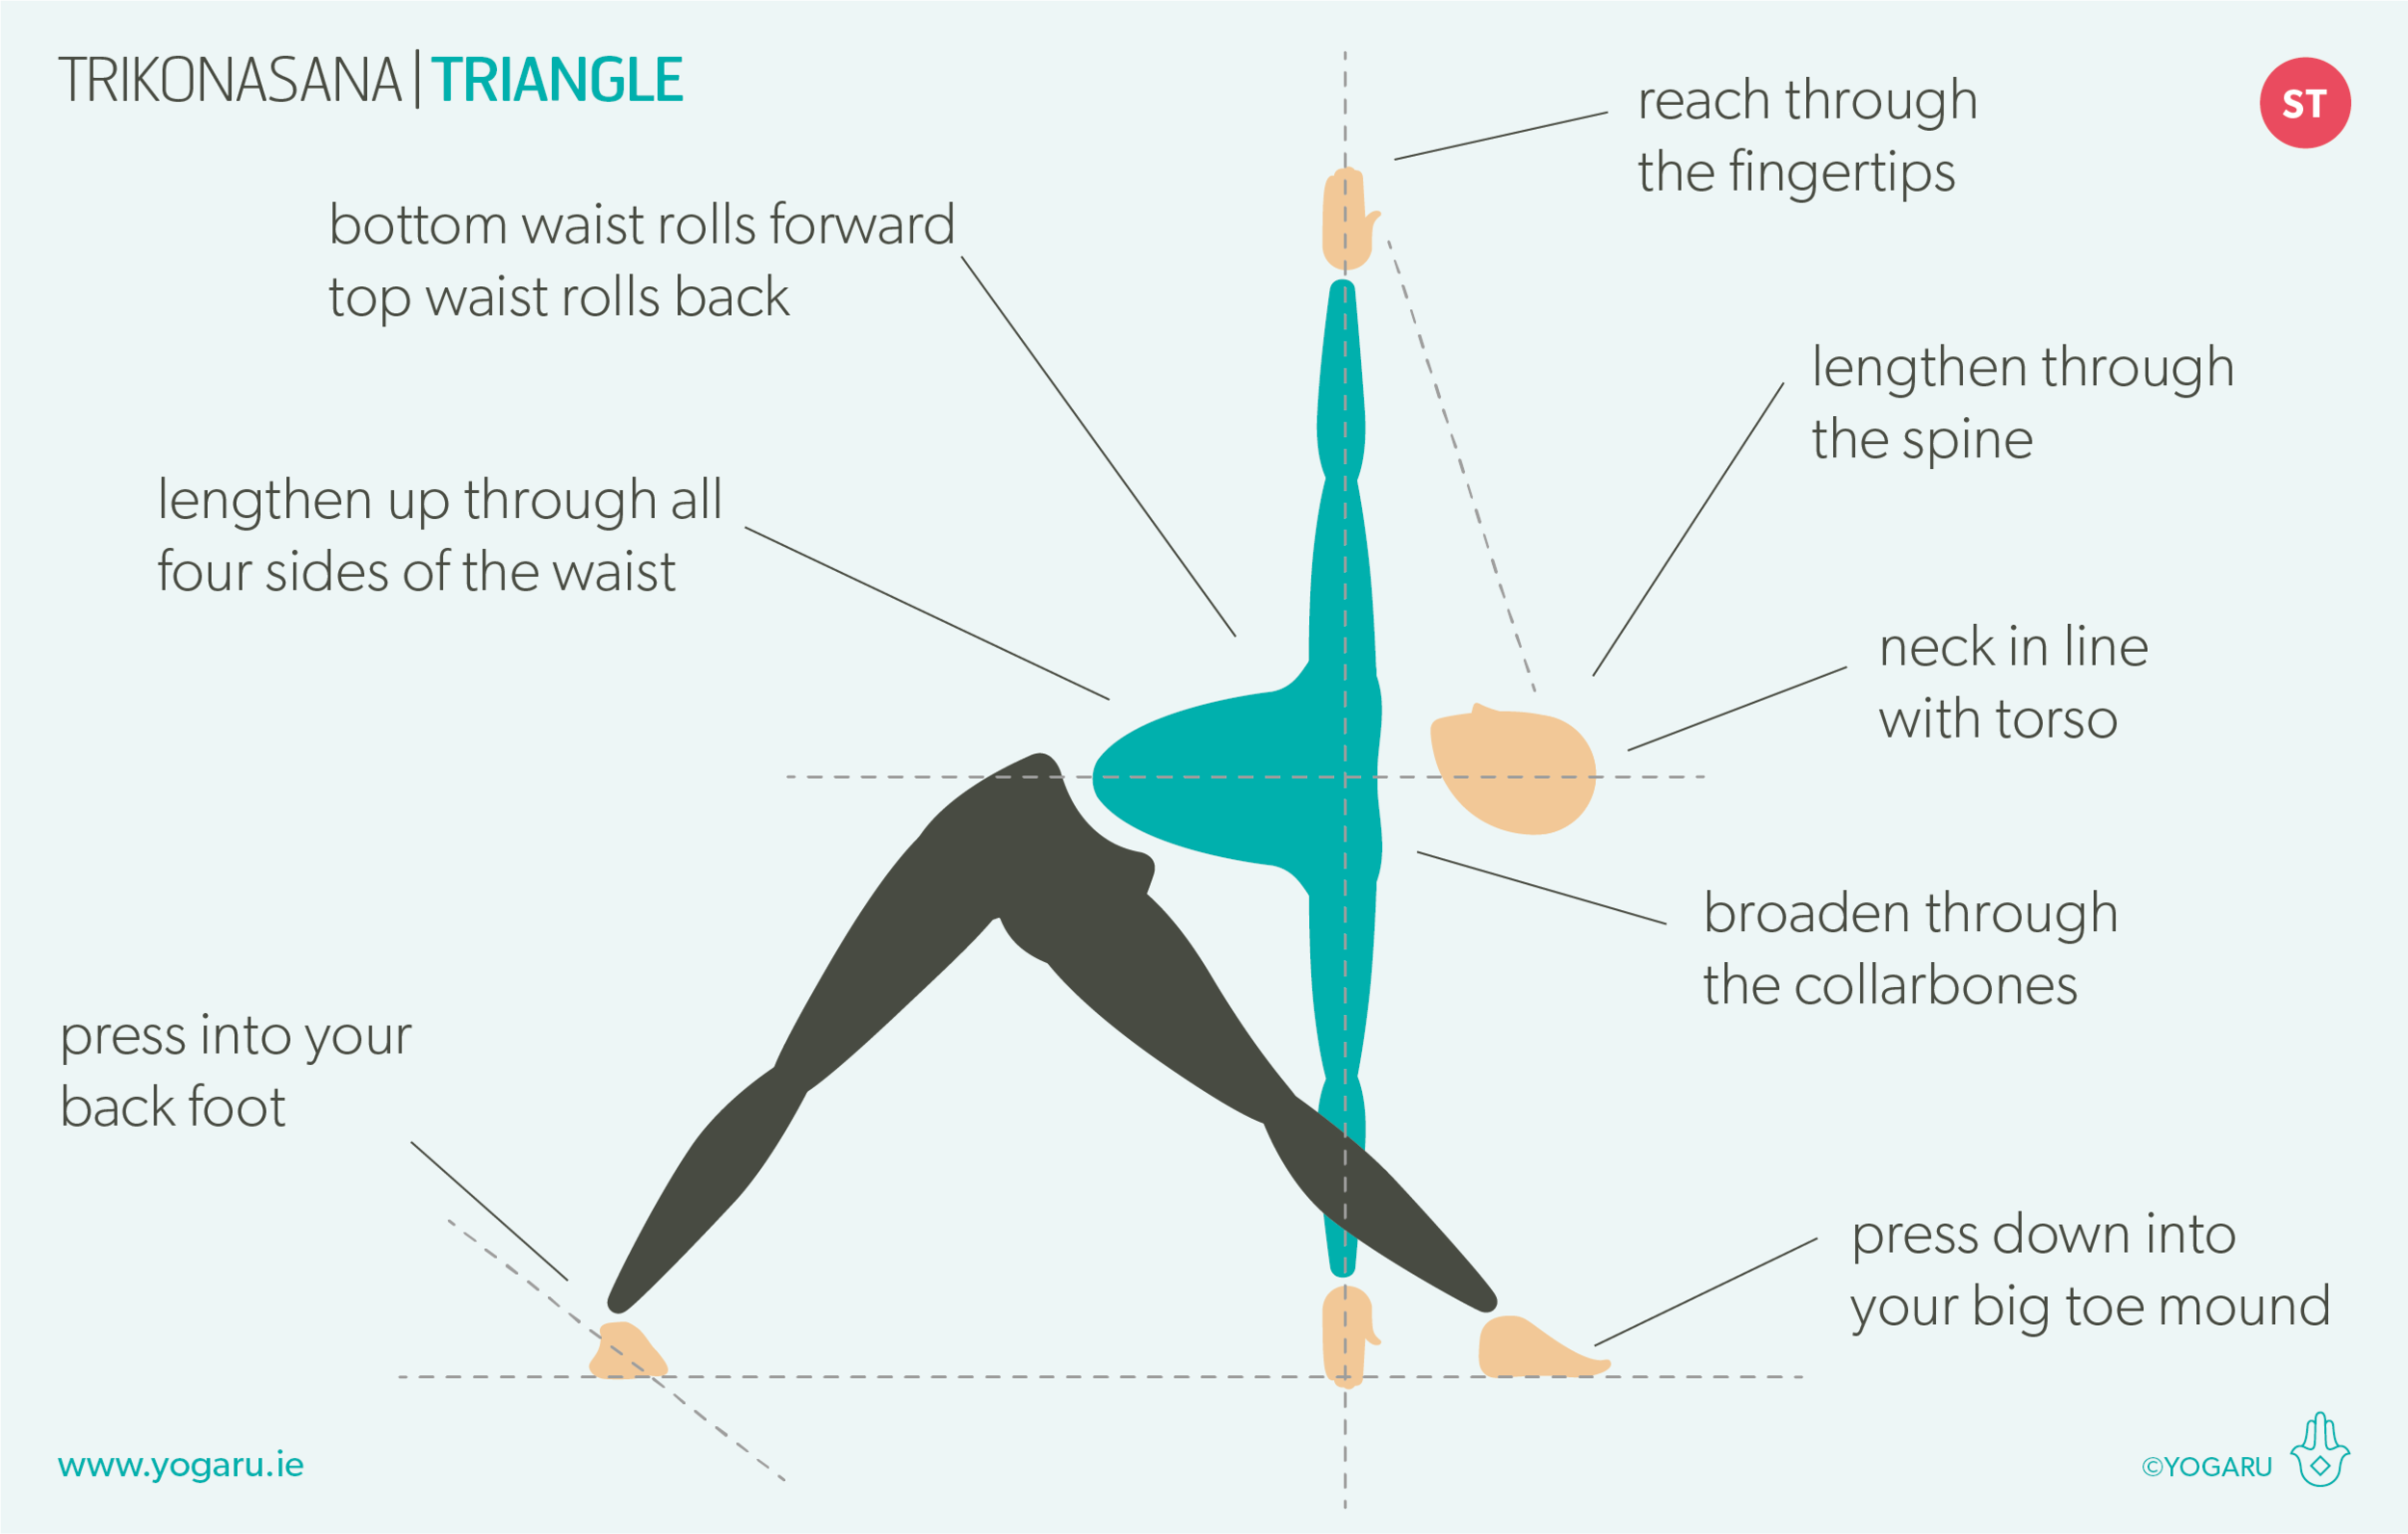
ALIGNMENT CUES
You will often hear in class the imagery sandwiching your body between two panes of glass. This instruction can sometimes make students unnaturally force the back hip back in line with the front hip. Anatomically it is better for the pelvis to allow the back hip to be slightly forward of the front hip as it tilts up and towards the front of the mat.
The following are some alignment cues that might help you to reinvigorate your Trikonasana/Triangle. Print them out, along with the sequence, and play around with what makes sense to you:
From Adho Mukha Svanasana/Downward Facing Dog, ground your left foot at a 45 degree angle. Inhale, step your right foot between your hands, check for front heel to back heel or arch alignment, exhale here.
Inhale, press into your feet to come up, reach your arms out to shoulder height, straighten your front leg.
Exhale, reach forward with your right arm and hinge to your right from the hip joint, right hip moves back, left hip tilts up towards the front of the mat.
Rest your hand on your shin, to a brick, or the ground inside/outside your right foot.
Feel for the contraction in your right glute, press into your big toe to slightly engage the inner groin to balance the inside and outside of the knee joint.
Bottom waist rolls forward, top waist rolls back, reach your left arm up high, palm facing left, gaze to your left or to your left fingertips.
To save the images for personal use click and hold down the image until the ‘save image’ option appears; on Mac hold down ‘control’ and click the image to get the option box; on PC right click on the image to get the option box. Scroll down in the ‘option box’ and click ‘save image’.
Ruth Delahunty Yogaru