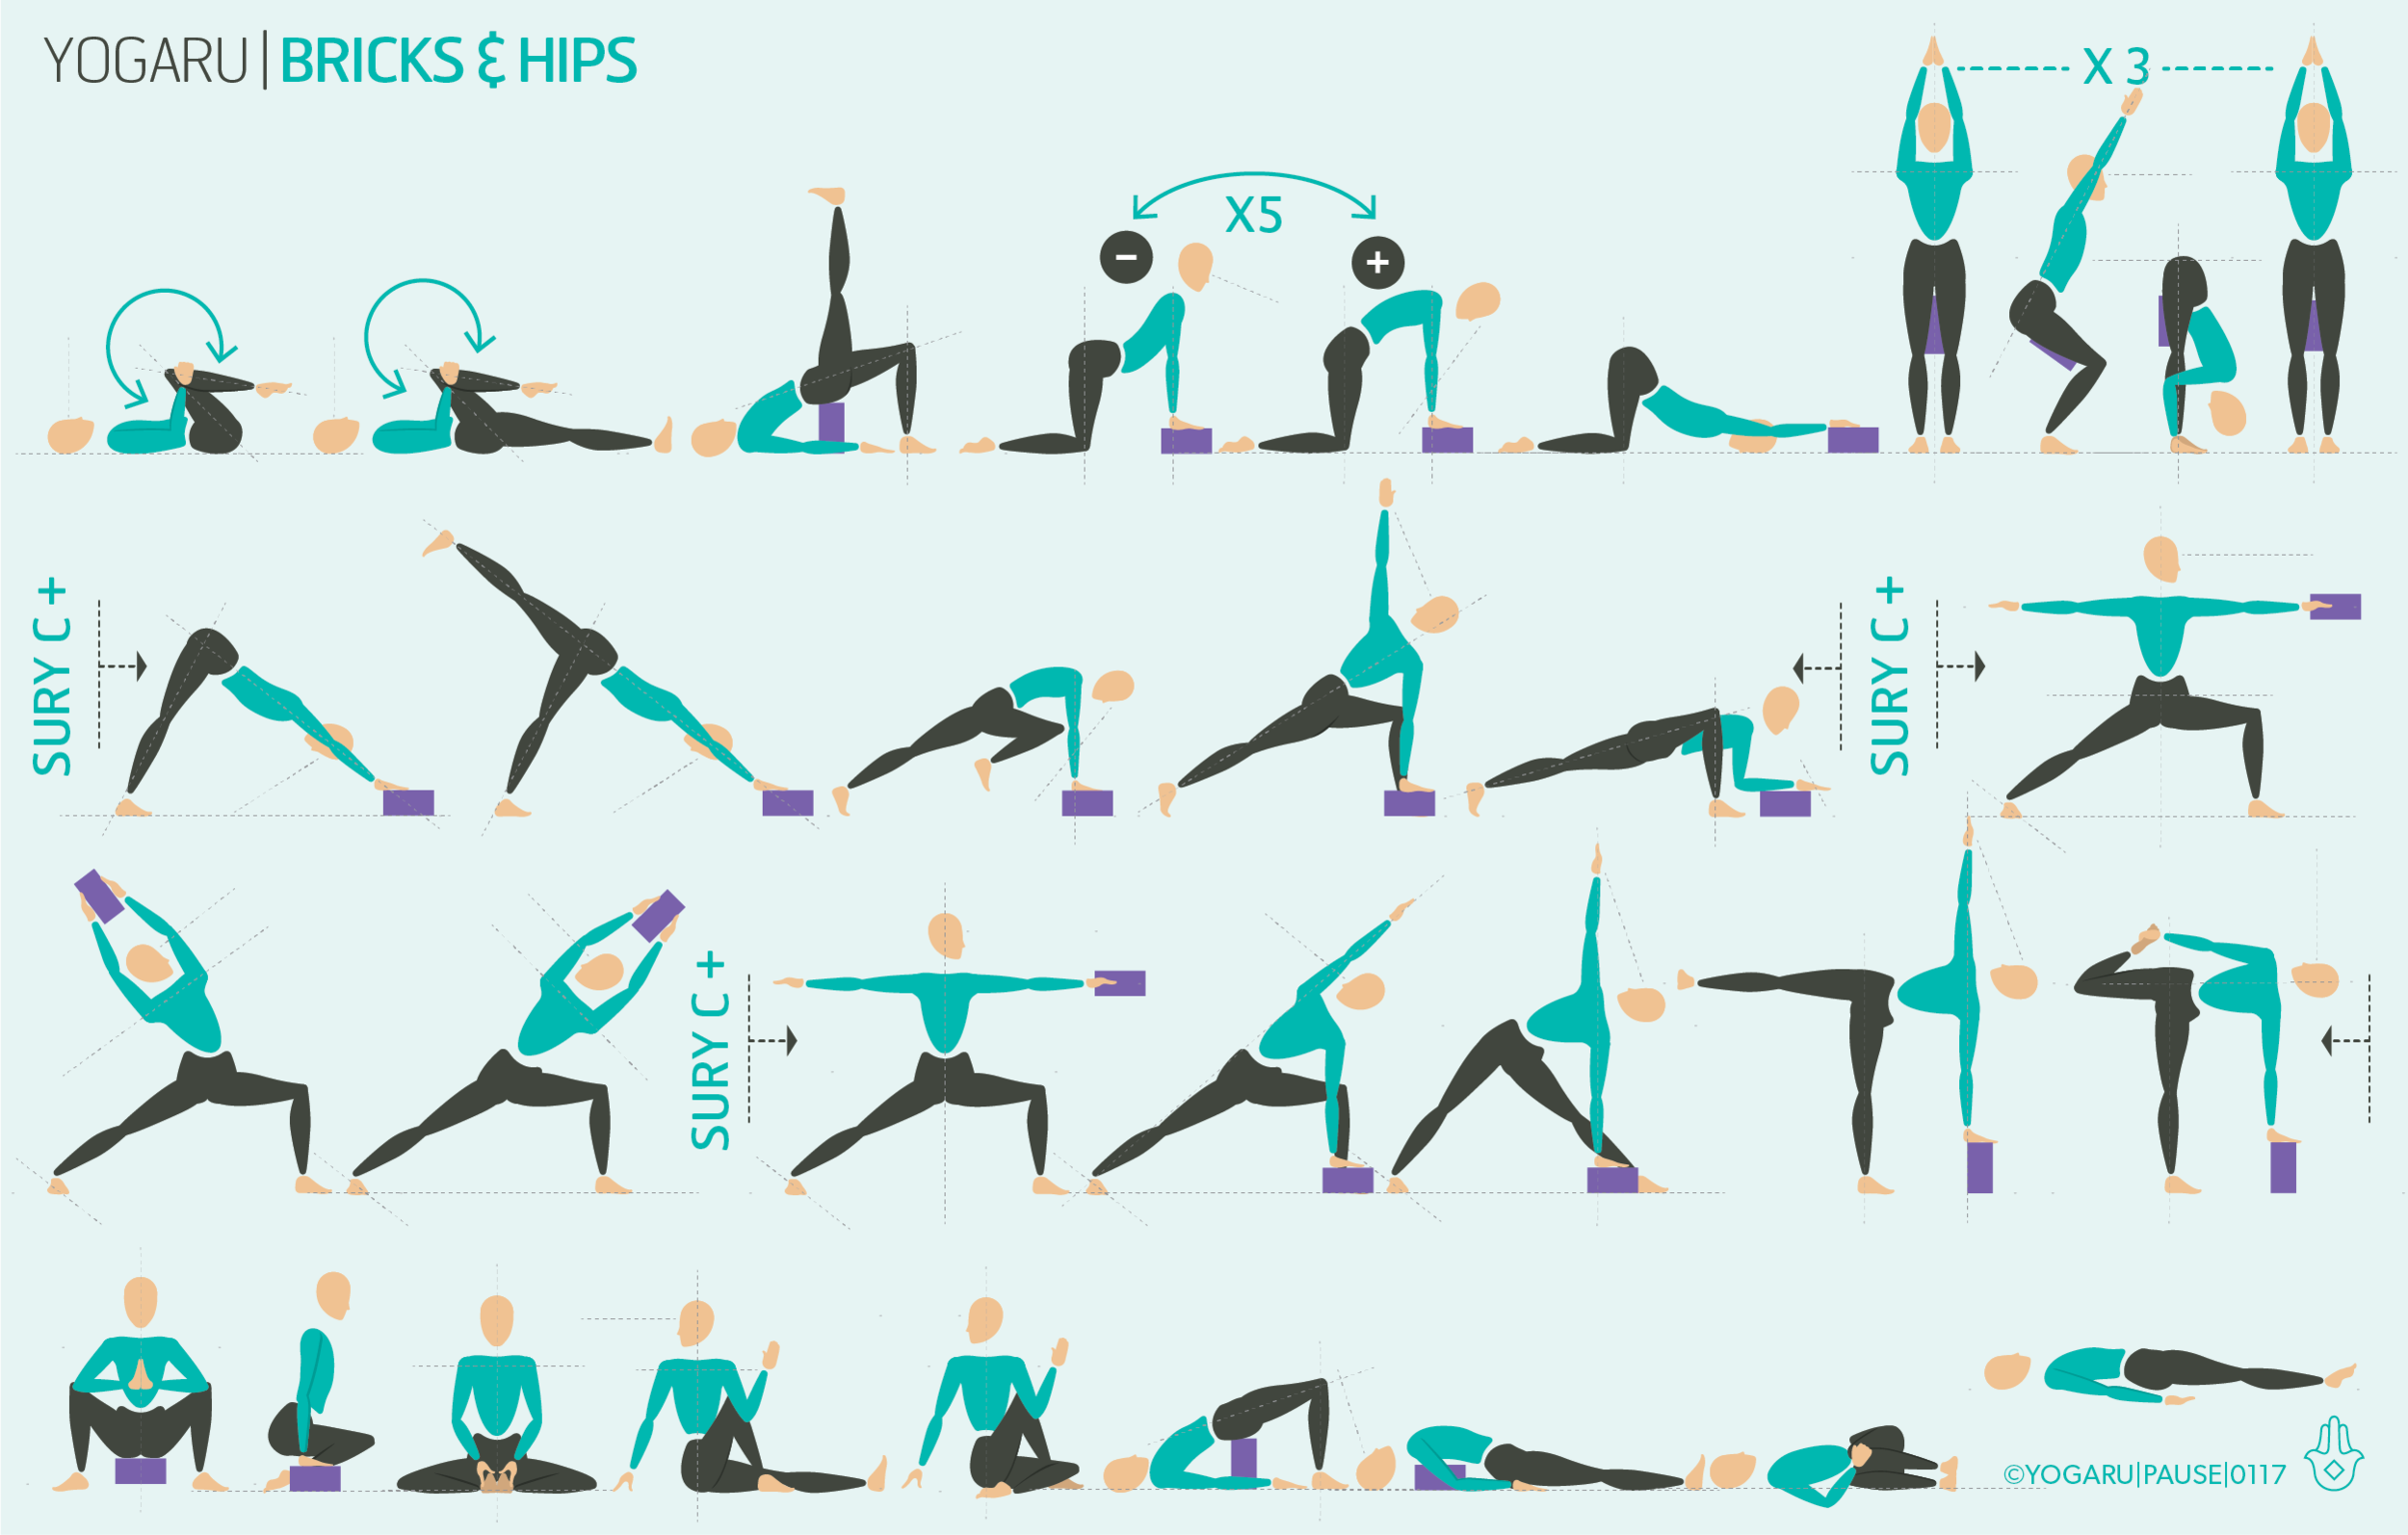
BRICK PARTY
Props are incredibly versatile and can offer support where you need it, facilitate deepening a pose and reinvigorate your home practice when used creatively. Anatomy comes into play when finding your personal optimum alignment. Some poses ask for a position that doesn’t suit your skeletal structure. For some students better alignment comes from using props regardless of flexibility or strength. Aisling Conn took us through the benefits of adding bricks, blocks and belts into your practice, with lots of different ways to use them and some sample poses to try out. Here we look at a full sequence using bricks. Bricks are the most adaptable of all the yoga props. They have three different height options – stacked, on their side and flat. They come on cork which are more sturdy and used mainly in Iyengar Yoga, or floam which are a slightly softer while still very supportive, and better for sitting on and propping the hips in poses like Setu Bandha Sarvangasana/Bridge and Restorative Yoga. Adding props gives your practice variety which is the basis of a sustainable practice. The more you surprise your body and don’t let it get too complacent in its movement, the more you can maintain your long term mobility.
HOW TO USE BRICKS
Bricks are currently my favourite prop to use in my home practice. I keep them beside my mat ready to grab and get creative with while I flow. There are lots of ways to add bricks to your practice. The most traditional use being in standing poses to press your hand into when your arm doesn’t reach the ground, giving you extra space to expand the chest and reach the top arm up. You can also use them to work the muscles of the arm in standing poses by raising one above your head and squeezing it between your hands. I have started to play around with placing them under my hands in Marjaryasana/Cat & Bitilasana/Cow. This helps to open the chest as you move from Marjaryasana/Cat to Bitilasana/Cow and deepen the breath. I also sometimes use them in Adho Mukha Svanasana/Downward Facing Dog to help me press the back of the heel down towards the ground and reach my sit bones up high.
EXPLORING BRICKS & HIPS IN YOUR PRACTICE
This sequence will give you lots of opportunities to try out the poses with bricks. Get creative and try a few different versions yourself too, to see what suits you and how you can find different versions of the poses. Use the bricks as suggested even in poses where you don’t usually use them and notice where in the body it might feel different.
For your Sun Salutation try placing a brick between your thighs and work on keeping it there without it falling out as you move. You might need to remove the brick as you step back and forward if jumping back and forward isn’t part of your practice. When using the brick in Adho Mukha Svanasana/Downward Facing Dog make sure to have the heel of your hand pressing over the edge of your bricks to make sure your hands don’t slip forward on the bricks. Play around with the three different heights of the blocks too and see what suits you.
ALIGNMENT CUES
The peak pose of this sequence is Ardha Chandra Chapasana/Half Moon Sugarcane using a brick to ensure you stay up a bit higher and have space to open the chest. If your arm doesn’t reach your foot just reach your arm towards the foot without holding it. You may not get quite as deep into your backbend but this version is very strengthening for the hamstrings and the hip joint.
Have a read of the tips below and either print out the sequence or save it onto your device:
From Ardha Chandrasana, bend your left knee, reach your left hand back to hold the outside of your left foot.
Press your hand into your foot and your foot into your hand. Reach your left knee up, broaden through the collarbones, press down through your right foot.
Arch through your whole spine, lengthen your neck and softly reach your head back, gaze down or up.
To save the images for personal use click and hold down the image until the ‘save image’ option appears; on Mac hold down ‘control’ and click the image to get the option box; on PC right click on the image to get the option box. Scroll down in the ‘option box’ and click ‘save image’.
Ruth Delahunty Yogaru