Backbends

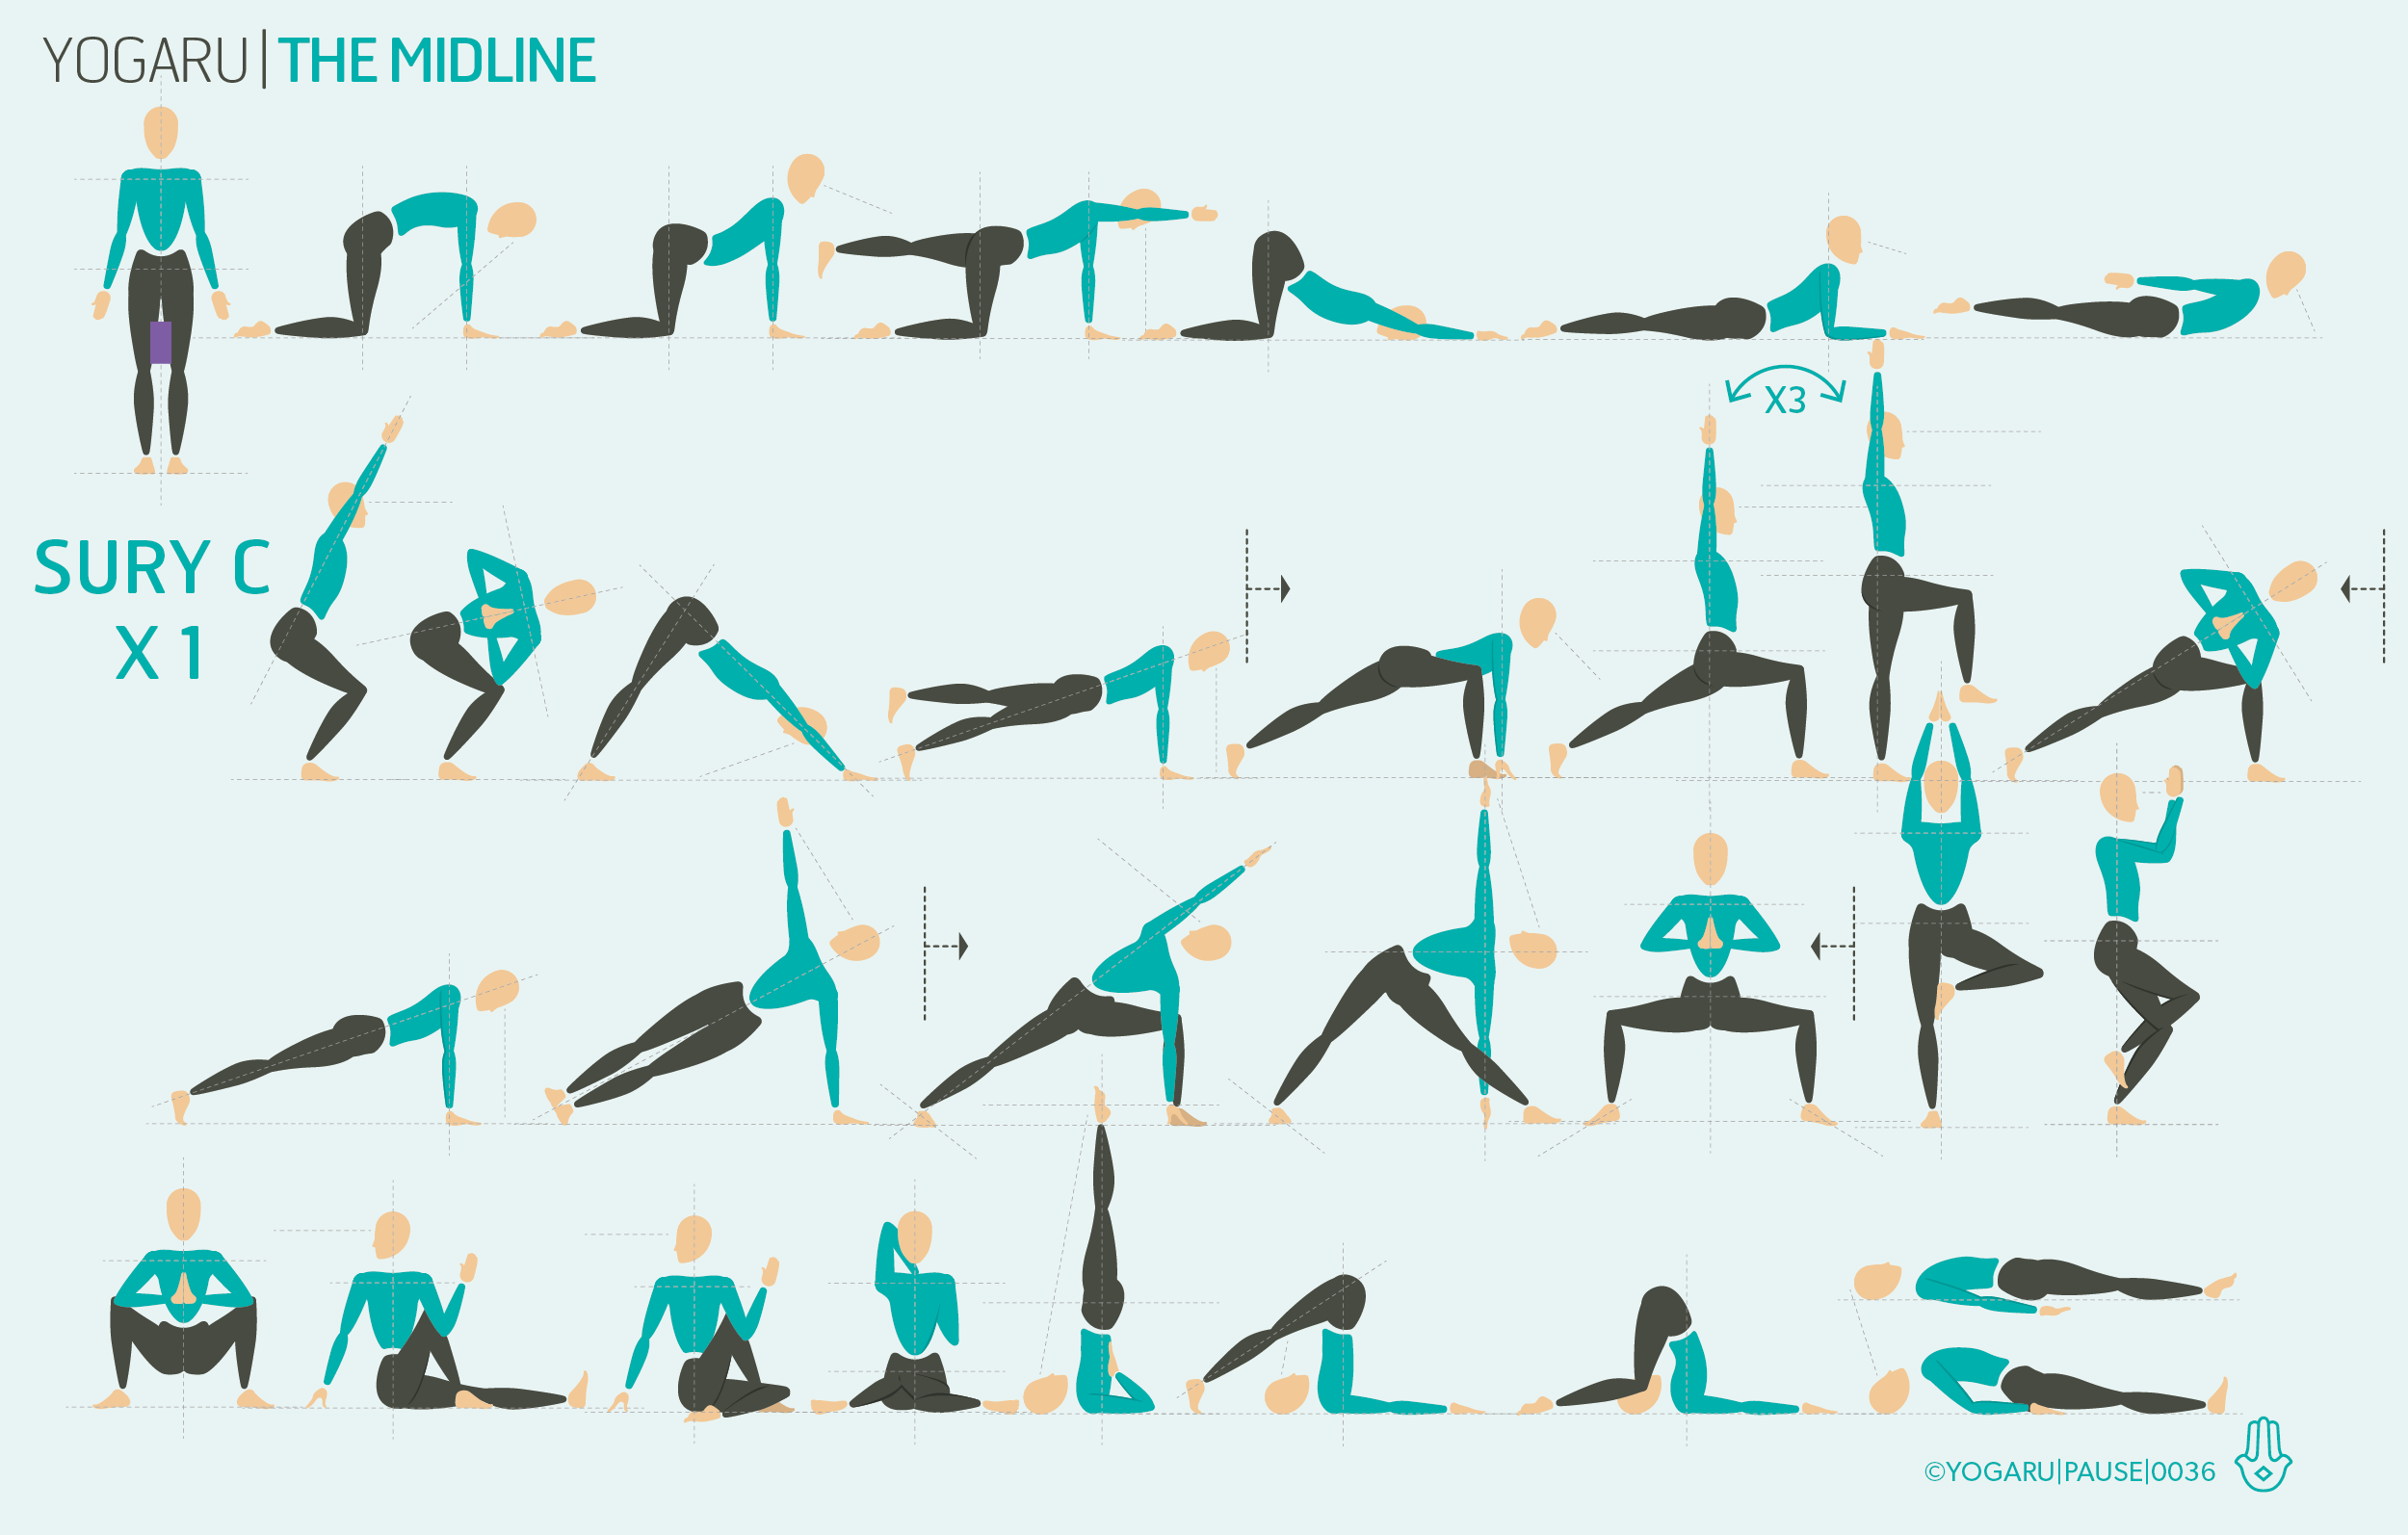
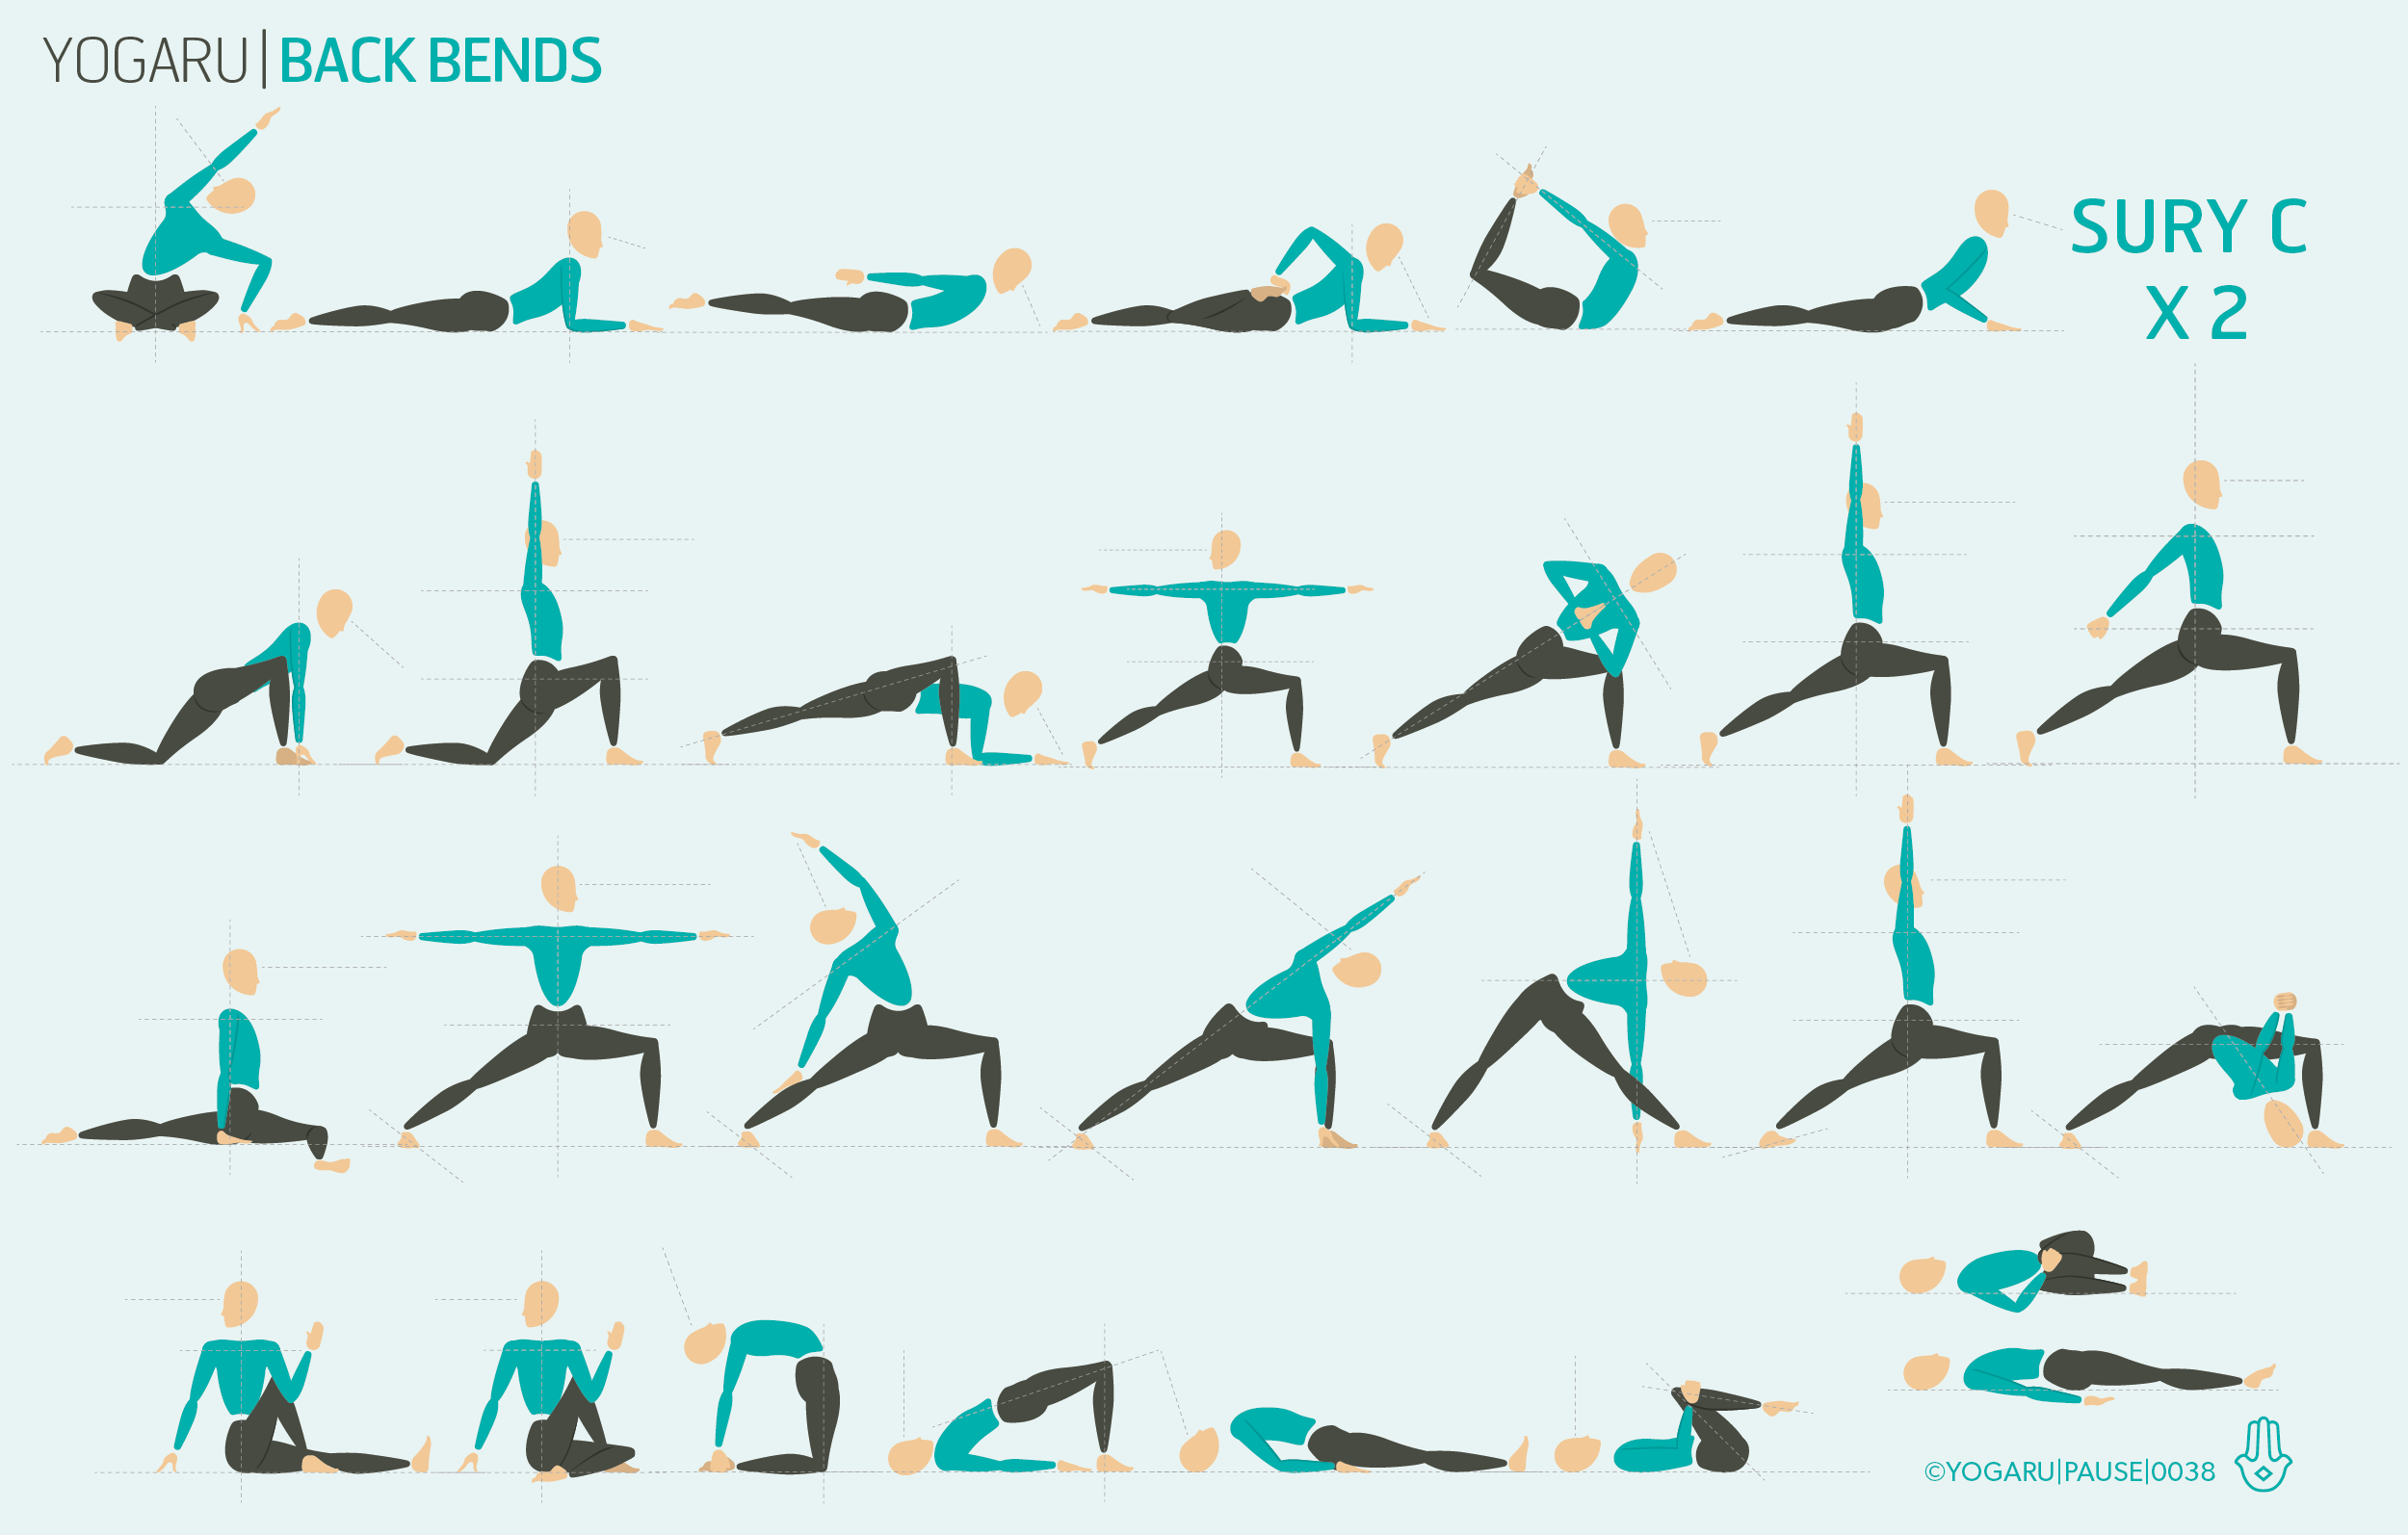
BACKBENDS AND THE MIDLINE
Moving into exploration of the spine is a natural progression from last weeks sequence on the midline. The spine runs along our midline, and gives us a physical element to work towards when ‘drawing into the midline’ in our practice. Maintaining awareness of the midline when practicing backbends reminds us to exert equal effort right and left, and gives a stable structure for the front body to expand and the back body to curve into.

THE SPINE
The spine supports the body against gravity, facilitates movement of the torso, and protects the spinal cord. An understanding of the four natural curves of your back helps you to access safer alignment in your asana. Try standing in Tadasana/Mountain and trace the four curves of your back – starting with the concave curve at the back of your neck/cervical (115 degree full range of motion); moving down to the convex curve of your upper back/thoracic (70 degree full range of motion); diping again into the concave of your lower back/lumbar (95 degree full range of motion); and finally the convex curve of the fused tailbone/sacral. The cervical and lumbar curves have the most range of motion in the spine, which makes them more susceptible to injury. The spine is involved in every asana with either flexion, extension or rotation. Yoga lengthens, strengthens and promotes good interstitial fluid health of the spine.

BENEFITS OF BACKBENDS
Backbends stimulate the nervous system, aid digestion, ease stress, tension, anxiety and depression. They also expand and breath, promoting healthy lung capacity and ease symptoms of asthma and sleep apnea. You’ll notice an increased energy throughout the room in a backbend focused yoga class. We spend a lot of time in our day with our upper spine hunched forward through last of postural awareness in our movement and sitting. Backbebds stretch, expand and open the heart centre. The mind follows the physical, and becomes open and energised too.

The above sequence warms up the spine with lateral bends, twists and strengthening backbends. It also works on lengthening the hip flexors and psoas muscle. Tight hip flexors prevent the posterior (backwards) tilt of the pelvis, restricting backbends and bringing increased flexion and pressure into the lower back. Click this link to get a full list of backbends.

THE BENEFITS OF LATERAL BENDS
Lateral bends are a lovely gentle way to access the concept of lengthening up through the spine to find space between the vertebra for your backbends. Before you do the backbending sequence, try the lateral bends sequence below. Reach up tall through the spine to the tip of the crown before each lateral bend. There is lots of hidden lateral bends in our practice that you may not even notice – such as Viparita Virabhadrasana/Reverse Warrior, Parsvakonasana/Extended Side Angle and Trikonasana/Triangle – which are all great asana to warm up the spine before a backbend peak pose.

To save the images for personal use click and hold down the image until the ‘save image’ option appears; on Mac hold down ‘control’ and click the image to get the option box; on PC right click on the image to get the option box. Scroll down in the ‘option box’ and click ‘save image’.

Ruth Delahunty Yogaru

The midline

ANATOMY MEETS SUBTLE BODY
In yoga, the midline is the foundation on which each asana is built. This vertical axis that bisects the whole body is more than of anatomical importance in yoga – referred to as the Sushumna, it is the central channel, or Nadi, through which pranic energy flows. It is also the line where you will find the seven Chakras, or energy centres, each bringing it’s own unique quality to the subtle body.

WHERE IS THE MIDLINE?
Drawing close to the midline in our practice makes us stronger, more supported and stable. It helps you to access the deep inner muscles of the body, and  builds your asana from the inside out, rather than from the outside in. The midline travels from the tip of your crown, through the torso, bisects the pelvis, and doesn’t stop till it reaches your foundation. In standing asana the base of the midline is the ground between your feet; twisting poses wrap your outer body around the midline; in inversions, such as handstand, the midline is flipped, starting in the space between your feet, and ending on the ground between the palms of your hands. Some asana are easier to visualise the midline in. But it’s always there, supplying energy through your whole body!

EXPLORING THE MIDLINE IN YOUR PRACTICE
Try the above sequence to explore your midline. Before you start, stand in Tadasana/Mountain with a brick between your thighs. Bring your attention to your right side body, the right side of your face, right shoulder, right arm, right torso, right leg, right foot. Notice any areas of tension you might feel. Repeat on the left side. Then bring your attention to the midline, where right and left meet, from the inside out start to hug your body to the midline, using your brick to press against. Imagine you’re trying to make your body as narrow as possible. Press into the centre for three breaths, then release. Repeat once or twice till you get to know how the midline feels. Applying equal effort between right and left side.

Focus your attention on your midline in each asana (even while you run through your warm up Sun Salutations). Hug your outer hips to the midline with equal effort and zip your inner legs up from your inner ankle to your inner groin. Draw your navel in towards your spine and lengthen your spine to the tip of your crown. Press your hands/feet into the mat and drag them in towards the midline. Track your spine running along the midline and continuing on into the surface that supports you and beyond the tip of your crown!

To save the images for personal use click and hold down the image until the ‘save image’ option appears; on Mac hold down ‘control’ and click the image to get the option box; on PC right click on the image to get the option box. Scroll down in the ‘option box’ and click ‘save image’.

Ruth Delahunty Yogaru

Staying committed

PAUSE_0035.png

BEING PRESENT
The concept of staying committed to your practice doesn’t have to be as daunting as trying to find time everyday to get on your mat. It can be as simple as working towards staying present on your mat, when you do find time to practice. Whether it’s in respect to the fact that you got up that extra bit early to practice at home, or that you’ve managed to put aside some time for yourself to make it to a class. Take a few moments to ask yourself what it is that your practice can give you today, and honour the response that you get from your inner voice. During your practice reconnect with this intention, and be true and honest to yourself, and the journey of your practice.

PRACTICE WITH PATIENCE
The above sequence works strongly into the hamstrings in preparation for Hanumanasana/Monkey pose or Splits. As a runner, hamstring asana do not come easily to me, they teach me patience and commitment to staying present. For most people, Hanumanasana/Monkey pose or Splits is a challenging pose. It doesn’t require strength but it gives you a very clear picture as to the level of stretch in your hamstrings, hip flexors, quads and inner groins. It also stimulates the abdominal organs; teaches you patience; reverses the effect of sitting for long periods of time and develops deep body awareness.

Try the above sequence. Start in Balasana/Childs Pose, with your knees together; hug your outer hips into the midline, using your outer buttocks muscles; strengthen your quads and squeeze the creases at the back of your knees; make your lower body as tight and small as possible. Hold for 5 deep breaths and release, repeat 3 times . Take a few breaths in the asana where you find some resistance in your hamstrings and being very gentle and patient. It takes 30 seconds for a muscle to register that you are asking its permission to open up. Use a bolster to raise your hips up in Hanumanasana/Monkey pose or Splits The higher your hips are from the ground the lower down your leg the support should be. Stay committed to the time on your mat, keep exploring and keep going.

To save the images for personal use click and hold down the image until the ‘save image’ option appears; on Mac hold down ‘control’ and click the image to get the option box; on PC right click on the image to get the option box. Scroll down in the ‘option box’ and click ‘save image’.

Ruth Delahunty Yogaru