RETHINKING TRANSITIONS
Injuries can really test our patience. Wrist injuries in particular can feel like the end of your practice for the foreseeable future! But it doesn’t have to be so drastic. Adho Mukha Svanasana/Downward Dog is the most obvious pose that will cause problems with a wrist, hand, arm or shoulder injury. We predominantly use Adho Mukha Svanasana/Downward Dog as a transitional pose through the standing sequences of our practice. There are more than one way to get from standing pose to standing pose. Often the answer to many sequencing conundrums are answered through the beginners mindset. Stepping forward from Adho Mukha Svanasana/Downward Dog is not an easy transition for most beginners. When teaching beginner students we step them back from Tadasana/Mountain into standing poses, similar to how we transition in Iyengar. Taking a leaf out of the beginners book will help you flow through your practice without having to worry about encountering a wrist intense pose. Once you safely navigate the standing poses, and find your way to the seated poses, there is less of an issue with wrist problems.
ADAPT TO YOUR SURROUNDINGS
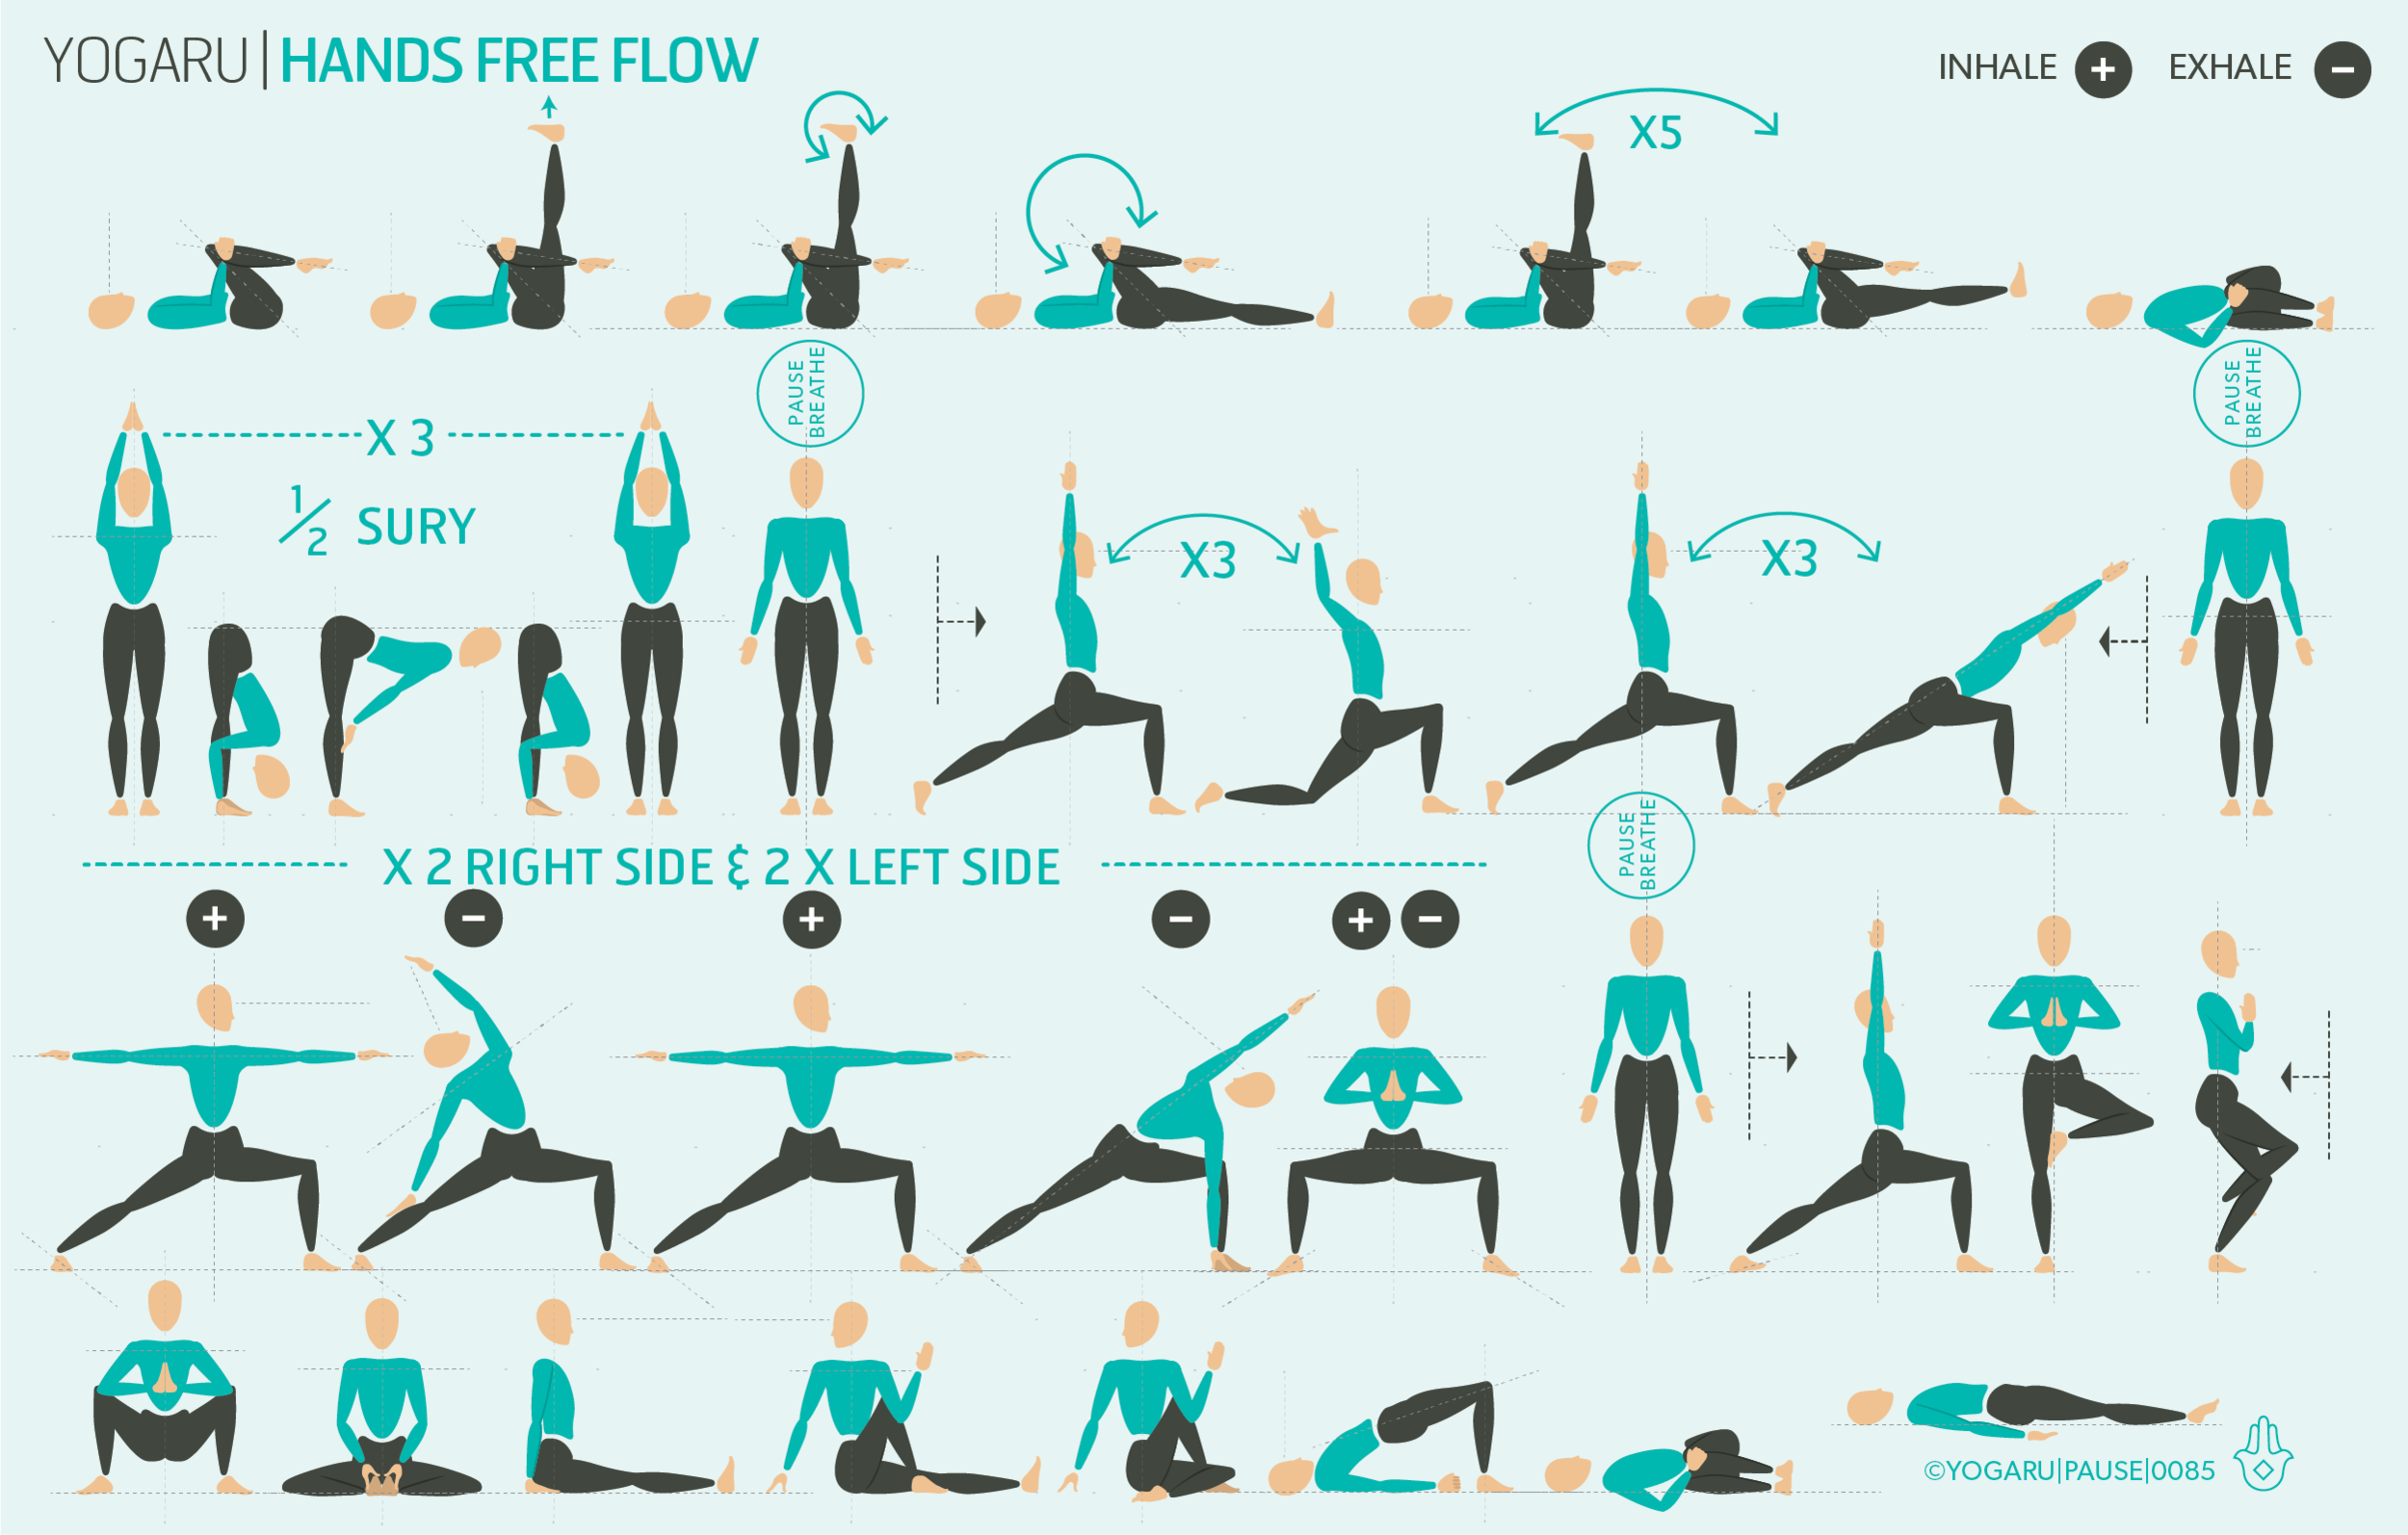
A sequence without Adho Mukha Svanasana/Downward Dog can also come in very handy if you are practising outdoors and the ground doesn’t look very inviting. I’ve also sometimes had to adapt my practice to this method in Hotel rooms. Carpets can hold onto the memories of the many previous guests and not be very inviting to vinyasaing through Ashtanga Pranam/Knees, Chest, Chin and Bhujangasana/Cobra! You can start your practise with some standing side stretches and twists and then start from ½ Surya Namaskara on the second row.
EXPLORING HANDS FREE FLOW UP IN YOUR PRACTICE
This hands free flow is perfect for wrist, hand, arms and shoulder injuries. It is also suitable for carpal tunnel syndrome and tendonitis. It bypasses Adho Mukha Svanasana/Downward Dog, Four Limb Staff/Chaturanga, Phalakasana/Plank and any poses that puts excess body weight on the hands and arms. Instead of taking Balasana/Child’s Pose as your resting pose you will pause in Tadasana/Mountain and assimilate the practice. When you are stepping back step your left foot back first so that you are practising with the right leg forward first.
ALIGNMENT CUES
Our peak pose for this sequence is Vrksasana/Tree. It will teach you the principle of rooting down, finding your centre of gravity and feeling the surface beneath you.
From Tadasana/Mountain, hands on hips, inhale, pour your weight into your left foot, draw your navel towards your spine.
Bend your right knee and open your hip out to the side, place your right foot on your right calf, or at the top inside of your left thigh.
Press your right foot against your inner left thigh and your thigh into your foot.
Place your hands on your hip bones to check they are level, press firmly into the standing leg, exhale here.
Lengthen through your spine to the tip of your crown, bring your hands to prayer position, inhale, raise your hands up over your head, broaden your collarbones gaze forward.
To save the images for personal use click and hold down the image until the ‘save image’ option appears; on Mac hold down ‘control’ and click the image to get the option box; on PC right click on the image to get the option box. Scroll down in the ‘option box’ and click ‘save image’.
Ruth Delahunty Yogaru